costco frozen pretzels cooking instructions

Costco Frozen Pretzels: A Comprehensive Cooking Guide

Discover optimal methods for enjoying Costco’s Brauhaus pretzels! From oven baking at 350-400°F to quick microwaving‚ and crispy air frying—we’ve got you covered.

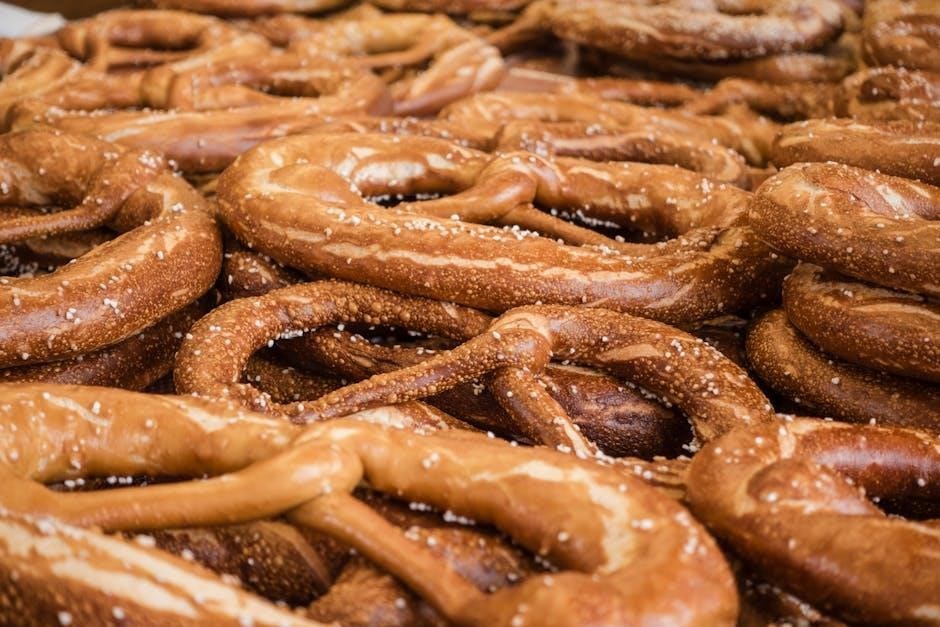
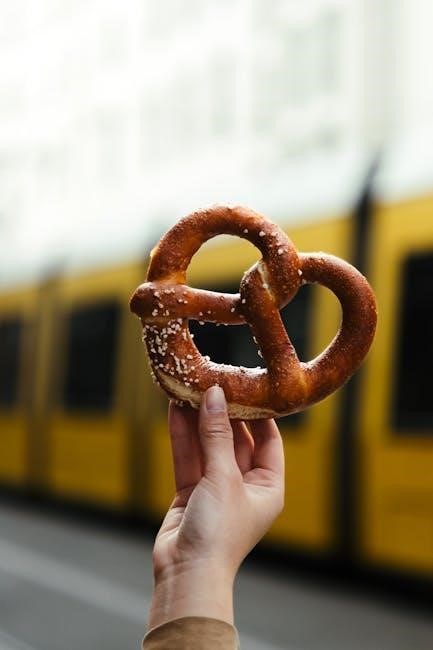
Costco’s Brauhaus frozen pretzels have become a beloved staple for many‚ offering a convenient and delicious snack option. These jumbo-sized pretzels deliver an authentic soft pretzel experience right from your freezer. However‚ achieving that perfect golden-brown exterior and soft‚ chewy interior requires understanding the best cooking methods.

Many shoppers are discovering that these pretzels aren’t limited to oven baking; quick and easy microwave instructions are also available. Furthermore‚ air frying provides a delightfully crispy alternative. Whether you prefer a traditional bake‚ a speedy microwave solution‚ or an air fryer crunch‚ mastering the preparation – including a light water mist and salt application – is key to unlocking the full potential of these Costco favorites.

Understanding the Product: Size and Quantity

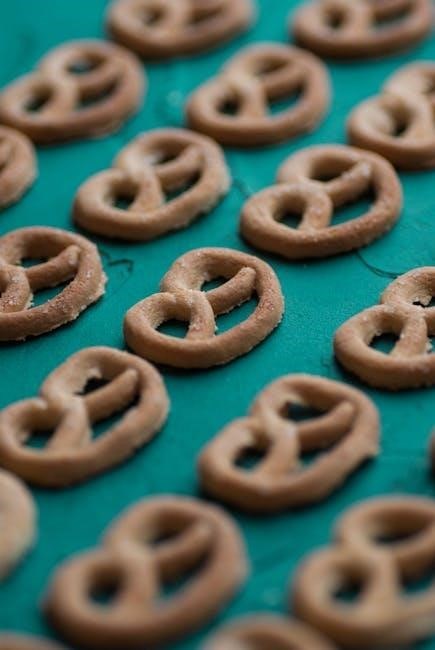
The Costco Brauhaus frozen pretzels are notably large‚ described as “jumbo” sized‚ and typically come in a package containing two substantial pretzels totaling 24 ounces. This generous quantity makes them ideal for gatherings or satisfying a significant craving. Due to their size‚ consistent and thorough cooking is essential.

Understanding the pretzel’s dimensions impacts cooking times across different methods. A larger surface area requires slightly longer baking or air frying to ensure even heating. When microwaving‚ portioning – considering “5-6 bites” per 30-second interval – becomes important; Recognizing the substantial weight and volume helps tailor cooking instructions for optimal results‚ avoiding undercooked centers or overly browned exteriors.

Optimal Cooking Methods Overview

Several methods effectively prepare Costco’s frozen pretzels‚ each offering a unique texture and convenience level. Oven baking‚ at 350-400°F‚ is the standard‚ yielding a traditionally soft interior and golden-brown exterior. For speed‚ microwaving – with a water mist and salt – provides a surprisingly palatable result in short bursts.

Air frying emerges as a compelling alternative‚ promising enhanced crispiness. Regardless of the chosen method‚ a light misting of water prior to cooking is frequently recommended‚ followed by a generous sprinkling of salt. Each technique requires adjusted timings; convection ovens bake faster‚ while microwave power levels influence cooking duration. Experimentation helps pinpoint your preferred method and achieve pretzel perfection!

Oven Baking: The Standard Approach

Oven baking delivers classic pretzel texture. Preheat to 350-400°F‚ mist with water‚ sprinkle with salt‚ and bake for approximately 10-20 minutes for best results.

Preheating the Oven: Temperature Range

Achieving the perfect bake with Costco’s frozen pretzels begins with proper oven preheating. The recommended temperature range for baking these jumbo pretzels falls between 350°F and 400°F. Lower temperatures‚ around 350°F‚ will yield a softer pretzel‚ requiring a longer baking time – approximately 20 minutes.

Conversely‚ preheating to 400°F will result in a crispier exterior‚ but necessitates closer monitoring to prevent burning‚ typically around 8-12 minutes. For convection ovens‚ a slightly lower temperature may be beneficial. Consistent preheating ensures even cooking and optimal texture. Always ensure your oven has fully reached the desired temperature before placing the frozen pretzels inside for best results.

Preparing the Pretzels for Baking: Water and Salt

To enhance the flavor and texture of your Costco frozen pretzels before baking‚ a simple water and salt application is crucial. Lightly misting the frozen pretzel with water creates a surface for the salt to adhere to‚ ensuring even seasoning. Alternatively‚ pressing the pretzel face-down into a bed of salt is also effective.

This step is vital for achieving that classic pretzel taste and slightly coarse exterior. Don’t oversaturate with water‚ as this can lead to a soggy pretzel. A fine spray bottle works best for even distribution. Experiment with different salt types – coarse sea salt provides a delightful crunch!

Baking Time: Conventional Oven Instructions

For baking Costco’s frozen pretzels in a conventional oven‚ preheating is key – aim for a temperature between 350°F and 400°F. Once preheated‚ place the prepared‚ frozen pretzel directly onto a baking sheet. A typical baking time ranges from 20 minutes‚ though this can vary slightly depending on your oven.

Monitor closely after 15 minutes to prevent over-browning. The goal is a golden-brown exterior and a warm‚ soft interior. Some sources suggest around 8-12 minutes at 350°F‚ so checking for doneness is essential. Ensure even cooking by rotating the baking sheet halfway through the baking process.

Baking Time: Convection Oven Instructions

When utilizing a convection oven to bake Costco’s frozen pretzels‚ a slightly reduced baking time is generally recommended due to the enhanced heat circulation. Preheat your convection oven to 350°F. Place the prepared pretzel – lightly misted with water and salted – onto a baking sheet.

Bake for approximately 8 minutes. Convection ovens cook faster‚ so closely monitor the pretzel after 6 minutes to avoid burning. The pretzel is ready when it achieves a golden-brown color. Remember that convection ovens may require a temperature reduction of 25°F compared to conventional ovens‚ but 350°F works well here.

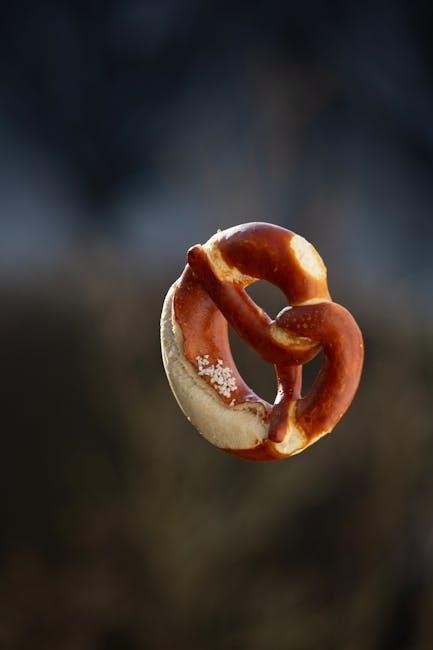
Checking for Doneness: Visual Cues

Determining when your Costco frozen pretzel is perfectly baked relies heavily on visual cues. The most prominent indicator is a rich‚ golden-brown color across the surface. Look for an even browning‚ signifying thorough heating. The pretzel should appear slightly puffed up‚ indicating internal expansion from the heat.

Avoid relying solely on time; oven variations exist. Gently press the pretzel – it should feel firm‚ but not rock-hard. If it’s still soft or doughy‚ continue baking for another minute or two‚ checking frequently. A beautifully browned exterior generally corresponds to a warm‚ soft interior‚ ready for enjoying with your favorite dips!

Microwave Cooking: A Quick Alternative

For a speedy snack‚ microwave the frozen pretzel after lightly misting with water and sprinkling with salt; 30 seconds per 5-6 bites is ideal.

Microwave Power Level and Time Guidelines

Microwaving Costco’s frozen pretzels offers a remarkably quick solution when oven baking isn’t feasible. However‚ achieving the best texture requires understanding power levels and timing. Generally‚ utilize a medium power setting – around 50% to 70% – to prevent the pretzel from becoming overly chewy or rubbery.

Cooking time is directly related to the number of pretzel “bites” or sections. A common guideline suggests approximately 30 seconds of microwaving for every 5-6 bite-sized pieces. It’s crucial to monitor closely‚ as microwave wattages vary. Start with a shorter time‚ around 20 seconds for a few bites‚ and add 10-second increments until warmed through. Remember to always apply water and salt before microwaving for optimal results!

Avoid prolonged cooking‚ as this can lead to a tough‚ undesirable texture.

Water Application for Microwave Cooking

Applying water to the frozen pretzels before microwaving is a surprisingly crucial step for achieving a soft‚ authentic pretzel texture. The water creates steam during the microwaving process‚ helping to rehydrate the exterior and prevent it from becoming excessively hard or dry.

Simply splash or lightly mist each frozen pretzel section with water. A spray bottle works exceptionally well for even distribution. Don’t saturate the pretzel; a light coating is sufficient. This moisture‚ combined with the microwave’s heat‚ mimics the traditional boiling step in pretzel making.

Following the water application‚ immediately sprinkle with salt. The damp surface allows the salt to adhere effectively‚ ensuring a flavorful bite. This technique significantly enhances the overall microwave experience.

Salt Application for Microwave Cooking

Proper salt application is key when microwaving Costco’s frozen pretzels‚ as it directly impacts the final flavor profile. The best practice is to apply the salt immediately after the water has been applied. The slight moisture creates a perfect adhesive surface for the salt crystals to cling to.

Coarse pretzel salt is ideal for replicating the authentic taste and texture. However‚ standard table salt can also be used in a pinch. Sprinkle the salt generously‚ ensuring even coverage across the pretzel’s surface. Don’t be shy – these large pretzels can handle a substantial amount of seasoning!

Pressing the pretzel face-down into a bed of salt is another effective method for maximum coverage. This ensures a consistently salty and satisfying snack.

Air Fryer Method: For a Crispier Texture

Achieve ultimate crispiness! Air frying Costco’s pretzels delivers a delightful crunch. Prepare for a faster cook time and superior texture compared to oven baking.

Air Fryer Temperature and Time Settings

For perfectly cooked Costco Brauhaus pretzels in your air fryer‚ begin by preheating to 350°F (175°C). This ensures even heating and optimal crisping. Place the frozen pretzels in the air fryer basket in a single layer‚ avoiding overcrowding for best results.

Cook for approximately 6-8 minutes‚ flipping halfway through to guarantee uniform browning and texture. Keep a close watch during the final minutes‚ as air fryers can vary. Adjust the time slightly based on your specific model and desired level of crispness. Remember‚ these pretzels are substantial in size‚ so a little experimentation may be needed to find your sweet spot!

Consistent monitoring is key to preventing burning while achieving that desirable golden-brown exterior.

Pre-Treatment for Air Frying: Water and Salt

Before air frying your Costco Brauhaus pretzels‚ a simple pre-treatment step dramatically enhances their flavor and texture. Lightly mist the frozen pretzel with water – a spray bottle works perfectly. This creates steam during cooking‚ contributing to a softer interior.

Immediately after misting‚ generously sprinkle with coarse salt. Alternatively‚ for even coverage‚ gently press the pretzel face-down into a bed of salt. This ensures a satisfying salty bite in every mouthful. Don’t be shy with the salt; these large pretzels can handle it!

This water and salt combination is crucial for replicating the authentic soft pretzel experience when using an air fryer.

Achieving Optimal Crispiness in the Air Fryer

To unlock maximum crispiness with your Costco frozen pretzels in the air fryer‚ precise temperature and timing are key. Begin by preheating your air fryer – this ensures even cooking. A temperature range of 350-400°F generally yields excellent results‚ but start at 350°F to prevent burning.

Air fry for approximately 6-10 minutes‚ flipping halfway through. Monitor closely‚ as air fryers vary. The goal is a golden-brown exterior and a warm‚ soft interior. Avoid overcrowding the air fryer basket; work in batches if necessary for optimal air circulation.

For extra crispness‚ increase the temperature slightly during the last 2-3 minutes of cooking.

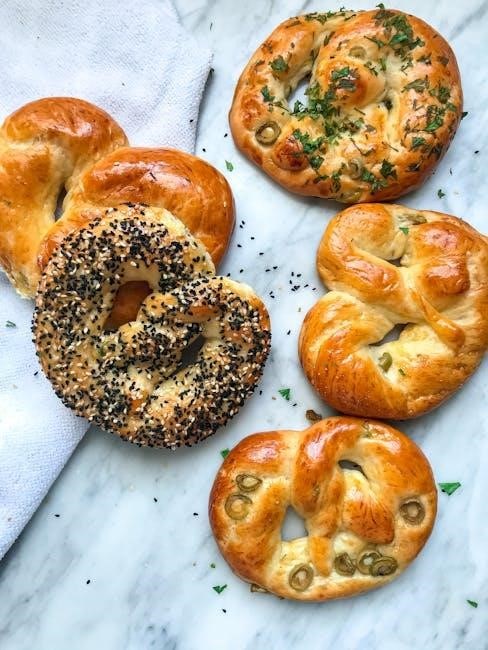
Salt Variations and Additions

Elevate your pretzel experience! Explore beyond traditional salt with garlic powder‚ parmesan cheese‚ or create custom seasoning blends for a unique flavor profile.

Beyond Traditional Salt: Exploring Flavors

While coarse salt is classic‚ don’t limit your Costco pretzel enjoyment! Consider a sprinkle of garlic powder for a savory kick‚ or experiment with onion powder for a subtle sweetness. Parmesan cheese offers a delightful umami boost‚ transforming the pretzel into an Italian-inspired treat.

For spice lovers‚ a dash of cayenne pepper or paprika adds a pleasant warmth. Everything bagel seasoning is another fantastic option‚ providing a complex blend of flavors. Don’t be afraid to get creative and mix your own blends – a combination of garlic powder‚ parmesan‚ and a pinch of red pepper flakes can be incredible! Pre-made seasoning blends designed for pretzels are also readily available‚ offering convenience and exciting flavor combinations.

DIY Pretzel Seasoning Blends

Crafting your own pretzel seasoning is surprisingly easy and rewarding! Start with a base of coarse salt and build from there. For a “Spicy Cheddar” blend‚ combine 2 tablespoons salt‚ 1 tablespoon cheddar cheese powder‚ ½ teaspoon paprika‚ and ¼ teaspoon cayenne pepper.

A “Garlic Herb” blend could include 2 tablespoons salt‚ 1 tablespoon dried parsley‚ 1 teaspoon garlic powder‚ and ½ teaspoon dried rosemary. “Everything But the Bagel” can be replicated with 2 tablespoons salt‚ 1 tablespoon sesame seeds‚ 1 tablespoon poppy seeds‚ ½ tablespoon dried garlic‚ and ½ tablespoon dried onion. Mix thoroughly and store in an airtight container. Experiment with ratios to find your perfect pretzel seasoning!

Troubleshooting Common Issues

If pretzels aren’t browning‚ increase baking time or temperature. For hardness‚ reduce baking duration. Uneven cooking? Rotate the baking sheet during the process.

Pretzels Not Browning Enough

Encountering pale pretzels despite following instructions? Several factors could be at play. First‚ ensure your oven is accurately preheated to the recommended 350-400°F. A lower oven temperature directly impacts browning. Secondly‚ consider extending the baking time by a few minutes – a slight increase can make a noticeable difference.

Additionally‚ lightly misting the frozen pretzel with water before baking is crucial‚ as it aids in Maillard reaction‚ responsible for browning. Ensure even water coverage. If using a convection oven‚ reduce the baking time slightly‚ as convection ovens generally cook faster and can sometimes prevent optimal browning if left too long. Finally‚ avoid overcrowding the baking sheet; allow space for air circulation.

Pretzels Too Hard or Dry

If your Costco Brauhaus pretzels emerge from the oven feeling excessively hard or dry‚ overbaking is the most likely culprit. Reduce your baking time‚ especially when using a conventional oven. Start checking for doneness a few minutes before the recommended time.

Microwaving can also contribute to dryness if overdone; adhere to the suggested 30-second intervals per 5-6 bites. Remember that a quick splash of water before cooking is vital – it introduces moisture. For air frying‚ lower the temperature slightly or shorten the cooking duration. Storing leftover pretzels in an airtight container with a small piece of bread can help retain moisture.

Uneven Cooking

Experiencing uneven cooking with your Costco frozen pretzels? This often stems from inconsistent heat distribution within your oven or air fryer. Ensure your oven is properly preheated and calibrated. When baking‚ rotate the baking sheet halfway through the cooking process to promote even browning.

For air frying‚ avoid overcrowding the basket; work in batches if necessary. Consistent water application and salt distribution are also key. Lightly misting or sprinkling evenly across the entire pretzel surface helps. If using a microwave‚ ensure the pretzel isn’t touching the sides‚ allowing for uniform microwave penetration.

Serving Suggestions and Pairings

Enjoy your perfectly cooked pretzels with classic dips like cheese‚ mustard‚ or a flavorful beer cheese! They’re ideal as a snack or appetizer.

Dipping Sauces: Cheese‚ Mustard‚ and More

Elevate your Costco pretzel experience with a delightful array of dipping sauces! Classic cheese sauces‚ ranging from cheddar to beer cheese‚ provide a rich and comforting pairing. For a tangy kick‚ explore various mustards – spicy brown‚ honey mustard‚ or even a Bavarian sweet mustard complement the pretzel’s flavor beautifully.

Beyond these staples‚ consider experimenting with other options. A creamy ranch dip‚ a zesty queso‚ or even a sweet cinnamon cream cheese spread can offer exciting contrasts. Don’t underestimate the simplicity of a good honey mustard combination! Ultimately‚ the best dipping sauce is the one that satisfies your personal preference‚ enhancing the enjoyment of these delicious pretzels.

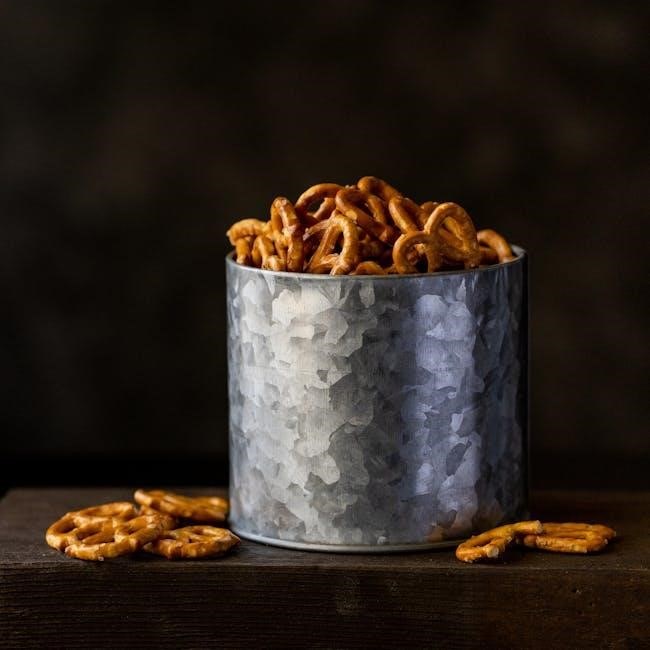
Pretzels as a Snack or Appetizer

Costco’s frozen pretzels are incredibly versatile‚ perfect for both a quick snack and a crowd-pleasing appetizer. Enjoy them straight from the oven (or microwave!) for a satisfying individual treat any time of day. For gatherings‚ arrange the warm pretzels on a platter with a selection of dipping sauces – cheese‚ mustard‚ and even sweet options – to create an inviting spread.

Consider pairing them with a cold beverage‚ like beer or soda‚ for a complete experience. Their substantial size makes them filling‚ while their soft texture and salty flavor keep everyone coming back for more. They’re a guaranteed hit at parties‚ game nights‚ or casual get-togethers!

chopin waltz in a minor pdf

Chopin’s haunting Waltz in A Minor, B.150, offers a glimpse into Romantic-era melancholy, readily available as a PDF for pianists of all levels.

Numerous online resources provide free sheet music downloads, facilitating access to this beloved composition for study and performance.

Its expressive qualities and technical demands continue to captivate audiences, making it a cornerstone of the piano repertoire.

Historical Context of the Waltz

The waltz, originating in 18th-century Austria and Southern Germany, rose to prominence during the early 19th century, becoming a defining dance of the Romantic era. Initially considered scandalous due to its close embrace, it quickly gained acceptance in ballrooms across Europe.

Chopin’s waltzes, composed primarily between 1830 and 1847, represent a sophisticated evolution of the genre. He moved beyond the purely social dance music, infusing his waltzes with poetic depth and individual expression.

Access to Chopin’s works, including the A Minor Waltz, has been greatly enhanced by the availability of PDF sheet music online. This allows modern musicians to study and perform these pieces, preserving a vital part of musical history. The ease of access through digital formats ensures the waltz’s continued relevance.

Chopin’s Contribution to the Waltz Genre

Frédéric Chopin fundamentally transformed the waltz, elevating it from a simple dance form to a vehicle for profound musical expression. He imbued his waltzes with a lyrical beauty, harmonic complexity, and nuanced emotional depth previously unheard of in the genre.

Unlike the grand, often bombastic waltzes of his contemporaries, Chopin’s waltzes possess an intimate, melancholic quality. The Waltz in A Minor exemplifies this, showcasing his masterful use of rubato and delicate ornamentation.

The widespread availability of PDF sheet music allows pianists to explore these subtleties firsthand. Accessing Chopin’s scores digitally democratizes music study, fostering a deeper appreciation for his innovative contributions to the waltz tradition and his lasting legacy.

Understanding the Sheet Music (PDF Format)

PDF versions of Chopin’s Waltz in A Minor offer convenient access to the score, enabling detailed study and practice for pianists globally.

Sources for Free PDF Sheet Music

Finding free, legal PDF sheet music for Chopin’s Waltz in A Minor requires careful navigation. Several websites offer downloads, but verifying copyright status is crucial.

IMSLP (International Music Score Library Project) is a prominent resource, providing public domain scores, including various editions of this waltz.

MuseScore also hosts user-submitted arrangements and transcriptions, often available as PDFs, though quality and accuracy can vary.

8notes.com provides a selection of classical sheet music, including Chopin’s works, in PDF format. Always check the terms of use before downloading and printing. Be cautious of sites offering seemingly free downloads that may infringe on copyright laws.

Navigating PDF Sheet Music – Key Symbols

Decoding Chopin’s Waltz in A Minor PDF requires understanding common musical symbols. The key signature of A minor features four sharps, influencing accidentals throughout the piece.

Dynamic markings – p (piano), mf (mezzo forte), f (forte) – dictate volume. Slurs indicate phrasing and legato articulation.

Pedal markings, often denoted by “ped.” or “*”, guide damper pedal usage for harmonic richness. Pay attention to crescendos and diminuendos for expressive shaping.

Fermatas extend notes, while staccato dots shorten them. Understanding these symbols unlocks Chopin’s intended nuances within the PDF score.

Print Quality and Legality of PDF Sources

Downloading Chopin’s Waltz in A Minor PDF necessitates caution regarding source legitimacy. Free PDFs vary significantly in print quality; some may appear blurry or contain errors. Prioritize sources offering high-resolution scans for clear notation.

Copyright considerations are crucial. Public domain scores are legal to download and print, but copyrighted editions require purchase or subscription. Websites offering unauthorized PDFs infringe copyright laws.

Reputable sources, like the IMSLP (International Music Score Library Project), provide legally accessible, high-quality scores. Always verify the source’s credibility before downloading to ensure both legality and readability.

Musical Analysis of the Waltz in A Minor

Chopin’s A Minor Waltz showcases a poignant melody, rich harmonies, and a distinctive rhythmic flow, often studied using readily available PDF scores.

Its structure reveals Chopin’s masterful command of form and emotional expression.

Key Signature and Tonality

Chopin’s Waltz in A Minor is firmly rooted in the key of A minor, indicated by the key signature of no sharps and no flats. However, the tonality is far from simple, exhibiting frequent and dramatic shifts.

The piece explores closely related keys, notably C major (the relative major) and E minor, creating harmonic tension and release. These modulations, easily followed when studying a PDF score, contribute significantly to the waltz’s emotional depth.

Chopin frequently employs chromaticism, adding color and complexity to the harmonic landscape. The use of diminished chords and altered harmonies further intensifies the expressive character of the waltz, making it a compelling study for pianists and music theorists alike.

Analyzing the PDF reveals these tonal nuances.

Tempo and Time Signature

The Waltz in A Minor is notated in 3/4 time, the standard time signature for waltzes, providing its characteristic lilting rhythm. However, determining a precise tempo is nuanced, often described as Moderato, though interpretations vary.

Many performers favor a tempo around 66-76 beats per minute, allowing for expressive phrasing and clarity of articulation. Examining a PDF score reveals Chopin’s subtle tempo markings and dynamic indications, crucial for informed interpretation.

Rubato, a flexible approach to tempo, is essential to capturing the waltz’s emotional essence. This involves subtly speeding up and slowing down, creating a sense of freedom and spontaneity. A clear PDF facilitates studying these rhythmic subtleties.

Mastering the tempo is key to a successful performance.

Melodic Structure and Themes

The Waltz in A Minor features a distinctly melancholic and lyrical melody, characterized by descending phrases and expressive ornamentation. Analyzing a PDF score reveals a ternary (ABA) structure, with a contrasting middle section offering a brief respite from the prevailing sadness;

The primary theme, presented initially, is hauntingly beautiful, built upon stepwise motion and delicate chromaticism. Recurring melodic fragments create a sense of unity throughout the piece. A detailed PDF allows close examination of these thematic connections.

Chopin masterfully employs ornamentation – grace notes, trills, and mordents – to enhance the melody’s expressive power. These embellishments, clearly visible in a quality PDF, demand careful attention to detail.

The melodic contour evokes a sense of longing and introspection.

Harmonic Progression and Chord Voicings

The harmonic language of Chopin’s Waltz in A Minor is richly chromatic and emotionally evocative, readily apparent when studying a PDF of the score. The progression frequently utilizes diminished chords and unexpected modulations, contributing to the waltz’s overall sense of yearning.

Chopin’s characteristic use of seventh chords and inversions adds depth and color to the harmonic texture. A clear PDF reveals his sophisticated voice leading, creating smooth transitions between chords.

The piece centers around A minor, but explores related keys, enhancing the emotional impact. Examining a PDF allows pianists to trace these harmonic shifts and understand their expressive function.

Chord voicings are carefully crafted to maximize resonance and create a lush, romantic sound.

Technical Aspects for Pianists

Chopin’s Waltz in A Minor demands refined technique; a clear PDF score aids mastering its delicate fingerings, nuanced pedaling, and expressive dynamics.

Precise rhythmic control is crucial for interpreting this piece effectively.

Fingerings and Hand Positions

Chopin’s Waltz in A Minor presents unique fingering challenges, best addressed with a carefully studied PDF score. Achieving fluidity requires prioritizing comfortable hand positions and efficient finger substitutions.

The opening arpeggios benefit from a relaxed wrist and a focus on evenness between notes. Consider utilizing fingerings that minimize tension and allow for seamless transitions.

Pay close attention to passages requiring large stretches; strategic finger choices can prevent strain and maintain clarity. A well-annotated PDF can offer suggested fingerings from experienced performers.

Maintaining a curved finger shape and a flexible thumb are essential for navigating the waltz’s melodic lines and harmonic textures. Consistent practice with mindful technique will unlock the piece’s expressive potential.

Pedaling Techniques

Effective pedaling is crucial for realizing the nuanced beauty of Chopin’s Waltz in A Minor, and a detailed PDF score can illuminate suggested pedal markings. Avoid excessive pedaling, which can muddy the harmonic clarity.

Instead, employ subtle half-pedaling and quick changes to create a shimmering effect without sacrificing definition. The waltz’s melancholic character benefits from a delicate touch with the sustain pedal.

Observe the phrasing and use the pedal to enhance the emotional arc of each musical line. Syncopated rhythms require precise pedal coordination to maintain rhythmic integrity.

Studying recordings of renowned pianists alongside the PDF can provide valuable insights into their pedaling choices and interpretive approaches. Experiment to discover what best serves the music.

Dynamics and Articulation

Chopin’s Waltz in A Minor demands a sensitive approach to dynamics and articulation, readily apparent when studying a detailed PDF score. The piece fluctuates between delicate pianissimo passages and more assertive forte sections.

Pay close attention to the composer’s markings – crescendos, diminuendos, and accents – to shape the musical phrases effectively. Articulation should be varied, employing legato for lyrical melodies and staccato for rhythmic emphasis.

Subtle nuances in touch and phrasing are essential for conveying the waltz’s inherent emotional depth. A well-annotated PDF will highlight these expressive details.

Balance the left-hand accompaniment with the right-hand melody, ensuring neither overpowers the other. Careful attention to dynamics and articulation brings this waltz to life.

Rhythmic Accuracy and Interpretation

Maintaining rhythmic precision is crucial when performing Chopin’s Waltz in A Minor, especially when referencing a PDF score for detailed analysis. The waltz’s characteristic 3/4 time signature requires a steady pulse and graceful flow.

However, avoid rigidity; Chopin often employs subtle rubato – a flexible tempo – to enhance expressiveness. Studying a quality PDF reveals these nuanced rhythmic indications.

Interpretation involves balancing adherence to the written rhythm with artistic freedom. Understand the harmonic structure to inform phrasing and dynamic shaping.

A clear understanding of the waltz’s rhythmic foundation, combined with sensitive interpretation, unlocks its emotional power and beauty.

Learning Resources and Tutorials

PDF sheet music unlocks learning; online video tutorials demonstrate technique, while interactive platforms offer guided practice of Chopin’s Waltz.

Dedicated websites provide Chopin-specific insights, aiding interpretation and performance.

Online Video Tutorials

YouTube hosts a wealth of tutorials dissecting Chopin’s Waltz in A Minor, often utilizing the readily available PDF sheet music as a visual aid. These videos cater to diverse skill levels, from beginner walkthroughs focusing on basic hand positions and fingerings to advanced masterclasses exploring nuanced interpretations.

Many instructors offer slow-motion demonstrations, highlighting challenging passages and providing detailed explanations of phrasing and dynamics. Some tutorials even incorporate on-screen annotations directly onto the PDF score, clarifying complex rhythms or harmonic progressions.

Platforms like Flowkey and Skoove offer interactive learning experiences, syncing the PDF sheet music with real-time feedback as you play, helping to refine timing and accuracy. Searching for “Chopin Waltz A Minor tutorial” yields numerous options, allowing learners to find an instructor whose style resonates with their learning preferences.

Interactive Sheet Music Platforms

Several platforms enhance the learning experience beyond static PDF sheet music. Musicnotes.com and Sheet Music Plus offer interactive versions of Chopin’s Waltz in A Minor, allowing tempo adjustment and looping of difficult sections. These platforms often include playback features, enabling students to hear professional recordings alongside the score.

Newzik and ForScore are popular apps for iPad and iPhone, transforming the PDF into a dynamic, annotatable score. Users can mark fingerings, dynamics, and phrasing directly onto the music, creating a personalized learning tool.

These platforms frequently integrate with MIDI keyboards, providing real-time feedback on accuracy and rhythm. The ability to transpose the PDF to different keys can also be beneficial for learners, facilitating practice and comprehension.

Chopin-Specific Learning Websites

Dedicated websites offer focused resources for studying Chopin, complementing PDF sheet music of the Waltz in A Minor. Chopinmusic.net provides biographical information, historical context, and detailed analyses of his works, enriching understanding. International Chopin Piano Competition’s website archives performances and masterclasses, offering invaluable insights.

The Fryderyk Chopin Institute offers scholarly articles, PDF scores (some free, others for purchase), and a vast digital library. These resources delve into Chopin’s compositional techniques and stylistic nuances.

Many piano teachers maintain blogs and websites with specific lessons and interpretations of Chopin’s pieces, often referencing readily available PDF versions. Exploring these curated resources can significantly enhance learning.

Performance Considerations

Chopin’s Waltz in A Minor, often accessed via PDF, demands nuanced interpretation; prioritize emotional expression and phrasing for a captivating performance.

Authentic style requires careful attention to dynamics and rubato, bringing the piece’s inherent drama to life.

Interpreting Chopin’s Style

Chopin’s unique style, beautifully showcased in the Waltz in A Minor – frequently studied from a PDF score – transcends mere technical proficiency. It necessitates a deep understanding of bel canto, the Italian operatic style, influencing his melodic lines and phrasing.

Rubato, a flexible tempo, is crucial; it’s not about speeding up or slowing down randomly, but rather a subtle “robbing” of time from one beat to lend expression to another.

Pay attention to the ornamentation – grace notes and trills – they aren’t simply decorative, but integral to the melodic character.

Furthermore, Chopin’s harmonies are often unexpected, creating a sense of longing and melancholy. A successful interpretation requires conveying this emotional depth, moving beyond a technically accurate reading to truly embody the composer’s intent.

Emotional Expression and Phrasing

The Waltz in A Minor, often accessed via PDF sheet music, demands nuanced emotional expression. Chopin’s music isn’t simply about notes; it’s about conveying a profound sense of longing and melancholy.

Phrasing should be shaped like a vocal line, with careful attention to dynamics and subtle tempo variations. Avoid a mechanical approach; instead, allow the music to breathe.

Consider the harmonic shifts – they often create moments of tension and release. Emphasize these changes to highlight the emotional narrative.

Ultimately, successful performance relies on connecting with the music’s inherent sadness and vulnerability, communicating this depth to the audience through sensitive phrasing and expressive playing.

Stage Presence and Performance Practice

Performing Chopin’s Waltz in A Minor, often studied from a PDF score, requires a delicate balance between technical precision and artistic interpretation. Stage presence should reflect the music’s introspective nature – avoid excessive gestures or theatrics.

Maintain a focused and composed demeanor, allowing the music to speak for itself. Historically informed performance practice suggests a degree of rubato, but avoid exaggeration.

Connect with the emotional core of the piece, conveying its inherent sadness and vulnerability.

Remember that Chopin’s music was intended for intimate settings; strive to create a similar atmosphere, even in larger venues, fostering a connection with the audience.

The Waltz in A Minor in Popular Culture

Chopin’s Waltz in A Minor, easily accessed as a PDF, frequently appears in film and television, enhancing dramatic scenes with its poignant melody.

Numerous arrangements exist, showcasing its adaptability, while modern recordings continue to introduce it to new listeners.

Use in Film and Television

Chopin’s Waltz in A Minor, often found as a readily available PDF, has experienced notable inclusion in various cinematic and television productions. Its melancholic and romantic character lends itself beautifully to scenes requiring emotional depth and dramatic tension.

The waltz frequently underscores moments of introspection, loss, or burgeoning romance, enhancing the narrative impact. While specific instances are often subtle, the piece’s recognizable melody contributes to the overall atmosphere.

The accessibility of the PDF format has likely facilitated its use by independent filmmakers and student projects, further expanding its presence in visual media. Its timeless quality ensures continued relevance for future productions seeking a touch of classical elegance.

Arrangements and Adaptations

Chopin’s Waltz in A Minor, easily accessible as a PDF, has inspired a wealth of arrangements and adaptations across diverse musical genres. Beyond the original piano solo version, orchestral arrangements exist, expanding the harmonic palette and dynamic range.

Numerous transcriptions cater to different instrumentations, including cello, guitar, and even wind ensembles, demonstrating the waltz’s melodic versatility. Contemporary artists have incorporated elements of the piece into electronic music and pop songs, bridging classical and modern sounds.

The widespread availability of the PDF sheet music encourages amateur musicians to create their own interpretations, fostering creativity and a deeper engagement with Chopin’s masterpiece.

Modern Interpretations and Recordings

The accessibility of the Waltz in A Minor PDF has fueled countless modern interpretations and recordings. Renowned pianists continue to offer fresh perspectives on Chopin’s work, balancing fidelity to the score with individual artistry.

Recordings range from historically informed performances striving for authenticity to more romanticized readings emphasizing emotional expression. Digital platforms host a vast collection of these interpretations, allowing listeners to explore diverse approaches.

Furthermore, amateur pianists sharing their performances online contribute to a vibrant community surrounding the waltz, showcasing the enduring appeal of this iconic piece, readily available through PDF sheet music.

Related Chopin Waltzes

Chopin’s waltzes, including the famous “Minute Waltz” and Op. 18 “Grande valse brillante”, share stylistic traits with the A Minor Waltz PDF.

Exploring these pieces provides a broader understanding of Chopin’s waltz compositions and his innovative approach to the genre.

Waltz in D-flat Major, Op. 64, No. 1 (“Minute Waltz”)

Chopin’s “Minute Waltz,” despite its nickname, rarely takes a full minute to perform, though brisk tempos are common. Like the A Minor Waltz, readily available as a PDF, it showcases Chopin’s lyrical genius and technical brilliance.

This waltz, Op. 64 No. 1, is characterized by its sparkling melody and delicate ornamentation, demanding precise fingerwork and a light touch from the pianist. Its popularity stems from its accessibility and immediate appeal, making it a favorite among both performers and audiences.

While structurally simpler than some of Chopin’s other waltzes, the “Minute Waltz” requires nuanced interpretation to convey its charm and elegance. Numerous PDF versions exist online, offering varying levels of editing and accuracy.

Waltz in E-flat Major, Op. 18 (“Grande valse brillante”)

Chopin’s “Grande valse brillante,” Op. 18, stands in contrast to the intimacy of the A Minor Waltz, offering a display of virtuosic brilliance. Like its counterpart, finding a PDF version is relatively easy, though quality varies significantly.

This waltz demands considerable technical prowess, featuring rapid passages, sweeping arpeggios, and intricate ornamentation. It’s a showcase piece, intended to impress with its grandeur and dazzling effect. The piece’s length and complexity require stamina and a refined sense of musicality.

Despite its showy character, the “Grande valse brillante” retains Chopin’s characteristic melodic sensitivity, making it more than just a technical exercise. Many free PDF scores are available online for study.

Waltz in C-sharp Minor, Op. 64, No. 2

Chopin’s Waltz in C-sharp Minor, Op. 64, No. 2, shares a similar introspective quality with the A Minor Waltz, though possessing a distinct character. Accessing a PDF of this piece is common, with numerous websites offering free downloads of the sheet music.

This waltz is noted for its melancholic beauty and expressive harmonies, creating a poignant and emotionally resonant experience. It’s a more restrained work than the “Grande Valse Brillante,” focusing on nuance and delicate phrasing;

While technically demanding, the emphasis lies on conveying the waltz’s underlying emotional depth. Finding a legally sourced, high-quality PDF is crucial for accurate interpretation and practice.

free 12×24 shed plans pdf

Planning a spacious storage solution? Explore readily available free 12×24 shed plans PDF options online, offering detailed guides for DIY enthusiasts seeking a large, functional structure.

Why Choose a 12×24 Shed?

A 12×24 shed offers substantial space – ideal for workshops, garden tool storage, or even small vehicle housing. Utilizing free 12×24 shed plans PDF allows you to construct this sizable structure without significant upfront costs for design.

These plans cater to diverse needs, from basic storage to more complex projects. The generous dimensions accommodate larger equipment, furniture, or seasonal items. Many downloadable plans feature gable roofs and include details for doors and windows, enhancing functionality and aesthetics.

Choosing this size provides ample room for organization, while the availability of free PDF plans makes it an accessible project for DIYers of varying skill levels. It’s a cost-effective way to add valuable space to your property.

Benefits of Using PDF Plans

Free 12×24 shed plans in PDF format offer numerous advantages for builders. They are easily downloadable and printable, providing a readily accessible reference throughout the construction process. PDF plans ensure consistent formatting, eliminating discrepancies often found with online guides.

These plans typically include detailed diagrams, cut lists, and material lists, streamlining the building process and minimizing waste. The digital format allows for easy zooming and annotation, facilitating a clearer understanding of complex details.

Furthermore, PDF plans are compatible with various devices, enabling access on-site. Many plans are designed to be print-friendly, optimizing paper usage. Utilizing these resources empowers DIYers to confidently tackle a 12×24 shed project.

Essential Tools and Materials

Building from free 12×24 shed plans PDF requires standard tools – saws, drills, levels – and materials like lumber, concrete, fasteners, roofing, and siding.

Lumber Selection for Shed Construction

Choosing the right lumber is crucial when utilizing free 12×24 shed plans PDF. Typically, 2×6 lumber is recommended for wall framing, providing sufficient strength for a shed of this size. However, some builders, as noted in online discussions, opt for 2x4s for cost savings, potentially requiring closer stud spacing.

For rafters, 2x10s are frequently suggested, offering the necessary support for the roof structure. Pressure-treated lumber is essential for any wood in direct contact with the ground, preventing rot and extending the shed’s lifespan. Consider the grade of lumber; higher grades minimize knots and imperfections, leading to a more structurally sound build.

Carefully review your chosen free plans PDF for specific lumber requirements and adjust based on local building codes and desired durability.

Foundation Materials: Concrete, Gravel, or Wood

Selecting a foundation is key when implementing free 12×24 shed plans PDF. Concrete foundations offer the most durable and level base, but require more labor and expense. Gravel pads are a cost-effective alternative, providing good drainage, though they may settle over time. Wooden foundations, using pressure-treated skids, are simpler to install but are less permanent and may be unsuitable for certain soil conditions.

Many free shed plans don’t specify a foundation, leaving the choice to the builder. Consider your local climate, soil type, and intended use when deciding. Proper site preparation is vital regardless of the material chosen, ensuring a stable and long-lasting structure.

Always check local building codes regarding foundation requirements before starting construction.

Fasteners, Roofing, and Siding Options

Utilizing free 12×24 shed plans PDF requires careful material selection. For fasteners, galvanized screws and nails resist rust, crucial for outdoor structures. Roofing options range from asphalt shingles – affordable and common – to metal roofing for durability and longevity. Consider the aesthetic and budget when choosing.

Siding choices include wood, vinyl, and metal. Wood offers a classic look but needs regular maintenance. Vinyl is low-maintenance but less durable. Metal siding is robust but can be more expensive.

Free plans often list material quantities, but verifying these against your specific design and local building codes is essential for a successful build.

Understanding the 12×24 Shed Plans

Free 12×24 shed plans PDF require careful review of blueprints, component lists, and cut lists to ensure a smooth and accurate construction process.

Reading and Interpreting Shed Blueprints

Decoding free 12×24 shed plans PDF blueprints is crucial for success. These plans typically utilize standard architectural symbols representing walls, doors, windows, and roofing elements. Pay close attention to dimensions, ensuring accurate measurements for lumber and materials.

Understanding views – top, front, side, and sections – provides a comprehensive understanding of the shed’s structure. Look for details regarding framing, foundation specifics (concrete, gravel, or wood), and roofing pitch.

Familiarize yourself with the legend or key, which explains the symbols used. Note fastener types and spacing, as well as any specific construction techniques illustrated. Carefully examine the bill of materials, cross-referencing it with the drawings to verify quantities and sizes.

Don’t hesitate to consult online resources or seek guidance if any aspect of the blueprint remains unclear before commencing construction.

Key Components of the Plan: Walls, Roof, Floor

Free 12×24 shed plans PDF detail three core components: walls, roof, and floor. Wall plans specify framing layouts – typically 2×6 or 2×4 studs – with details on stud spacing, header sizes for openings, and sheathing requirements. Roof plans illustrate rafter or truss designs, pitch angles, and overhang dimensions, crucial for weather protection.

Floor plans outline foundation types (concrete slab, gravel base, or wooden skid foundation) and framing details, including joist size and spacing. Pay attention to the plans’ depiction of siding and roofing materials, ensuring compatibility with the structural design.

Understand how these components interconnect. Wall framing ties into the floor platform, while the roof structure rests upon the walls. Accurate interpretation of these relationships is vital for a structurally sound shed.

Bill of Materials and Cut Lists

Free 12×24 shed plans PDF invariably include a Bill of Materials (BOM), a comprehensive list of all required materials – lumber, fasteners, roofing, siding, doors, and windows. Carefully review the BOM to estimate project costs and ensure you procure everything needed before starting construction.

Alongside the BOM, you’ll find a Cut List. This details the precise dimensions and quantities of each lumber piece required. Utilizing a cut list minimizes waste, saves time, and improves accuracy. Double-check measurements and quantities before cutting any lumber.

Some plans categorize materials by component (walls, roof, floor), simplifying organization. Always verify the BOM and cut list against the plans to avoid discrepancies and ensure a smooth build.

Step-by-Step Construction Guide

Free 12×24 shed plans PDF provide sequential instructions, starting with the foundation and progressing through framing, roofing, and finishing – a clear path to completion!

Building the Foundation

Utilizing free 12×24 shed plans PDF, the foundation is paramount for a durable structure. Plans typically detail options like concrete slabs, gravel bases, or wooden skids. Concrete provides a robust, level surface, requiring formwork and pouring, while gravel offers excellent drainage and is more affordable.

Wooden skids are suitable for smaller sheds and allow for relocation. Regardless of the chosen method, ensure proper leveling and compaction. The plans will specify dimensions and material quantities. Accurate foundation construction, following the PDF’s guidance, prevents future structural issues and ensures a square, stable shed. Thorough preparation is key to a successful build!

Framing the Walls

Free 12×24 shed plans PDF will illustrate wall framing using 2×6 lumber, commonly spaced 16 or 24 inches on center. Begin by constructing wall sections flat on the floor, ensuring squareness with accurate measurements. Include top and bottom plates, and stud cuts detailed in the PDF.

Pay close attention to window and door openings, adding headers for support. Once sections are assembled, raise and brace them, connecting them securely at the corners. Proper bracing is crucial for stability during construction. The plans will guide you on sheathing application, adding rigidity and weather protection. Accurate framing, guided by the PDF, is vital for a structurally sound shed.

Constructing the Roof

Free 12×24 shed plans PDF typically detail a gable roof, utilizing 2×10 rafters for strength. Begin by cutting rafters to the specified angle, referencing the PDF’s diagrams for precise measurements. Assemble roof trusses or rafters individually, ensuring consistent spacing.

Install a ridge board to support the rafters, creating the roof’s peak. Sheathe the roof with plywood or OSB, following the PDF’s instructions for proper fastening. Consider overhangs for weather protection. The plans will guide you through installing roofing felt and your chosen roofing material. Accurate cuts and secure fastening, as shown in the PDF, are essential for a weatherproof roof.

Adding Finishing Touches

Free 12×24 shed plans PDF guide siding, roofing, and door/window installation. Interior finishing and organization enhance functionality, completing your spacious shed build.

Installing Siding and Roofing

Utilizing your free 12×24 shed plans PDF, carefully install siding to protect the structure from the elements. Options range from wood, vinyl, or metal, each offering unique aesthetics and durability.

Ensure proper overlap and secure fastening, following the plan’s specifications. Roofing installation is equally crucial; consider asphalt shingles, metal roofing, or other suitable materials.

Pay close attention to underlayment application for waterproofing. The free plans PDF will detail rafter spacing and roofing material quantities. Proper installation prevents leaks and extends the shed’s lifespan. Accurate cuts and secure attachment are vital for a weather-resistant finish, completing a robust exterior shell.

Door and Window Installation

Referring to your free 12×24 shed plans PDF, precisely frame the openings for doors and windows. Ensure squareness and proper dimensions before installing the frames. Select doors and windows appropriate for shed use – consider durability and weather resistance.

The free plans typically indicate window sizes and placement for optimal light and ventilation. Securely fasten the frames, ensuring a tight seal to prevent drafts and water intrusion.

Install doors with robust hinges and a reliable locking mechanism. Proper alignment is crucial for smooth operation. Following the PDF’s guidance, complete this stage for a functional and secure shed, enhancing both accessibility and usability.

Interior Finishing and Organization

Utilizing your free 12×24 shed plans PDF as a guide, consider interior finishing options to maximize usability. While not always essential, adding plywood or OSB to the walls and ceiling creates a cleaner, more finished space. This also provides a surface for mounting shelving and organization systems.

The free plans won’t detail specific organization, so plan shelving, workbenches, or pegboards based on your needs. Prioritize vertical storage to utilize the shed’s height effectively.

Think about electrical needs if you plan to use power tools. Refer to the PDF for structural considerations when adding weight. A well-organized interior transforms your shed into a functional workshop or storage haven;

Customization Options

Free 12×24 shed plans PDF offer a base; personalize with shelving, workbenches, or electrical wiring to create a tailored, functional space for your needs.

Adding Shelving and Workbenches

Maximizing space within your 12×24 shed, built from free 12×24 shed plans PDF, is crucial. Incorporating shelving and workbenches transforms it from simple storage to a functional workshop.

Consider building sturdy shelving units along the walls, utilizing the shed’s height for vertical storage. Plan for adjustable shelves to accommodate items of varying sizes. A dedicated workbench provides a solid surface for projects, and can be customized with drawers and vises.

When designing these additions, factor in the shed’s door placement and workflow. Ensure ample space for movement and access to tools and materials. Utilizing scrap lumber from the shed construction can reduce costs and promote sustainability. Remember to securely anchor shelving and workbenches to the shed’s framing for stability and safety.

Electrical Wiring Considerations

Enhancing your 12×24 shed, constructed using free 12×24 shed plans PDF, with electrical wiring expands its usability, but requires careful planning and adherence to safety codes.

Before starting, check local regulations regarding shed electrical installations – permits may be necessary. Use underground-rated wiring for exterior runs, protecting it within conduit. A dedicated circuit breaker in your main panel is essential, sized appropriately for the shed’s anticipated load.

Ground Fault Circuit Interrupter (GFCI) outlets are crucial for safety, especially in damp environments. Plan outlet placement strategically for tools, lighting, and potential future needs. If you’re unfamiliar with electrical work, always consult a qualified electrician to ensure a safe and code-compliant installation.

Paint and Exterior Protection

Protecting your shed, built from free 12×24 shed plans PDF, from the elements is vital for longevity. Begin with a quality exterior primer, ensuring good adhesion to the siding material. Choose paints specifically formulated for outdoor use, offering UV resistance and weather protection.

Acrylic latex paints are popular choices, providing durability and ease of application. Consider a satin or semi-gloss finish for better washability. Before painting, thoroughly clean the siding, removing any dirt, mildew, or loose paint.

For added protection, explore wood preservatives or stains, especially if using natural wood siding. Regularly inspect the exterior for damage and repaint as needed to maintain a weatherproof barrier.

Resources for Free 12×24 Shed Plans PDF

Numerous websites offer free 12×24 shed plans PDF downloads, providing diverse designs and instructions for building a robust and spacious outdoor structure.

Popular Websites Offering Free Plans

Finding reliable free 12×24 shed plans PDF requires exploring several online resources. Many websites specialize in DIY projects and offer downloadable plans as a service to builders. These platforms frequently feature a range of shed designs, including the popular 12×24 size, catering to various storage and workshop needs.

Some sites provide plans directly, while others link to external resources or require registration. It’s crucial to verify the source’s credibility before downloading any plans. Look for websites with positive user reviews and clear, detailed instructions. Remember to carefully review licensing and usage rights before commencing construction, ensuring compliance with any terms and conditions associated with the free plans.

Exploring these resources can significantly reduce project costs and provide a solid foundation for a successful shed-building endeavor.

Checking Plan Validity and Completeness

Before starting your 12×24 shed project with a free PDF plan, thorough verification is essential. Ensure the plans include a comprehensive bill of materials, detailed cut lists, and clear, step-by-step instructions. Missing components can lead to costly delays and structural issues.

Scrutinize the blueprints for accuracy and logical flow. Check for proper dimensions, foundation specifications, and framing details. A complete plan should cover all construction phases, from foundation building to roofing and finishing. Look for 3D diagrams or sketches to aid visualization.

If anything seems unclear or inconsistent, seek clarification or consider alternative plans. A valid, complete plan is the cornerstone of a safe and successful build.

Understanding Licensing and Usage Rights

When utilizing free 12×24 shed plans PDF, carefully review the licensing and usage rights. Many “free” plans aren’t entirely unrestricted. Some websites may retain copyright, limiting commercial use or modifications. Others might require attribution or prohibit redistribution.

Pay close attention to the terms of service or accompanying documentation. Understand if you’re permitted to alter the plans, build for resale, or share them with others. Ignoring these terms could lead to legal issues.

Look for plans with a clear Creative Commons license or explicit permission for broad usage. Prioritize plans that grant you the freedom to adapt and build without restrictions, ensuring a hassle-free project.

ge dry boost dishwasher manual

GE Dry Boost Dishwasher Manual: A Comprehensive Guide

This manual provides detailed instructions for GE dishwashers featuring Dry Boost technology, ensuring optimal performance and addressing common issues for sparkling clean dishes.

GE’s Dry Boost technology represents a significant advancement in dishwasher drying performance, specifically engineered to combat the frustrating issue of lingering moisture, particularly on plastics. Traditional dishwasher drying cycles often struggle with these materials, leaving them damp and requiring manual drying. Dry Boost addresses this challenge through a clever combination of enhanced heat and optimized airflow, creating a more effective drying environment within the dishwasher cavity.

Unlike conventional heated dry options that rely solely on residual heat from the wash cycle, Dry Boost actively introduces a fan to circulate air, drawing in warmer air and directing it over the dishes. This targeted airflow accelerates evaporation, ensuring even drying across all racks. The technology isn’t simply about higher temperatures; it’s about intelligently managing and distributing heat for superior results. This results in dishes, especially plastics, being up to three times drier compared to standard heated dry cycles, saving you time and effort.

This introduction will explore the core principles of Dry Boost, its benefits, and how it differentiates itself from other drying technologies available in modern dishwashers.

What is GE Dry Boost and How Does it Work?

GE Dry Boost isn’t merely a heating element; it’s a thoughtfully engineered system designed to maximize drying efficiency. At its heart, Dry Boost utilizes a dedicated fan that actively circulates air during the drying cycle. This isn’t just about blowing air around – the fan draws in warmer air from within the dishwasher and strategically directs it onto the dishes, accelerating the evaporation process.

This enhanced airflow is particularly beneficial for plastic items, which notoriously retain moisture. By consistently exposing these items to warmer, moving air, Dry Boost significantly reduces drying times and minimizes the need for hand-drying. The system intelligently manages heat, preventing excessive temperatures that could potentially damage delicate items.

The process begins after the final rinse cycle. The Dry Boost fan activates, initiating the circulation of heated air. This continuous airflow ensures that moisture is efficiently removed from all surfaces, leaving dishes, glassware, and plastics thoroughly dry. It’s a proactive approach to drying, rather than relying on passive heat dissipation.

Benefits of Using the Dry Boost Feature

The primary benefit of GE’s Dry Boost technology is, undeniably, superior drying performance. Users consistently report dishes being up to three times drier compared to traditional heated dry cycles, eliminating the frustrating task of hand-drying; This is especially crucial for plastic containers and utensils, which often remain stubbornly wet after a standard wash.

Beyond convenience, Dry Boost contributes to improved hygiene. Thoroughly dried dishes are less likely to harbor bacteria and mildew, promoting a cleaner kitchen environment. The feature also saves you valuable time and effort, freeing you from post-wash cleanup. Reduced hand-drying also translates to energy savings, as you’re not relying on manual heat sources.

Furthermore, Dry Boost offers peace of mind. Knowing your dishes are completely dry before storing them prevents unpleasant surprises and ensures they’re ready for immediate use. It’s a small addition that significantly enhances the overall dishwasher experience, delivering consistently sparkling and sanitary results.

Understanding Your GE Dishwasher Control Panel

GE dishwasher control panels vary by model, but generally feature intuitive buttons and displays for cycle selection, options like Dry Boost, and status indicators;

Locating the Dry Boost Option

Finding the Dry Boost option on your GE dishwasher control panel is usually straightforward, though the exact location can differ slightly depending on the specific model. Typically, you’ll find it as a dedicated button clearly labeled “Dry Boost” alongside other drying cycle selections. On newer models with touchscreens, Dry Boost is often accessible through the “Options” or “Modifiers” menu.

Look for a button that might also have an icon representing enhanced drying – often a droplet with radiating lines. If your dishwasher has multiple drying settings (like “Auto Dry,” “Heated Dry,” and “Air Dry”), Dry Boost will likely be presented as a more powerful alternative to these standard options. Some dishwashers require you to press a “Options” or “Modifiers” button first, then select Dry Boost from the displayed list.

Consult your dishwasher’s specific user manual for a visual guide to the control panel layout and precise instructions on activating the Dry Boost feature. The manual will illustrate the button’s location and explain any necessary steps to engage it during cycle setup. Remember, activating Dry Boost is key to achieving superior drying, especially for plastics.

Other Relevant Drying Cycle Options

Beyond Dry Boost, GE dishwashers offer a range of drying cycles tailored to different needs. “Heated Dry” utilizes a heating element to warm the air, aiding evaporation – a standard option, but less effective on plastics. “Auto Dry” employs sensors to detect rinse aid levels and adjust drying time automatically, conserving energy. “Air Dry” or “Eco Dry” relies on residual heat and natural airflow, offering the most energy-efficient, though slowest, drying method.

Some models feature “Extended Dry,” providing a longer drying period for heavily loaded dishwashers or items requiring extra time. “Hybrid Dry” combines condensation drying with a fan for improved performance. Understanding these options allows you to select the most appropriate cycle based on your load and preferences.

While Dry Boost excels at drying plastics, combining it with “Auto Dry” can optimize overall efficiency. Experimenting with different cycles helps determine the best settings for consistently sparkling clean and thoroughly dry dishes. Always refer to your dishwasher’s manual for a complete list of available cycles and their specific functions.

Troubleshooting Common Dry Boost Issues

Dry Boost problems often stem from simple causes; this section guides you through initial checks, persistent moisture solutions, and addressing excessive heat during the drying cycle.

Dry Boost Not Working: Initial Checks

If your GE dishwasher’s Dry Boost feature isn’t activating, begin with a series of straightforward checks. First, confirm that the Dry Boost option is actually selected on the control panel alongside your chosen wash cycle. It’s surprisingly common for this setting to be inadvertently overlooked!

Next, verify the dishwasher door is securely latched. The Dry Boost function relies on a closed system to effectively circulate heated air; an improperly sealed door will prevent activation. Also, ensure the dishwasher isn’t experiencing any power supply issues – a tripped breaker or loose connection can disable features.

Inspect the dishwasher’s heating element. While Dry Boost utilizes enhanced airflow, a malfunctioning heating element will significantly hinder drying performance. A visual inspection (with the power OFF, of course!) can reveal obvious damage. Finally, check for any error codes displayed on the control panel, as these can pinpoint the specific problem. Refer to the error code section of this manual for detailed explanations.

Persistent Moisture on Plastics – Causes and Solutions

One common complaint with dishwashers, even those with Dry Boost, is lingering moisture on plastic items. This isn’t necessarily a malfunction, but rather a characteristic of plastic’s material properties. Plastics don’t retain heat as effectively as glass or metal, making them slower to dry.

However, several factors can exacerbate this issue. Insufficient rinse aid is a primary culprit; rinse aid reduces water’s surface tension, promoting sheeting and faster evaporation. Ensure your rinse aid dispenser is adequately filled and set to the appropriate level. Proper loading is also crucial – avoid nesting plastics, allowing water to fully drain.

If Dry Boost isn’t fully resolving the problem, consider using the “High Temp Wash” option (if available) alongside Dry Boost for an extra boost of heat. Finally, manually cracking the dishwasher door slightly after the cycle completes can release trapped moisture and accelerate drying, especially for stubborn plastic containers.

Excessive Heat During Dry Boost Cycle

While Dry Boost utilizes increased heat for enhanced drying, excessively high temperatures can be a concern. Though designed with safety in mind, certain conditions might lead to perceived or actual overheating. A properly functioning heating element is crucial; if it’s malfunctioning, it could generate disproportionate heat.

Ensure the dishwasher’s vent isn’t blocked. Restricted airflow prevents heat dissipation, causing temperatures to rise. Check for obstructions around the dishwasher’s base and vent opening. Overloading the dishwasher can also contribute, hindering air circulation. Avoid tightly packing dishes, allowing space for heated air to circulate effectively.

If you suspect excessive heat, immediately stop the cycle and allow the dishwasher to cool. If the issue persists, or if you notice any burning smells, disconnect the power and contact a qualified technician. Ignoring excessive heat could damage plastic items or even pose a safety hazard. Regular maintenance helps prevent such issues.

GE Dishwasher Maintenance for Optimal Dry Boost Performance

Regular maintenance—filter cleaning, proper rinse aid use, and correct loading—is vital for maximizing Dry Boost effectiveness and ensuring consistently spotless, dry dishes every time.

Cleaning the Dishwasher Filter

Maintaining a clean dishwasher filter is paramount for optimal Dry Boost performance and overall dishwasher health. A clogged filter restricts water flow, hindering cleaning and drying efficiency. GE recommends cleaning the filter at least monthly, or more frequently depending on usage.

To clean the filter, first, remove the lower rack. Locate the filter assembly, typically at the bottom of the dishwasher interior. Twist the filter counterclockwise to unlock and lift it out. Separate the filter components – usually a cylindrical filter and a flat mesh screen.

Rinse each component thoroughly under warm running water, using a soft brush to remove any food particles or debris. Avoid using harsh detergents or abrasive cleaners, as these can damage the filter. Once clean, reassemble the filter components and securely lock it back into place. A clean filter ensures proper water circulation, contributing to better drying results with Dry Boost and extending the life of your GE dishwasher.

Rinse Aid Usage and Compatibility

Rinse aid plays a crucial role in enhancing the effectiveness of the Dry Boost feature in your GE dishwasher. It reduces water surface tension, allowing water to sheet off dishes rather than forming droplets, which contribute to spotting and poor drying. GE recommends using a high-quality rinse aid specifically formulated for dishwashers.

To fill the rinse aid dispenser, locate it within the dishwasher door and carefully pour rinse aid until the fill indicator reaches the “Max” line. Adjust the rinse aid dosage setting based on your water hardness – harder water requires a higher setting. GE dishwashers are generally compatible with most liquid rinse aids available on the market.

However, avoid using rinse aids containing chlorine bleach, as these can damage the dishwasher’s interior components. Regularly check the rinse aid level and replenish as needed. Proper rinse aid usage, combined with Dry Boost, ensures sparkling clean, spot-free dishes and optimal drying performance.

Proper Loading Techniques for Dry Boost

To maximize the benefits of the Dry Boost feature, proper dishwasher loading is essential. Avoid overcrowding, ensuring water and heated air can circulate freely around all dishes. Place items facing the center for optimal cleaning and drying. Don’t block the spray arms, as this hinders water distribution.

For plastic items, which often struggle to dry, position them facing upwards and avoid nesting them together. Leave space between plastic containers to allow hot air to reach all surfaces. Ensure tall items don’t obstruct the upper spray arm. Proper spacing is key for Dry Boost to effectively eliminate moisture.

Avoid loading dishes directly over the heating element (if applicable) and ensure the dishwasher door can close completely. Following these loading guidelines, alongside utilizing Dry Boost, will result in consistently dry and sparkling clean dishes, even with challenging items like plastics.

Advanced Troubleshooting & Error Codes

GE dishwashers utilize error codes to diagnose issues; consult your manual for specifics. Complex problems may require a qualified technician for repair and optimal function.

Decoding GE Dishwasher Error Codes Related to Drying

GE dishwashers employ a sophisticated error code system to pinpoint the source of malfunctions, particularly those affecting the drying cycle and Dry Boost functionality. Understanding these codes can save time and potentially avoid unnecessary service calls. A common error, often displayed as “E4” or a similar variation, indicates a heating element failure – crucial for Dry Boost’s enhanced heat.

Another frequent code relates to the thermistor, the temperature sensor; an inaccurate reading can disrupt the drying process. Codes like “E5” might signal a problem with the control board, impacting its ability to regulate drying functions. Furthermore, issues with the circulation pump or fan motor, vital for airflow in Dry Boost, can trigger specific error messages.

Always refer to your specific model’s manual for a comprehensive list of error codes and their corresponding solutions. Resetting the dishwasher by disconnecting power for a few minutes can sometimes clear minor errors. However, persistent codes necessitate professional diagnosis and repair to ensure the Dry Boost feature operates correctly and prevents further damage.

When to Call a Professional Technician

While many GE dishwasher issues, even those impacting Dry Boost, can be addressed with basic troubleshooting, certain situations demand professional intervention. If you encounter persistent error codes that don’t resolve after a reset, or if the dishwasher is leaking water, a technician is essential. Electrical issues, such as sparking or burning smells, require immediate professional attention due to safety concerns.

Furthermore, if you suspect a problem with the heating element, control board, or internal wiring – components critical for Dry Boost – avoid attempting self-repair. These repairs often require specialized tools and expertise. Similarly, any issue involving the dishwasher’s pump or motor should be handled by a qualified technician.

Attempting complex repairs without proper knowledge can void your warranty and potentially cause further damage. A certified GE technician possesses the diagnostic skills and genuine parts to accurately identify and resolve the problem, restoring your dishwasher’s optimal performance, including the Dry Boost feature.

GE Dishwasher Warranty Information & Support

Your GE dishwasher, including models with Dry Boost technology, is covered by a manufacturer’s warranty, offering peace of mind against defects in materials and workmanship. The standard warranty typically covers parts and labor for one year from the date of original purchase. Extended warranties are often available for purchase, providing coverage for a longer period and potentially including additional components.

To access warranty details and initiate a claim, visit the official GE Appliances website or contact their customer support team. Have your model number and serial number readily available. GE offers comprehensive online support resources, including FAQs, user manuals, and troubleshooting guides specifically for Dry Boost features.

For personalized assistance, you can reach GE Customer Service via phone or live chat. They can help diagnose issues, schedule service appointments with authorized technicians, and provide information regarding warranty coverage and repair options. Retain your proof of purchase for warranty claims.