radiation safety questions and answers pdf

Radiation safety is crucial for protecting people and the environment from harmful effects of ionizing radiation. Understanding key concepts, measurement units, and safety protocols is essential for professionals. This section provides answers to common questions about radiation safety, ensuring awareness and compliance with safety standards.

What is Radiation Safety?

Radiation safety refers to practices and protocols designed to minimize exposure to ionizing radiation, protecting human health and the environment. It involves understanding radiation types, measurement units, and safety standards to ensure safe handling and use of radioactive materials. Key aspects include dose limits, shielding techniques, and monitoring tools like dosimeters and Geiger counters. Radiation safety is critical in medical, industrial, and nuclear applications, ensuring compliance with regulations and safeguarding against potential hazards.

Why is Radiation Safety Important?

Radiation safety is essential to protect human health, the environment, and facilities from the harmful effects of ionizing radiation. It prevents acute and long-term biological damage, ensuring safe handling of radioactive materials. Proper safety protocols minimize exposure risks, safeguarding workers and the public. Adhering to radiation safety standards is crucial in medical, industrial, and nuclear applications to avoid contamination and maintain ecological balance. Effective radiation safety practices also comply with legal requirements, promoting a culture of safety and responsibility.

Types of Radiation

Radiation includes alpha, beta, gamma, and X-ray types, each with distinct properties and penetration levels, requiring specific safety measures to mitigate their potential hazards effectively.

Alpha Radiation

Alpha radiation consists of high-energy helium nuclei emitted by heavy radioactive elements like uranium and radium. It travels short distances and is easily blocked by thin materials, such as paper or human skin. While alpha particles are not deeply penetrating, they can cause significant damage if ingested or inhaled, leading to internal exposure. Sources include natural decay of heavy elements and certain industrial applications. Understanding alpha radiation is crucial for developing effective safety protocols to minimize exposure risks.

Beta Radiation

Beta radiation consists of high-speed electrons emitted from unstable atomic nuclei. It can travel farther than alpha radiation, penetrating thin materials like wood and plastic but stopped by denser materials like metal. Beta radiation poses risks to living tissues, especially when exposed directly, potentially causing burns or long-term health effects. Safety measures include shielding with appropriate materials and monitoring exposure levels. Understanding beta radiation’s properties is essential for effective radiation protection strategies in various industrial and medical settings.

Gamma Radiation

Gamma radiation consists of high-energy electromagnetic waves emitted during nuclear transitions. It is highly penetrating, requiring thick, dense materials like lead for shielding. Unlike alpha or beta radiation, gamma rays can pass through solid objects, posing significant health risks if not properly contained. They are commonly used in medical imaging and sterilization but demand strict safety protocols to minimize exposure. Understanding gamma radiation’s properties is vital for developing effective shielding strategies and ensuring safe handling in industrial and medical environments.

X-Ray Radiation

X-ray radiation is a form of ionizing electromagnetic radiation with wavelengths shorter than visible light. Commonly used in medical imaging, it helps diagnose conditions by penetrating tissues. Proper shielding and limited exposure times are essential to protect against health risks. Safety measures include using lead aprons and ensuring equipment meets international standards. Regular monitoring of X-ray exposure is crucial to adhere to radiation safety guidelines and safeguard both patients and professionals from unnecessary radiation exposure.

Radiation Measurement Units

Key units include Sieverts (Sv) for dose equivalent, Microsieverts (μSv) for smaller doses, Curie (Ci) and Becquerels (Bq) for activity, and half-life for decay measurement.

Sieverts (Sv) and Microsieverts (μSv)

Sieverts (Sv) and Microsieverts (μSv) are units measuring radiation dose equivalent, reflecting biological impact. Sv quantifies the health risk from radiation exposure, while μSv is used for smaller doses. These units are crucial for assessing safety limits and ensuring compliance with radiation protection standards. They help in evaluating exposure levels in both occupational and public settings, providing a standardized measure for radiation safety assessments and dose management strategies globally.

Curie (Ci) and Becquerels (Bq)

Curie (Ci) and Becquerels (Bq) are units measuring radioactivity, indicating the rate of radioactive decay. Ci is a traditional unit, while Bq is the SI unit, where 1 Bq equals one decay per second. These units are vital for quantifying the activity of radioactive materials in medical, industrial, and research settings. Understanding Ci and Bq helps in assessing radiation levels, ensuring proper handling, and complying with safety regulations to minimize exposure risks and maintain environmental safety standards effectively.

Half-Life and Decay

Half-life refers to the time required for half of a radioactive substance to decay. It is a fundamental concept in radiation safety, determining the stability and potential hazards of materials. Decay describes the process by which unstable isotopes lose energy through radiation. Understanding half-life and decay rates is crucial for assessing radiation risks, handling radioactive materials safely, and predicting long-term environmental impacts. This knowledge aids in developing effective safety protocols and ensuring compliance with regulatory standards to protect people and the environment from radiation exposure risks. Proper management of decay processes minimizes health hazards and ecological contamination, ensuring sustainable use of radioactive substances in various applications. Accurate measurement and monitoring of decay rates are essential for maintaining safety in industrial, medical, and research settings, preventing accidents, and promoting public health. By understanding the decay cycle, professionals can implement timely interventions and safety measures, reducing the likelihood of radiation-related incidents and their consequences.

Radiation Dose Limits and Safety Standards

Radiation dose limits and safety standards are established to protect workers and the public from harmful radiation exposure. Regulatory bodies set these limits to ensure safety and compliance.

Annual Dose Limits for Workers

Annual dose limits for workers exposed to radiation are set to ensure safety and minimize health risks. According to regulations, the maximum allowable dose for workers is typically 20 millisieverts (mSv) per year. This limit applies to workers in industries like nuclear energy, healthcare, and research. Employers must monitor exposure levels and implement safety measures to stay below these limits. Exceeding them can lead to legal and health consequences, emphasizing the importance of strict adherence to these standards.

Public Exposure Limits

Public exposure limits are set to protect individuals from radiation risks. The recommended annual limit for the general public is 1 millisievert (mSv), significantly lower than occupational limits. This ensures minimal health risks from background radiation or occasional exposures. Regulatory bodies enforce these limits to safeguard public health, emphasizing the importance of monitoring and safety measures in environments where radiation exposure is possible for the general population.

International Safety Standards

International safety standards, such as those from the IAEA and ICRP, provide frameworks to ensure radiation safety worldwide. These standards establish guidelines for exposure limits, monitoring practices, and emergency protocols. They promote consistency in radiation protection across countries and industries, ensuring that safety measures are aligned with global best practices. Compliance with these standards is crucial for safeguarding workers, the public, and the environment from the risks associated with ionizing radiation.

Common Radiation Safety Questions

Common radiation safety questions include understanding types of radiation, measurement units, and protection methods. These questions address practical concerns and ensure informed safety practices are followed.

Does TLD/DRD Protect from Radiation?

TLD/DRD devices measure radiation exposure but do not provide physical protection. They assess radiation levels, helping monitor safety, while actual protection requires shielding or PPE.

How to Measure Radiation Exposure?

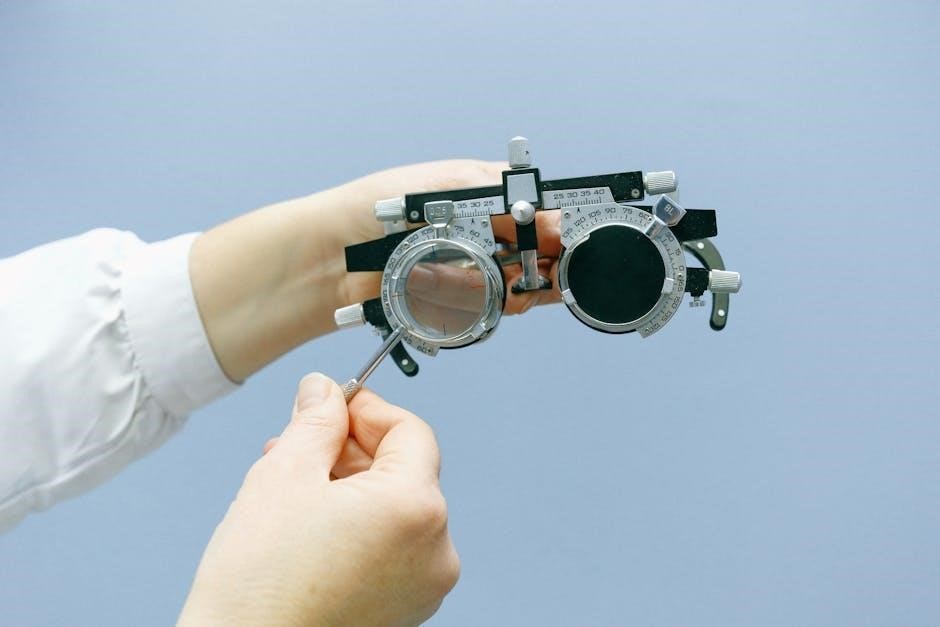
Measuring radiation exposure involves using devices like Geiger counters, dosimeters, and TLD/DRD. These tools detect and quantify radiation levels, ensuring accurate monitoring for safety compliance. Regular calibration is essential for reliable readings.

What is the Most Penetrating Type of Radiation?

Gamma radiation is the most penetrating type of radiation due to its high energy and short wavelength. It can pass through thick materials like lead and concrete, requiring robust shielding for protection. Unlike alpha or beta radiation, gamma rays pose significant risks due to their deep penetration capabilities, making them a critical concern in radiation safety protocols and exposure mitigation strategies.

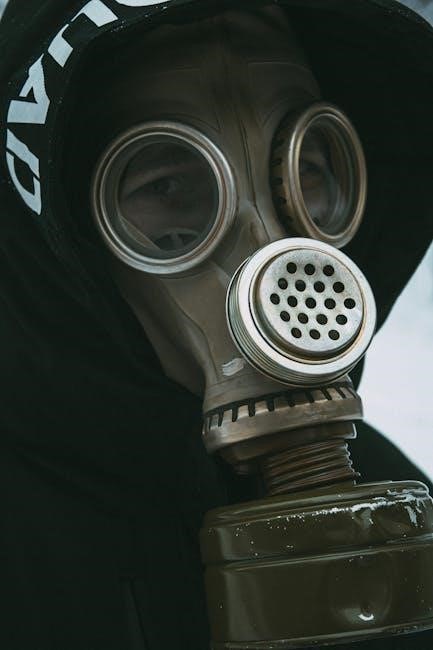
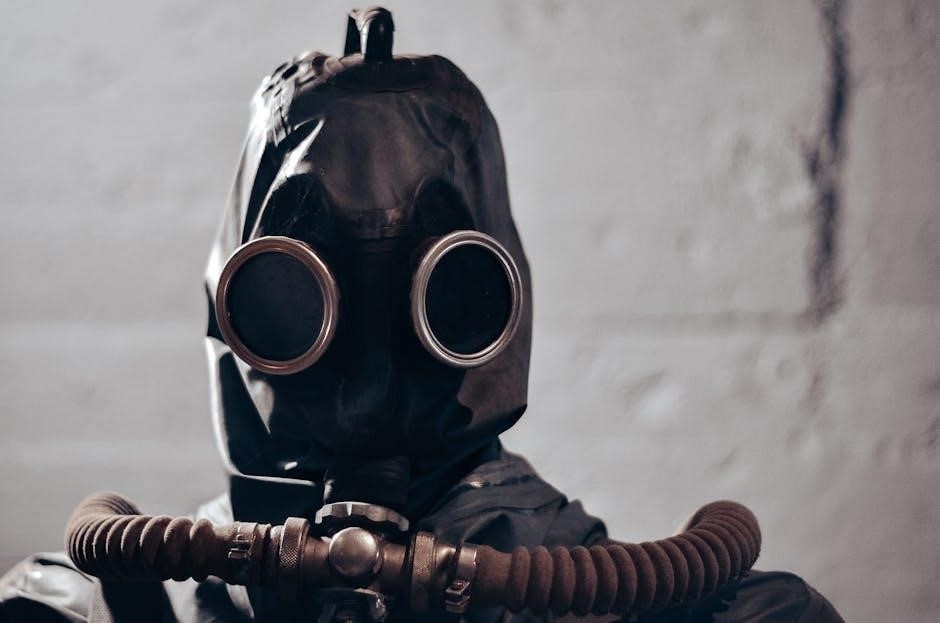
Radiation Protection and Shielding

Radiation protection and shielding are vital for minimizing exposure. Lead shields effectively block gamma rays due to their high density. Time and distance reduce radiation intensity, enhancing safety.

Lead Shields and Their Use

Lead shields are essential in radiation protection due to their high density, which effectively blocks gamma rays and X-rays. They are commonly used in medical facilities, nuclear plants, and laboratories to safeguard personnel and equipment. Lead aprons and gloves are worn by workers to minimize exposure during procedures. Additionally, lead-lined walls and barriers are constructed to contain radiation within controlled areas, ensuring safety and compliance with regulatory standards.

Time, Distance, and Shielding

Time, distance, and shielding are fundamental principles of radiation safety. Reducing exposure time minimizes radiation dose. Increasing distance from the source lowers intensity, as radiation spreads out. Shielding with materials like lead or concrete blocks or absorbs radiation. Combining these methods enhances protection, ensuring safer working conditions in environments with ionizing radiation. These practices are critical for adhering to safety guidelines and preventing overexposure.

Detection and Monitoring Instruments

Detection and monitoring instruments, like Geiger counters and personal dosimeters, are essential for measuring radiation levels. They help assess exposure risks and ensure safety protocols are followed.

Geiger Counters and Their Function

Geiger counters are portable devices used to detect and measure ionizing radiation levels. They function by ionizing gas inside a tube, creating an electrical pulse when radiation enters. This pulse is then amplified and displayed as counts per second or in units like microsieverts. Widely used for monitoring radiation exposure, they are crucial in various settings, including industrial, medical, and emergency response scenarios, ensuring accurate radiation level assessment and personnel safety.

Personal Dosimeters

Personal dosimeters are devices worn by individuals to measure cumulative radiation exposure over time. They are crucial for monitoring doses in occupational settings, ensuring safety standards are met. Common types include thermoluminescent dosimeters (TLDs) and digital radiation detectors (DRDs). TLDs record exposure through temperature-induced light emission, while DRDs provide real-time readings. Both are essential for tracking doses in medical, industrial, and research environments, helping prevent overexposure and ensuring compliance with radiation safety regulations. They offer accurate, personalized data for safeguarding health and maintaining safe working conditions.

Biological Effects of Radiation

Radiation exposure can damage cells and DNA, leading to health risks. Low doses may not cause harm, while high doses can result in acute radiation syndrome or cancer.

Low-Dose Exposure Effects

Low-dose radiation exposure may cause subtle biological effects, such as increased risk of cancer over time. Prolonged exposure to small doses can damage cellular DNA, leading to mutations. While immediate symptoms are rare, long-term risks include genetic damage and cancer development. The International Commission on Radiological Protection (ICRP) recommends strict limits to minimize these risks. Understanding these effects is vital for developing safety protocols and ensuring public health protection from radiation hazards. Continuous monitoring and research are essential to refine safety standards.

High-Dose Exposure Risks

High doses of radiation exposure pose severe health risks, including acute radiation syndrome (ARS). Symptoms like nausea, burns, and organ failure can occur within hours. Prolonged exposure leads to bone marrow depletion, impairing the immune system. Severe doses can cause central nervous system damage, coma, and even death. Immediate medical intervention is critical. Radiation safety protocols emphasize minimizing high-dose risks through shielding, distance, and time limits. Understanding these risks is essential for safeguarding workers and the public from radiation-related health crises. Prompt action is vital to prevent long-term consequences.

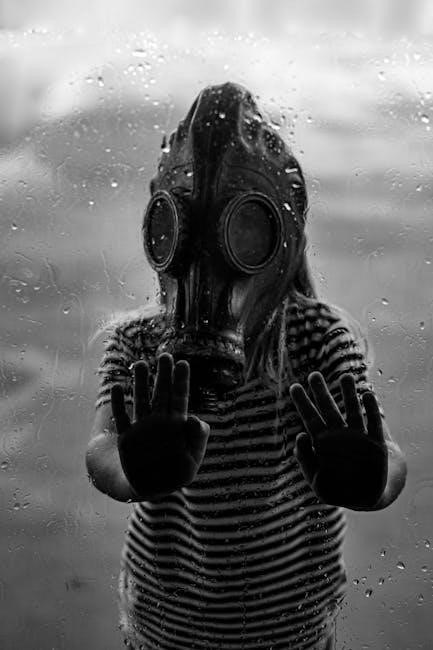
Emergency Procedures

Emergency procedures involve immediate response to radiation spills, exposures, and contamination. Evacuate the area, contain the spill, and report incidents to radiation safety committees for proper handling.

Spill Response and Cleanup

In case of a radiation spill, immediate action is crucial. Contain the spill to prevent spread, evacuate the area, and secure it. Notify radiation safety personnel and follow established protocols. Trained teams should handle cleanup, using appropriate protective equipment and techniques. Decontaminate surfaces thoroughly and dispose of waste according to regulations. Document the incident and conduct a post-spill review to prevent future occurrences. Proper cleanup ensures safety and minimizes exposure risks to people and the environment.

Exposure and Contamination Protocols

Exposure and contamination protocols are vital for minimizing radiation risks. If exposed, immediately remove contaminated clothing and wash affected areas. Report incidents to radiation safety personnel for assessment. Contamination requires decontamination procedures, and medical evaluation may be necessary. Personal protective equipment (PPE) must be worn during cleanup. Strict adherence to protocols ensures safety and prevents long-term health risks. Regular training and drills help prepare individuals for handling such situations effectively, maintaining a safe environment for everyone involved. Prompt action is key to mitigating potential harm.

Legal and Regulatory Aspects

Legal and regulatory frameworks ensure radiation safety compliance, outlining permit requirements and oversight by Radiation Safety Committees. These measures safeguard public health and environmental protection, ensuring accountability.

Permit Requirements

Obtaining permits is a legal obligation for handling radioactive materials, ensuring compliance with safety standards. Permits are issued by regulatory bodies, requiring approval from Radiation Safety Committees. They outline specific conditions for material use, storage, and disposal, ensuring minimal risk to health and the environment. Non-compliance can result in legal penalties. These requirements are essential for maintaining safety protocols and preventing unauthorized radiation exposure. Proper documentation and adherence to permit terms are critical for legal and operational compliance in radiation-related activities.

Radiation Safety Committees

Radiation Safety Committees oversee compliance with radiation safety regulations, ensuring safe handling of radioactive materials. They review permit applications, conduct audits, and investigate incidents. Committees comprise experts in radiation safety, medical physics, and regulatory affairs. Their role is to mitigate risks, provide guidance, and ensure adherence to legal standards. Regular meetings and updates are crucial for maintaining safety protocols and addressing emerging challenges in radiation management. Their oversight is vital for protecting workers, the public, and the environment from radiation hazards. Effective communication within these committees ensures informed decision-making and robust safety practices.

Public Awareness and Education

Public awareness and education are vital for understanding radiation risks and benefits. Educational resources, such as “radiation safety questions and answers pdf,” help reduce misconceptions and promote safety practices.

Understanding Radiation Risks

Understanding radiation risks involves recognizing both the benefits and potential hazards of ionizing radiation. Educational materials, such as “radiation safety questions and answers pdf,” provide insights into low-dose exposure effects, high-dose risks, and safety measures. These resources help the public grasp how radiation impacts health and environments, fostering informed decision-making and promoting safe practices in various fields, including medicine and energy production.

Understanding radiation safety is vital for protecting health and environments. “Radiation safety questions and answers pdf” resources help clarify risks, safety measures, and regulatory compliance, promoting continuous learning.

Importance of Continuous Learning

Continuous learning is essential in radiation safety to stay updated on evolving technologies and regulations. Resources like “radiation safety questions and answers pdf” offer insights into key concepts, measurement units, and safety protocols. Regular updates ensure professionals can adapt to new challenges, such as handling emergencies or using advanced equipment. Ongoing education fosters a culture of safety, reducing risks and promoting best practices. It empowers individuals to make informed decisions, ensuring compliance with legal and regulatory standards.

Resources for Further Reading

For deeper understanding, resources like “Radiation Safety Questions and Answers PDF” provide comprehensive insights. These documents include 50 sample questions, covering topics like measurement units and safety protocols. Additionally, multiple-choice question sets and booklets from organizations like the Florida Department of Health offer practical guidance. These materials are ideal for professionals seeking to enhance their knowledge and ensure compliance with safety standards. They are readily available on official websites and educational platforms for easy access and reference.

optimal weight 5 & 1 plan guide pdf free download

The Optimal Weight 5 & 1 Plan is a structured weight-loss program combining meal replacements with Lean & Green meals. It offers a free downloadable guide to help users achieve their weight goals through portion control and balanced nutrition.

This plan emphasizes creating a calorie deficit, promoting fat burning, and maintaining healthy habits. With its comprehensive approach, it provides a sustainable path to optimal weight management and improved overall health.

Overview of the Plan

The Optimal Weight 5 & 1 Plan is a structured weight-loss program designed to help individuals achieve their weight goals through a combination of meal replacements and balanced nutrition. It involves consuming five pre-packaged Fuelings daily, along with one self-prepared Lean & Green meal. The plan emphasizes portion control, calorie deficit, and regular eating intervals to promote fat burning and maintain metabolism. With its comprehensive guide and support system, it offers a sustainable approach to weight management, focusing on healthy habits and long-term success.

Importance of Weight Management

Maintaining optimal weight is crucial for overall health and well-being. Excess weight can increase the risk of chronic diseases, such as diabetes and heart disease, while a healthy weight improves energy levels and mental health. The Optimal Weight 5 & 1 Plan emphasizes sustainable habits, helping individuals achieve and maintain their ideal weight. By focusing on balanced nutrition and portion control, the plan supports long-term weight management, reducing the risk of health complications and enhancing quality of life.

What is the 5 & 1 Plan?

The 5 & 1 Plan is a structured weight-loss program that combines meal replacements with home-cooked meals. It involves consuming five pre-portioned Optavia Fuelings and one Lean & Green meal daily. This approach creates a calorie deficit, promoting fat burning and metabolism. The plan is designed to be easy to follow, with scientifically formulated products ensuring nutritional balance. By adhering to the plan, users can achieve significant weight loss while developing sustainable eating habits for long-term health benefits.

How the Optimal Weight 5 & 1 Plan Works

The plan involves five pre-portioned Optavia Fuelings and one Lean & Green meal daily, creating a calorie deficit to promote fat burning and metabolism. Meals are spaced every 2-3 hours to maintain energy levels and reduce hunger, with a focus on structured eating to support weight loss and overall health.

Structure of the Plan

The Optimal Weight 5 & 1 Plan is designed around five pre-portioned Optavia Fuelings and one self-prepared Lean & Green meal daily. Meals are spaced every 2-3 hours to maintain metabolism and reduce hunger. The plan creates a calorie deficit of 800-1,000 calories per day, promoting fat burning. Fuelings include shakes, bars, and snacks, while Lean & Green meals provide balanced nutrition with protein, vegetables, and healthy fats. This structured approach supports steady weight loss and helps establish healthy eating habits.

Meal Frequency and Portion Control

The Optimal Weight 5 & 1 Plan recommends eating six small meals daily, spaced every 2-3 hours, to keep metabolism active and prevent hunger. Each meal is portion-controlled, with five being Optavia Fuelings (shakes, bars, or snacks) and one being a Lean & Green meal. Fuelings are designed to provide balanced nutrition, while Lean & Green meals include lean protein, vegetables, and healthy fats. This structured approach ensures consistent energy levels and supports weight loss by maintaining a calorie deficit without extreme hunger or nutrient deprivation.

Role of Meal Replacements

Meal replacements, known as OPTAVIA Fuelings, play a central role in the 5 & 1 Plan. These pre-packaged products, such as shakes, bars, and snacks, are nutritionally balanced to provide essential vitamins, minerals, and protein. They are designed to be convenient and portion-controlled, helping users adhere to the program’s calorie deficit strategy. Each Fueling typically contains 100-110 calories, ensuring sustained energy and satiety between meals. By substituting five daily meals with these products, the plan simplifies weight loss and reduces the likelihood of overeating or making unhealthy choices.

Calorie Deficit and Fat Burning

The Optimal Weight 5 & 1 Plan induces a calorie deficit by restricting daily intake to under 1,000 calories, primarily through portion-controlled meal replacements. This deficit prompts the body to burn stored fat for energy, aiding weight loss. The plan’s structure of five small, frequent meals maintains metabolic activity and reduces hunger, while the Lean & Green meal provides balanced nutrition. By focusing on protein-rich Fuelings and low-calorie intake, the program supports sustained fat burning and promotes a healthy weight management routine.

Benefits of the Optimal Weight 5 & 1 Plan

The plan offers rapid weight loss, improved health markers, and convenience. It provides a structured approach to achieving a healthy weight while promoting sustainable habits and fat burning.

Rapid Weight Loss

The Optimal Weight 5 & 1 Plan is designed for rapid weight loss, typically averaging 12 pounds in 12 weeks. By creating a calorie deficit through portion-controlled meals and regular eating intervals, the plan promotes gentle fat burning. This structured approach helps individuals achieve significant weight reduction quickly, making it ideal for those seeking immediate results. The combination of meal replacements and a Lean & Green meal ensures a balanced and effective path to shedding pounds efficiently.

Improved Health Markers

The Optimal Weight 5 & 1 Plan not only aids in weight loss but also improves key health markers, such as blood sugar control, blood pressure, and cholesterol levels. By focusing on nutrient-dense meals and portion control, the plan helps reduce inflammation and enhance overall metabolic health. Many users report better energy levels and improved physical functioning, contributing to a healthier lifestyle;

These improvements are supported by the plan’s emphasis on balanced nutrition and sustainable habits, leading to long-term benefits for overall well-being and disease prevention.

Convenience and Ease of Use

The Optimal Weight 5 & 1 Plan is designed for simplicity, offering pre-portioned meal replacements that eliminate the need for complex meal planning. With easy-to-prepare options like shakes, bars, and soups, it fits seamlessly into busy lifestyles. The free downloadable guide provides clear instructions and meal ideas, making it easier to stay on track. This convenience ensures that users can maintain consistency without sacrificing time or effort, making weight loss more achievable and sustainable.

The structured approach reduces decision fatigue, allowing users to focus on their health goals without hassle.

Support System and Community

The Optimal Weight 5 & 1 Plan offers a robust support system, including one-on-one coaching and an active online community. Members can connect with certified coaches for personalized guidance and encouragement. The community provides a platform to share experiences, tips, and recipes, fostering motivation and accountability. This collective support helps users stay committed to their weight loss journey, overcoming challenges, and celebrating successes together. The free downloadable guide also serves as a valuable resource, enhancing the overall support experience.

This network ensures no one feels isolated in their pursuit of optimal health.

Phases of the Optimal Weight 5 & 1 Plan

The plan includes three phases: Weight Loss, Transition, and Maintenance. Each phase guides users through achieving and sustaining their optimal weight with structured meal plans and healthy habits.

Phase 1: Weight Loss

Phase 1 focuses on rapid weight loss through a structured plan. It involves replacing five meals with Optavia Fuelings and preparing one Lean & Green meal daily. This phase creates a calorie deficit, promoting fat burning while maintaining nutrition. The plan restricts daily calories to 800-1,000, with meal replacements providing essential nutrients. Users are supported by coaches to stay on track and develop healthy habits. This initial phase is designed to kickstart weight loss and set the foundation for long-term success.

Phase 2: Transition

Phase 2 introduces a gradual transition to self-prepared meals, reducing reliance on meal replacements. The plan increases calorie intake slightly, focusing on balanced nutrition and portion control. This phase helps users reintroduce a variety of foods while maintaining weight loss momentum. It emphasizes sustainable habits, such as mindful eating and meal planning, to prepare for long-term maintenance. Coaches provide guidance to ensure a smooth transition, helping users build confidence in their ability to make healthy choices independently.

Phase 3: Maintenance

Phase 3 focuses on maintaining weight loss and adopting a sustainable lifestyle. Participants learn to balance their diet with a variety of whole foods, reducing reliance on meal replacements. The plan emphasizes long-term healthy habits, such as regular physical activity and mindful eating. Coaches and community support continue to play a key role in helping users stay on track. This phase ensures that the changes made during the weight loss journey become a permanent part of daily life, promoting overall health and well-being for years to come.

Approved Foods and Meal Options

The plan includes OPTAVIA Fuelings (pre-packaged shakes, bars, and snacks) and Lean & Green meals (balanced, home-cooked dishes). It promotes a mix of protein-rich, low-calorie foods to support weight management and nutrition. A free downloadable guide provides detailed meal options, ensuring variety and adherence to the program’s structure.

OPTAVIA Fuelings

OPTAVIA Fuelings are pre-packaged, portion-controlled meal replacements designed to support the 5 & 1 Plan. They include shakes, bars, puddings, and snacks, each providing balanced nutrition with high-quality protein, fiber, and essential vitamins. These Fuelings are calorie-controlled, typically ranging from 100-110 calories per serving, and are free from artificial flavors and sweeteners.

The Fuelings are scientifically formulated to promote satiety and metabolic balance, making them a convenient and nutritious option for weight loss. They are paired with one daily Lean & Green meal to ensure a well-rounded diet. A free downloadable guide is available to help users understand and incorporate these Fuelings effectively into their daily routine.

Lean & Green Meals

Lean & Green Meals are a cornerstone of the Optimal Weight 5 & 1 Plan, providing a balanced mix of protein, vegetables, and healthy fats. These meals are designed to be low in calories (250-400 per serving) and rich in nutrients, promoting satiety and overall health. They typically include 5-7 ounces of lean protein, three servings of vegetables, and up to two servings of healthy fats; The free downloadable guide offers recipes and tips to prepare these meals, ensuring a sustainable and enjoyable approach to weight loss.

By focusing on whole, unprocessed foods, Lean & Green Meals help participants develop healthy eating habits while supporting their weight management goals. The structure of these meals aligns with the plan’s emphasis on portion control and balanced nutrition, making them a key component of long-term success.

Sample Meal Plans

The Optimal Weight 5 & 1 Plan provides sample meal plans to guide users in preparing healthy, balanced meals. These plans include recipes for Lean & Green meals, ensuring a mix of protein, vegetables, and healthy fats. The free downloadable guide offers practical meal ideas, helping users stay on track while enjoying nutritious and flavorful dishes. With structured meal suggestions, participants can easily incorporate the plan’s principles into their daily routines, supporting their weight loss and overall health goals effectively.

These sample plans are designed to be flexible, catering to diverse tastes and dietary preferences while adhering to the program’s guidelines. They serve as a valuable resource for those seeking inspiration and structure in their weight management journey.

Support and Resources

The Optimal Weight 5 & 1 Plan offers extensive support, including one-on-one coaching, community forums, and a free downloadable guide. These resources help users stay motivated and informed, ensuring a successful weight loss journey.

One-on-One Coaching

One-on-one coaching is a cornerstone of the Optimal Weight 5 & 1 Plan, providing personalized guidance and support. Coaches help users choose the right plan, understand habits of health, and stay motivated. They offer tailored advice, track progress, and celebrate milestones, fostering accountability and confidence. This dedicated support system ensures users feel empowered throughout their weight loss journey, addressing individual needs and challenges. With expert guidance, participants can navigate the program effectively and achieve sustainable results.

Community Support and Online Forums

Community support and online forums play a vital role in the Optimal Weight 5 & 1 Plan, offering a space for members to connect and share experiences. These platforms foster motivation, provide tips, and celebrate successes, helping users stay focused on their goals. With a vibrant network of like-minded individuals, participants gain emotional support and practical advice, enhancing their journey toward optimal weight and health. This collective encouragement helps overcome challenges and maintains commitment to the program.

Free Downloadable Guides and Tools

The Optimal Weight 5 & 1 Plan offers a variety of free downloadable resources to support your journey. These include a comprehensive guide PDF, meal trackers, journals, and recipe books. The guide provides detailed meal plans, shopping lists, and tips for staying on track. Meal trackers help monitor progress, while journals allow for reflection and goal setting. Additional tools like recipe books and dining out guides cater to diverse needs, ensuring convenience and flexibility. These resources are designed to empower users, making the program accessible and user-friendly for everyone.

Concerns and Considerations

The Optimal Weight 5 & 1 Plan raises concerns about adherence, reliance on meal replacements, and its restrictive nature, which may impact long-term sustainability for some users.

Adherence and Sustainability

The Optimal Weight 5 & 1 Plan requires strict adherence to meal replacements and portion control, which can be challenging for long-term sustainability. While the plan promotes rapid weight loss through calorie deficit, reliance on pre-packaged meals may lead to difficulty maintaining habits post-program. Some users find the restrictive nature of the plan hard to sustain, emphasizing the need for transitioning to balanced eating habits in the maintenance phase. The plan’s structured approach, however, helps many stay consistent initially, supporting significant weight loss goals.

Nutritional Diversity

The Optimal Weight 5 & 1 Plan provides balanced nutrition through its pre-packaged Fuelings and Lean & Green meals, but some users find the lack of variety a concern. While the Fuelings are nutritionally designed, offering essential vitamins, minerals, and protein, the reliance on pre-packaged meals may limit exposure to diverse whole foods. This can raise questions about long-term nutritional diversity, though the program encourages incorporating a variety of lean proteins and vegetables in the daily Lean & Green meal to enhance overall dietary balance.

Cost and Value

The Optimal Weight 5 & 1 Plan is considered a higher price point for some, as it involves purchasing pre-packaged Fuelings and meal replacements. However, the program’s structured approach and personalized coaching may justify the cost for many users. With an average weight loss of 12 pounds in 12 weeks, the plan offers tangible results for those committed to their weight-loss journey. Additionally, free downloadable guides and resources add value, making the investment worthwhile for individuals seeking a guided and sustainable weight management solution.

Free Resources and Downloads

Download the 5 & 1 Plan Guide PDF for free, along with meal trackers, journals, and recipe books. These tools support your weight-loss journey with practical guidance and tips.

5 & 1 Plan Guide PDF

The 5 & 1 Plan Guide PDF offers detailed insights into the Optimal Weight program. It outlines meal strategies, calorie control, and tips for maintaining motivation. Available for free download, this guide helps users understand how to integrate Fuelings and Lean & Green meals effectively. It also covers foundational habits for long-term success, making it an essential resource for anyone starting their weight-loss journey with the 5 & 1 Plan.

Meal Trackers and Journals

Meal trackers and journals are essential tools for monitoring progress on the Optimal Weight 5 & 1 Plan. These resources help users log daily Fuelings, meals, and activities, ensuring accountability and adherence to the program. The 5 & 1 Plan Guide PDF often includes printable trackers or digital templates. By recording meals and hydration, individuals can identify patterns, stay motivated, and make informed adjustments. These tools also provide space for noting challenges and celebrating milestones, fostering a habit of mindful eating and consistent progress toward weight-loss goals.

Recipe Books and Dining Out Guides

Recipe books and dining out guides are valuable resources for the Optimal Weight 5 & 1 Plan, offering a variety of healthy meal ideas and restaurant recommendations. These guides provide detailed recipes for Lean & Green meals, ensuring nutritional balance and flavor. The dining out guide helps users make healthy choices while eating at popular restaurants, offering suggestions for complete, plan-compliant meals. These tools empower individuals to maintain their weight-loss journey, even when cooking at home or dining out, by providing practical and delicious options that align with the program’s principles.

Success Stories and Results

Success stories highlight average weight loss of 12 pounds in 12 weeks. Testimonials from users showcase their journeys to optimal weight and long-term maintenance, inspired by the free guide.

Real-Life Testimonials

Real-life testimonials from users of the Optimal Weight 5 & 1 Plan highlight remarkable transformations and satisfaction. Many share stories of achieving significant weight loss, improved health markers, and enhanced energy levels. Users praise the structured approach and convenience of the program, with some losing up to 12 pounds in 12 weeks. The free downloadable guide is often credited as a key resource for staying on track. Coaches and community support are frequently mentioned as motivators, helping users maintain their progress and adopt sustainable habits for long-term success.

Average Weight Loss Expectations

On the Optimal Weight 5 & 1 Plan, participants typically experience an average weight loss of 12 pounds in 12 weeks. This is achieved through a calorie deficit and structured meal replacements. Results vary based on factors like starting weight, physical activity, and adherence to the plan. The free downloadable guide provides tools to track progress and stay motivated. While some may lose more, others may lose less, but the program is designed to promote steady, sustainable weight loss and fat burning for most users, with support from coaches and community resources.

Long-Term Success Rates

The Optimal Weight 5 & 1 Plan supports long-term success through structured habits and maintenance strategies. While initial weight loss is significant, sustaining results requires transitioning to balanced eating. The free guide provides tools for tracking progress and adapting to lifestyle changes. Coaches and community support help users maintain motivation. Long-term success varies, but many achieve sustained weight loss by incorporating healthy habits. The program emphasizes transitioning to a maintenance phase, ensuring users can manage their weight independently over time with continued adherence to the plan’s principles.

Comparison with Other Weight Loss Plans

The Optimal Weight 5 & 1 Plan stands out among other weight loss programs with its structured meal replacements, balanced approach, and comprehensive guide, promoting sustainable weight management effectively.

Similarities and Differences

The Optimal Weight 5 & 1 Plan shares similarities with other structured weight-loss programs, such as Jenny Craig or Nutrisystem, in its use of pre-packaged meal replacements. However, it differs by incorporating a daily Lean & Green meal, promoting balanced nutrition and sustainable habits. Unlike some plans, it emphasizes a very low-calorie intake (800-1,000 calories/day) for rapid weight loss. While other plans may offer more flexibility, the 5 & 1 Plan’s free downloadable guide and comprehensive support system make it a unique choice for those seeking a disciplined approach to weight management.

Pros and Cons vs. Other Plans

The Optimal Weight 5 & 1 Plan stands out for its structured approach, rapid weight loss, and comprehensive support system. Unlike other plans, it combines meal replacements with a daily Lean & Green meal, promoting balanced nutrition. However, its restrictive nature and reliance on pre-packaged meals may pose challenges for long-term sustainability. While it offers a free downloadable guide and community support, the cost and calorie restrictions (800-1,000/day) may not suit everyone, especially those seeking more flexible options for weight management.

Which Plan is Right for You?

Choosing the right plan depends on your weight loss goals, lifestyle, and preferences. The Optimal Weight 5 & 1 Plan is ideal for those seeking rapid results and a structured approach. If you prefer meal replacements and value convenience, this plan aligns well with your needs. However, if you prefer more flexibility or are looking for a long-term dietary change, other plans might be more suitable. Consider your commitment to calorie restrictions and reliance on pre-packaged meals before deciding. Use the free downloadable guide to explore and determine the best fit for your journey.

The Optimal Weight 5 & 1 Plan offers a structured approach to weight loss, supported by a free downloadable guide. By combining meal replacements with Lean & Green meals, it provides a balanced path to weight management, emphasizing the importance of personalization for sustainable results.

The Optimal Weight 5 & 1 Plan is a structured program with meal replacements and one Lean & Green meal daily. It creates a calorie deficit for fat burning, with six small meals to boost metabolism. The free downloadable guide offers tools like meal trackers, supporting users in their weight loss journey. Coaches and community forums provide additional support, emphasizing sustainable habits for long-term success. This plan is ideal for those seeking rapid weight loss with a guided structure and community engagement.

Final Recommendations

For those seeking a structured weight-loss approach, the Optimal Weight 5 & 1 Plan offers a proven method. Download the free guide to access meal trackers and Lean & Green recipes. Consider consulting an OPTAVIA coach for personalized support. While the plan is effective for short-term weight loss, long-term success requires adopting sustainable habits. Ensure the program aligns with your health goals and lifestyle, especially if you have specific dietary needs or preferences.

Next Steps and Getting Started

Download the free 5 & 1 Plan Guide PDF to explore meal options and tracking tools. Connect with an OPTAVIA coach for personalized guidance and support.

How to Download the Guide

To access the Optimal Weight 5 & 1 Plan Guide PDF, visit the official OPTAVIA website or authorized coach platforms. Click on the “Resources” section and select the free download option. Ensure you have a valid email address for instant access. The guide includes meal trackers, Lean & Green recipes, and tips for success. For assistance, contact an OPTAVIA coach, who can provide a direct link and additional support.

Choosing the Right Plan

Selecting the right OPTAVIA plan depends on your weight-loss goals and lifestyle. The 5 & 1 Plan is ideal for those seeking rapid weight loss, while the 4 & 2 and 3 & 3 plans offer more flexibility. Consult the free downloadable guide to explore options and determine which plan aligns with your needs. For personalized recommendations, connect with an OPTAVIA coach who can guide you based on your health goals, activity level, and dietary preferences.

Connecting with a Coach

Connecting with an OPTAVIA coach provides personalized support to guide you through the 5 & 1 Plan. Coaches offer motivation, education, and accountability to help you stay on track. They share tips for meal preparation, habit formation, and overcoming challenges. Your coach will help you understand the Habits of Health system and tailor the program to your lifestyle. For a seamless experience, visit the OPTAVIA website to find a coach who aligns with your goals and preferences, ensuring a successful weight-loss journey.

primo bottom load water dispenser manual

Features and Functions

The Primo bottom load water dispenser offers hot and cold water dispensing, a nightlight for low-light visibility, a probe assembly, drip tray with overflow indicator, and convenience switches for easy control.

1.1 Hot and Cold Water Dispensing

The Primo bottom load water dispenser provides both hot and cold water options, ensuring convenient hydration at any temperature. The dispenser is designed to deliver hot water at approximately 185°F (85°C) and cold water as low as 50°F (10°C), catering to diverse preferences. The advanced heating and cooling systems operate efficiently, maintaining consistent temperatures for optimal performance. Users can easily switch between hot and cold modes using the convenient control switches. This feature is particularly useful for households, offices, or public spaces where both hot beverages and refreshing cold water are frequently needed. The dispenser’s ability to provide instant hot and cold water makes it a versatile addition to any setting.

1.2 Nightlight for Low-Light Visibility

The Primo bottom load water dispenser features an integrated nightlight, designed to enhance visibility in low-light conditions. This convenient feature ensures that users can easily operate the dispenser even in dimly lit environments, such as late at night or in areas with limited lighting. The soft glow of the nightlight illuminates the dispensing area, reducing the risk of spills and making it simpler to identify the controls. The nightlight is energy-efficient and can be toggled on or off using a dedicated switch, providing flexibility for users who prefer to minimize light usage during certain times. This feature adds both functionality and safety to the dispenser, making it a practical choice for various settings.

1.3 Probe Assembly and Probe Hanger

The Primo bottom load water dispenser includes a probe assembly and probe hanger, essential for proper water bottle installation. The probe assembly connects to the water bottle, ensuring a secure and leak-free connection, while the probe hanger provides a convenient storage location when the bottle is not in use. This design allows for easy bottle replacement and minimizes spills. The probe assembly is durable and constructed from high-quality materials, ensuring long-lasting performance. Proper use of these components is crucial for maintaining the dispenser’s functionality and preventing potential issues such as leaks or improper water flow, as outlined in the user manual. Regular inspection and maintenance of the probe assembly are recommended to ensure optimal operation.

1.4 Drip Tray with Overflow Indicator

The Primo bottom load water dispenser features a drip tray with an overflow indicator, designed to catch spills and drips during water dispensing. This convenient feature ensures a clean and mess-free experience. The overflow indicator alerts users when the drip tray is full, preventing water from spilling onto the floor or countertop. The tray is easy to remove and clean, promoting regular maintenance. This design enhances user convenience and reduces the risk of accidental spills. The drip tray is a practical addition to the dispenser, aligning with the product’s focus on ease of use and durability. Regular emptying and cleaning of the tray are recommended for optimal performance.

1.5 Convenience Switches for Dispenser Control

The Primo bottom load water dispenser is equipped with convenient control switches, allowing users to easily manage hot and cold water dispensing. These switches are intuitively designed for quick access. They enable users to toggle between hot, cold, or room temperature water with a simple touch. Additionally, the nightlight feature can be activated or deactivated using a dedicated switch, ensuring visibility in low-light conditions. The switches are durable and designed for long-term use, providing a seamless user experience. This feature enhances the overall functionality of the dispenser, making it user-friendly and efficient for daily use. Regular maintenance of the switches is recommended to ensure optimal performance.

Setup and Installation

Unpack the dispenser, position it on a level surface, and install the water bottle. Follow the manual for proper installation and initial power-up procedures to ensure functionality.

2.1 Unpacking the Dispenser

Begin by carefully unpacking the Primo bottom load water dispenser from its box. Inspect the unit for any visible damage during shipping. Inside the packaging, you’ll find the main dispenser unit, a probe assembly, a drip tray, and a user manual. Ensure all components are included and undamaged. Gently remove any protective packaging materials, such as foam or plastic wraps, from the dispenser and its parts. Place the dispenser on a stable, level surface to prepare for installation. If any items are missing or damaged, contact Primo Water customer support immediately for assistance. Proper unpacking ensures a smooth setup process.

2.2 Positioning the Dispenser

Place the Primo bottom load water dispenser on a hard, level surface, ensuring stability and proper function. Position it away from direct sunlight and moisture sources to prevent damage. Locate it near a power outlet and ensure the area is clear for easy access. Avoid placing it in areas prone to flooding or extreme temperatures. The dispenser should be at least 4 inches away from walls or other objects to allow proper airflow. Ensure the surface is clean and dry before positioning the dispenser. Do not place it in areas accessible to children to avoid accidental tampering. Proper positioning ensures safe and efficient operation of the dispenser. Always follow the manual’s guidelines for optimal placement.

2.3 Installing the Water Bottle

First, clean the bottle cap and neck with a cloth and warm soapy water, then rinse thoroughly. Open the dispenser door and place the probe assembly on the probe hanger. Carefully position the water bottle into the dispenser, ensuring it is centered and aligned properly. Gently push the bottle down until it is securely locked in place. Make sure the bottle is stable and the dispenser door closes properly. After installation, check for any leaks by dispensing a small amount of water. Ensure the bottle is a standard 3, 4, or 5-gallon size and specifically designed for water dispensers. Proper installation ensures safe and efficient operation of the dispenser.

2.4 Initial Power-Up and Testing

After installation, plug the dispenser into a grounded electrical outlet and ensure the power switch is turned on. Press the power button to activate the dispenser. Allow a few minutes for the system to initialize. Check for any indicator lights or sounds to confirm proper power-up. Dispense a small amount of water to test functionality. Ensure both hot and cold water flow correctly. Verify the nightlight illuminates if equipped. Inspect for leaks around the bottle and connections. If issues arise, refer to the troubleshooting section. Proper initial testing ensures the dispenser operates safely and efficiently. This step confirms all features are working as intended before regular use. Follow all safety guidelines during this process.

Maintenance and Troubleshooting

Regular maintenance ensures optimal performance. Clean the dispenser, sanitize parts, and check for leaks. Address common issues promptly to prevent damage and ensure smooth operation.

3.1 Routine Maintenance Schedule

Regular maintenance is essential for optimal performance. Daily, wipe down surfaces and check for leaks. Weekly, sanitize dispenser parts and clean the drip tray. Monthly, descale if using hard water and inspect tubing. Every 6 months, replace the water filter. Ensure the drainage hole is clear and clean the probe assembly. Refer to the manual for specific cleaning solutions. Maintain a clean environment to prevent contamination. Address any issues promptly to avoid damage. Following this schedule ensures longevity and efficiency of your Primo bottom load water dispenser.

3.2 Common Issues and Solutions

Common issues include water temperature inconsistency, leaks, and dispenser malfunction. For temperature issues, check the heating and cooling systems. Leaks may occur from loose connections; tighten all fittings. If the dispenser stops working, ensure the power switch is on and the water bottle is properly installed. Clean the probe assembly and hanger regularly to prevent blockages. Descale the dispenser every 6 months if using hard water. For persistent problems, refer to troubleshooting guides or contact customer support. Regular maintenance can prevent many of these issues, ensuring smooth operation of your Primo bottom load water dispenser. Always follow the manual’s instructions for repairs and adjustments.

3.3 Addressing Leaks and Drips

Leaks and drips can often be resolved by checking and tightening connections. Inspect the water bottle, probe assembly, and hanger for proper alignment. Ensure the probe is fully inserted into the bottle neck. If water pools around the dispenser, clean the drip tray regularly. For persistent drips, check for blockages in the dispenser’s tubing or valves. Descale the unit if mineral buildup is present. Apply a small amount of water-resistant sealant to any cracked or worn-out gaskets. If issues persist, consult the manual or contact Primo Water customer support for assistance. Regular maintenance helps prevent leaks and ensures optimal performance of your dispenser.

3.4 Deep Cleaning the Dispenser

Deep cleaning the dispenser involves descaling and sanitizing to remove mineral buildup and bacteria. Start by turning off the power and draining all water from the system. Remove and wash the drip tray, probe assembly, and any other detachable parts with warm soapy water. Rinse thoroughly and dry. Use a descaler to clean the internal heating and cooling systems, following the product’s instructions. Allow the solution to circulate through the system for the recommended time. Flush the dispenser with fresh water until the taste and odor of the descaler are gone. For sanitization, mix a solution of water and white vinegar, dispense it through the system, and let it sit for 30 minutes. Rinse again with clean water. Repeat if necessary for heavily scaled dispensers. Always refer to the manual for specific guidance, as procedures may vary by model. Regular deep cleaning ensures optimal performance and water quality. Proper maintenance also extends the lifespan of your dispenser and prevents potential breakdowns. By following these steps, you can keep your Primo bottom load water dispenser in excellent condition and ensure it continues to provide clean, fresh water for years to come.

Safety Precautions

Always read the manual before use to avoid injury and property damage. Ensure proper electrical installation, keep children away, and never use the dispenser for non-water purposes.

4.1 General Safety Warnings

Read the manual thoroughly before assembling, installing, or operating the dispenser to avoid injury or property damage. Ensure proper installation and electrical connections to prevent hazards. Keep children away from the dispenser and its components. Never use the dispenser for purposes other than water dispensing. Avoid improper modifications or tampering with the device. Ensure the dispenser is placed on a stable, level surface to prevent tipping. Regularly inspect for damage or wear and tear. Follow all safety guidelines to ensure safe and efficient operation of the Primo bottom load water dispenser.

4.2 Electrical Safety Guidelines

Ensure the dispenser is installed and operated according to the manual to prevent electrical hazards. Do not plug the power cord into a wall outlet until instructed. Use a properly grounded electrical outlet rated for the dispenser’s power requirements. Avoid using damaged cords or plugs, as they can cause electrical shocks. Never submerge electrical components in water or expose them to moisture. Keep the power cord away from hot surfaces or open flames. Do not overload the outlet with additional appliances. If damage occurs, unplug the dispenser immediately and contact a qualified technician. Failure to follow these guidelines may result in electrical hazards, injury, or property damage.

4.3 Child Safety Considerations

Keep children away from the dispenser to avoid accidental burns or injuries. Ensure they cannot access the hot water dispenser or controls; Store the dispenser out of children’s reach to prevent unauthorized use. Supervise children when they are near the dispenser. Do not allow children to play with the dispenser or its components. Regularly inspect the dispenser for any damage that could pose a hazard. Secure the dispenser to prevent tipping. Teach children to handle the dispenser safely and only with adult supervision. Clean up spills immediately to prevent slipping hazards. Never leave children unattended near the dispenser or its electrical components.

Design and Components

The Primo bottom load water dispenser features a sleek design with stainless steel accents, a bottom loading mechanism, and durable construction for long-lasting performance and reliability.

5.1 Bottom Loading Mechanism

The bottom loading mechanism of the Primo water dispenser allows for easy installation of water bottles without lifting heavy bottles. The probe assembly connects securely to the bottle cap, ensuring a leak-free and efficient water supply. This design feature minimizes spills and makes refilling convenient. The mechanism is durable and built to withstand frequent use, providing a reliable connection between the bottle and the dispenser. It also includes a probe hanger for easy removal and reinstallation of the probe when changing bottles. This user-friendly design enhances overall functionality, making it simple to maintain and operate the dispenser for both hot and cold water dispensing needs.

5.2 Heating and Cooling Systems

The Primo bottom load water dispenser features advanced heating and cooling systems designed for efficient performance. The heating system uses a thermostatically controlled element to maintain water at a consistent high temperature, ideal for hot beverages. The cooling system employs a quiet, energy-efficient design to chill water to a refreshingly low temperature. Both systems operate independently, ensuring precise temperature control. The dispenser includes separate tanks for hot and cold water, providing quick access to the desired temperature. The heating element is protected by a safety feature to prevent overheating, while the cooling system ensures minimal energy consumption. These systems work together seamlessly to deliver hot and cold water instantly, enhancing user convenience and satisfaction.

5.3 Durable Construction Materials

The Primo bottom load water dispenser is built with high-quality, durable materials to ensure long-lasting performance. The water tanks are constructed from food-grade stainless steel, ensuring purity and resistance to corrosion. The exterior is made from robust plastic, designed to withstand daily use and maintain a sleek appearance. The dispenser features a sturdy bottom loading mechanism, ensuring secure bottle placement and preventing leaks. Additionally, the drip tray and probe assembly are crafted from durable materials to handle repeated use without wear. These construction materials not only enhance the dispenser’s longevity but also ensure safe and hygienic water dispensing for years to come.

Usage Instructions

Dispense hot or cold water by pressing the respective buttons. Use the nightlight for visibility in low-light conditions. Adjust the cup size for accurate water portion control.

6.1 Dispensing Hot and Cold Water

To dispense hot or cold water, press the corresponding buttons on the control panel. Ensure a cup is placed under the spout before dispensing. For hot water, the dispenser heats water to approximately 185°F (85°C). Cold water is chilled to a refreshing temperature. The system automatically stops dispensing once the bottle is empty to prevent damage. Always allow a few seconds between dispenses to let the system reset. For safety, avoid touching hot water spouts or surfaces near the heating element. If no water dispenses, check the bottle for proper installation and ensure the probe is fully inserted.

6.2 Using the Nightlight Feature

The nightlight feature provides low-light visibility for easy water dispensing in the dark. To activate, locate the nightlight switch on the control panel and toggle it on. The LED light will illuminate the dispensing area, making it convenient to use at night without turning on additional lights. The nightlight automatically turns off after a few minutes of inactivity to conserve energy. For manual control, press and hold the nightlight button until the light turns off. Ensure the dispenser is plugged in for the nightlight to function. Regularly clean the nightlight area with a soft cloth to maintain visibility. This feature enhances usability and safety, especially in dark environments.

6.3 Adjusting Cup Size

To adjust the cup size on your Primo bottom load water dispenser, locate the cup size adjustment lever or button, typically found on the front panel. Press and hold the button while moving the lever up or down to accommodate your cup or glass size. Some models may require sliding the lever manually. Ensure the cup is placed securely under the spout before dispensing. The dispenser automatically detects the cup size and stops water flow once the cup is full. For precise control, refer to the manual for specific adjustment instructions. Proper adjustment prevents spills and ensures efficient water dispensing for various container sizes.

Care and Cleaning

Clean the dispenser regularly with mild soap and water. Sanitize every 1-2 months with a vinegar solution. Replace the water filter every 6-12 months for optimal performance. Dry thoroughly after cleaning to prevent mineral spots.

7.1 Regular Cleaning Steps

For regular cleaning, mix mild soap with warm water and use a soft cloth to wipe the dispenser’s exterior and interior. Avoid harsh chemicals or abrasive materials. Clean the drip tray by removing it and washing with soap and water. Dry thoroughly to prevent water spots. Sanitize the dispenser by running a vinegar solution through the system. Rinse with clean water to remove any vinegar taste. Regular cleaning helps maintain hygiene and ensures optimal performance. Always refer to the user manual for specific instructions tailored to your model. Proper maintenance ensures longevity and freshness of dispensed water.

7.2 Sanitization Process

To sanitize your Primo bottom load water dispenser, mix a solution of 1 cup white vinegar with 3 cups water. Pour the solution into the water reservoir and run it through the hot and cold dispensers until empty. This helps remove bacteria and freshen the system. Rinse by running clean water through the dispenser several times. Wipe all surfaces with a clean, damp cloth. For deeper sanitization, repeat the process if needed. Regular sanitization ensures clean and safe water delivery. Always follow the manufacturer’s guidelines for frequency and method. Proper sanitization maintains hygiene and prevents the growth of harmful microorganisms. This step is crucial for long-term functionality and user health. Sanitize every 1-2 months for optimal results.

7.3 Replacing the Water Filter

To replace the water filter in your Primo bottom load water dispenser, start by turning off the power and water supply. Locate the filter housing, typically near the water reservoir. Open the housing by turning it counterclockwise. Remove the old filter and discard it. Take the new filter, ensuring it is compatible with your dispenser model, and insert it into the housing. Hand-tighten the housing to secure the filter. Turn the water supply back on and run water through the dispenser for 2-3 minutes to flush out any impurities. Check for leaks and proper function. Replace the filter every 6-12 months or as recommended to maintain water quality and dispenser performance.

Environmental Considerations

Recycle the water bottle and follow energy efficiency tips to reduce environmental impact. Proper disposal and energy-saving features help minimize the dispenser’s ecological footprint.

8.1 Recycling the Water Bottle

Recycling the water bottle is an essential step in reducing environmental impact. Ensure the bottle is empty and clean before recycling. Check local guidelines for proper disposal. Many communities offer designated collection points for plastic bottles. Proper recycling helps conserve resources and reduces landfill waste. Additionally, participating in bottle deposit programs can encourage responsible disposal. Always remove labels and caps, as these can be processed separately. By recycling, you contribute to a more sustainable environment and support eco-friendly practices. Proper disposal also prevents contamination of natural resources. Make sure to rinse the bottle thoroughly before recycling to ensure it is accepted by recycling facilities. This simple step promotes environmental stewardship and aligns with the dispenser’s eco-conscious design.

8;2 Energy Efficiency Tips

To maximize energy efficiency, ensure the dispenser is placed in a well-ventilated area to prevent overheating. Adjust the temperature settings to avoid excessive heating or cooling. Use the nightlight feature only when necessary to minimize standby power consumption. Regularly clean the dispenser to maintain optimal performance and reduce energy use. Consider using energy-saving modes if available. Always unplug the dispenser when not in use for extended periods. Proper maintenance, such as checking and replacing filters, ensures the unit runs efficiently. By following these tips, you can reduce energy consumption while enjoying the benefits of your Primo bottom load water dispenser. These practices align with the dispenser’s eco-friendly design.

Limited Warranty Information

Primo Water Corporation provides a limited warranty covering defects in materials and workmanship for a specified period. Registration required for warranty activation. Exclusions apply;

9.1 Warranty Coverage Details

The Primo bottom load water dispenser is covered by a limited warranty from Primo Water Corporation. This warranty protects against defects in materials and workmanship for a specified period, typically one year from the date of purchase. The warranty applies to the original purchaser and covers parts and labor for defective components. Specific components, such as the water tank and electrical parts, may have extended coverage. The warranty does not apply to damage caused by misuse, improper installation, or failure to follow maintenance guidelines outlined in the user manual. For full details, refer to the warranty section in the manual or contact Primo Water customer support.

9.2 Registering Your Dispenser

Registering your Primo bottom load water dispenser is a straightforward process that ensures warranty validation and access to exclusive customer support. Visit the Primo Water official website and navigate to the product registration page. Enter your dispenser model number, purchase date, and personal contact information. Upon successful registration, you will receive a confirmation email. This step is crucial for activating your warranty and receiving timely assistance if issues arise. Additionally, registered users may receive updates on new features, maintenance tips, and special promotions. Keep your registration details safe for future reference and warranty-related inquiries.

9.3 Exclusions and Limitations

The warranty does not cover damage resulting from misuse, neglect, or improper installation. Normal wear and tear, such as scratches or fading, are also excluded. Repairs or modifications performed by unauthorized personnel void the warranty. The warranty does not apply to dispensers used for commercial purposes or purchased outside authorized channels. Additionally, damage caused by accidental drops, power surges, or natural disasters is not covered. The warranty is non-transferable and applies only to the original purchaser; For full details, refer to the warranty agreement provided with your Primo bottom load water dispenser. Always adhere to the manual’s guidelines to maintain warranty validity.

the clean house sarah ruhl pdf

Sarah Ruhl’s The Clean House is a captivating blend of magical realism and romantic comedy, exploring themes of love, grief, and identity through its unique storytelling and vivid characters․

Overview of the Play

The Clean House by Sarah Ruhl is a romantic comedy infused with magical realism, set in the home of Dr․ Lane and her sister Virginia․ The story revolves around Matilde, a Brazilian housekeeper who struggles with her duty to clean, as it fills her with sorrow․ Instead, she aspires to become a comedian․ When Lane’s husband, Charles, falls in love with Ana, a cancer patient with a remarkable ability to make people laugh, the dynamics of the household are disrupted․ The play explores themes of love, loss, and healing, blending tragedy with humor through its fluid mix of realistic and surreal elements․ Its unique tone and structure make it a compelling exploration of human emotions and relationships․

Historical and Cultural Context

The Clean House by Sarah Ruhl premiered in 2004 at Yale Repertory Theatre, blending contemporary American themes with elements of Latin American magical realism․ The play reflects Ruhl’s fascination with how cultural identities intersect, particularly through Matilde, a Brazilian housekeeper whose backstory adds a cross-cultural dimension․ Set against the backdrop of modern American life, the play explores universal themes of love, grief, and identity while maintaining a humorous and surreal tone․ Its production coincided with a growing interest in magical realism in American theatre, making it a significant work in the early 2000s․ The play’s success, including its Susan Smith Blackburn Prize, highlights its cultural relevance and artistic innovation․

About the Playwright: Sarah Ruhl

Sarah Ruhl is a celebrated American playwright known for her unique, poetic style and exploration of human emotions․ Her works, including The Clean House, Eurydice, and In the Next Room, have earned critical acclaim and numerous awards, solidifying her place in contemporary theatre․

Background and Other Works

Sarah Ruhl is a prominent American playwright born in 1974, known for her lyrical and imaginative storytelling․ She earned a BA from Brown University and an MFA from Yale University․ Ruhl’s plays often explore themes of love, family, and the supernatural, blending realism with poetic language․ Her notable works include Eurydice, a reimagining of the Orpheus myth, and In the Next Room (or The Vibrator Play), which explores intimacy and innovation in the 19th century․ Ruhl has received numerous accolades, including the Susan Smith Blackburn Prize for The Clean House and a Pulitzer Prize finalist nod for the same play․ Her writing continues to captivate audiences with its emotional depth and unique perspective․

Style and Themes in Her Writing

Sarah Ruhl’s writing is characterized by its poetic lyricism, blending magical realism with emotional depth․ Her plays often explore themes of love, family, and identity, with a focus on the interconnectedness of life and death; Ruhl’s use of language is both evocative and subtle, allowing characters to express complex emotions through understated dialogue․ Her work frequently incorporates elements of mythology and fantasy, as seen in Eurydice and The Clean House, where the supernatural intersects with everyday life․ Ruhl’s ability to balance humor with poignant introspection makes her writing both accessible and profound, resonating with audiences on a deeply personal level while challenging them to see the world anew․

Themes in “The Clean House”

The Clean House explores themes of love, grief, identity, and the intersection of reality with magical realism, offering a poignant reflection on life, loss, and human connection․

Magical Realism and Its Role

Magical realism in The Clean House seamlessly blends the ordinary with the extraordinary, creating a unique narrative voice․ Sarah Ruhl uses this technique to explore complex emotions, such as grief and love, through fantastical elements․ For instance, the recurring motif of apples and the ever-dusty house symbolize the characters’ inner struggles and transformations․ This style allows the audience to witness the characters’ emotional journeys in a way that transcends traditional storytelling․ The magical elements, like Matilde’s aversion to cleaning and the mysterious presence of Ana, deepen the play’s thematic resonance, making it both whimsical and profound․ Ruhl’s use of magical realism not only enhances the story but also invites the audience to reflect on the human condition․

Exploration of Love and Relationships

The Clean House delves into the complexities of love and relationships through its characters’ interconnected lives․ Lane’s marriage to Charles is tested by his affair with Ana, while Virginia’s attempts to help Lane reveal her own unspoken feelings․ Matilde, though detached, reflects on her past love, adding depth to the narrative․ The play examines how love can both unite and isolate individuals, often leading to unexpected emotional territories․ Ruhl’s portrayal of these relationships highlights the fragility and resilience of love, making it a central theme that resonates throughout the story․ The interplay between characters underscores the universal quest for connection and understanding in romantic and familial bonds․ The exploration is both poignant and humorous, offering a nuanced view of love’s multifaceted nature․

Grief and Memorialization

The Clean House profoundly explores grief and memorialization, weaving these themes into the fabric of its narrative․ The play delves into how characters confront and process loss, often through subtle yet powerful expressions․ Matilde’s backstory, marked by personal tragedy, illustrates how grief can shape identity and influence relationships․ The act of cleaning, a recurring motif, symbolizes both the desire to erase pain and the impossibility of doing so․ Ruhl uses magical realism to portray how memories of the deceased linger, affecting the living in unexpected ways․ The play suggests that grief is not merely sorrow but a transformative experience that reshapes understanding and connection․ Through its nuanced portrayal, The Clean House highlights the enduring impact of loss and the ways it intertwines with love and self-discovery․

Identity and Self-Discovery

In The Clean House, identity and self-discovery are central themes, as characters navigate their roles, desires, and sense of purpose․ Matilde, the Brazilian cleaner, embodies this journey, rejecting her assigned role to pursue her passion for joke-telling, symbolizing a quest for authenticity․ Virginia, Lane’s sister, struggles with her identity as a homemaker, finding meaning in cleaning and order․ Lane, a surgeon, confronts the cracks in her seemingly perfect life, questioning her marriage and career․ Through magical realism, Ruhl explores how characters confront their inner truths, revealing that identity is fluid and shaped by relationships and experiences․ The play suggests that self-discovery is a process of embracing contradictions and finding meaning beyond societal expectations․

Character Analysis

The characters in The Clean House are complex, each representing distinct facets of human experience․ Matilde, Virginia, Lane, Charles, and Ana navigate love, loss, and self-discovery, embodying universal themes․

Matilde: The Cleaner with a Unique Perspective

Matilde, the Brazilian housekeeper, stands out as a central character in The Clean House․ Her aversion to cleaning, rooted in childhood memories, reflects her emotional complexity․ Despite her reluctance, Matilde’s poetic insights and quirky humor offer a unique lens through which the audience views the world․ Her quiet strength and introspective nature make her a compelling figure, bridging the gap between the mundane and the magical․ Matilde’s perspective is deeply personal, often expressing sorrow and hope simultaneously․ Her background as a cleaner in an American household adds layers to her identity, making her a vital voice in the play’s exploration of love, loss, and self-discovery․

Virginia: The Sister and Her Struggles

Virginia, Lane’s sister, is a complex character grappling with her own emotional and psychological challenges․ Her struggles are deeply intertwined with her relationship with Lane and the dynamics of their household․ Virginia often finds herself taking on the role of caregiver, both literally and metaphorically, as she navigates her sister’s detachment and the tension within their family․ Her interactions with Matilde reveal her judgmental tendencies, yet also a profound desire for connection and understanding․ Virginia’s journey is one of self-discovery, as she confronts her insecurities and the constraints of her role as a sister and a woman․ Her character adds depth to the play’s exploration of identity and belonging․

Lane: The Doctor and Her Household

Lane, a successful doctor, embodies the contradictions of modern life, blending professionalism with personal detachment․ Her household, meticulously maintained, serves as a reflection of her inner world—orderly yet emotionally sterile․ Lane’s relationship with Virginia, her sister, is strained, highlighting her difficulty in connecting with those closest to her․ The arrival of Ana and Charles disrupts her carefully structured life, forcing her to confront her emotional numbness․ Through Lane’s character, Ruhl explores the tension between career ambition and personal fulfillment, as well as the challenges of maintaining control in a chaotic world․ Her journey is one of quiet self-reflection, revealing the cracks beneath her polished exterior․

Charles and Ana: The Intriguing Couple

Charles, a surgeon, and Ana, his enigmatic lover, form a magnetic yet volatile relationship that disrupts the equilibrium of Lane’s household․ Their passionate affair, marked by intensity and unpredictability, contrasts sharply with Lane’s controlled environment․ Ana, a free-spirited Argentine, embodies a sense of spontaneity and authenticity, challenging the sterility of Lane’s life․ The couple’s dynamic introduces chaos and unpredictability, forcing Lane to confront her own emotional detachment․ Through their story, Ruhl explores themes of desire, identity, and the complexities of human connections․ Their presence ignites a chain of events that reshapes the lives of all characters, making them central to the play’s exploration of love and transformation․

Play Structure and Style

The Clean House combines magical realism with sharp dialogue, crafting a distinctive narrative that mixes humor and emotional richness, exploring themes through a unique dramatic framework․

Use of Language and Dialogue

Sarah Ruhl’s The Clean House features sharp, evocative dialogue that blends humor with emotional depth․ The language is precise yet poetic, often capturing the subtleties of human emotion․ Characters rarely express feelings directly, relying instead on subtext and metaphor․ This approach creates a layered narrative, where silences and pauses carry as much weight as spoken words․ Ruhl’s use of magical realism is reflected in her language, which often blurs the line between the ordinary and the surreal․ The dialogue drives character development and thematic exploration, making it a key element in the play’s emotional resonance and intellectual engagement․ This distinctive style has been praised for its originality and depth, enhancing the play’s exploration of love, grief, and identity․

Comedic Elements and Tone

The Clean House masterfully balances humor with poignant themes, creating a tone that is both whimsical and reflective․ Sarah Ruhl incorporates witty banter and absurd situations, often using magical realism to heighten comedic moments․ Virginia’s obsessive cleaning and Matilde’s aversion to it provide much of the play’s humor, while the characters’ eccentric interactions add depth․ The comedic elements serve to lighten the narrative, making the exploration of complex emotions like grief and love more accessible․ Ruhl’s tone is unique, blending irony and vulnerability to create a play that is as humorous as it is thought-provoking․ This balance ensures the audience remains engaged, even as the story delves into darker, more introspective territory․

Productions and Performances

The Clean House premiered at Yale Repertory Theatre in 2004, opened Off-Broadway in 2006, and was produced at Chicago’s Goodman Theatre in 2006, directed by Jessica Thebus, with an extended, acclaimed run․

Notable Stagings and Productions

The Clean House premiered at Yale Repertory Theatre in 2004, directed by Bill Rauch, and later opened Off-Broadway at Lincoln Center Theatre’s Mitzi E․ Newhouse Theatre in 2006․ The play was also produced at the Goodman Theatre in Chicago in 2006, directed by Jessica Thebus, featuring set design by Todd Rosenthal and lighting by James F․ Ingalls․ These productions were widely acclaimed, showcasing the play’s unique blend of magical realism and humor․ The Off-Broadway run was particularly notable for its extended engagement, highlighting the play’s resonance with audiences․ These stagings solidified The Clean House as a significant work in contemporary American theatre, praised for its innovative storytelling and emotional depth․

Directorial Approaches and Reviews

Directors have approached The Clean House with a focus on balancing its magical realism with emotional authenticity․ Bill Rauch’s original direction emphasized the play’s poetic elements, while Jessica Thebus’s Chicago production highlighted the comedic undertones․ Reviews praised the play’s ability to blend humor with profound themes, with critics noting its original storytelling and strong character development․ The Off-Broadway production at Lincoln Center received acclaim for its nuanced performances and innovative staging․ Overall, the play has been celebrated for its unique voice and ability to connect with audiences, earning it a reputation as a modern classic in American theatre․

Critical Reception and Awards

The Clean House earned the 2004 Susan Smith Blackburn Prize and was a finalist for the 2005 Pulitzer Prize, solidifying its status as a modern classic․

Awards and Nominations

The Clean House received the prestigious Susan Smith Blackburn Prize in 2004, recognizing it as an outstanding work by a female playwright․ It was also a finalist for the 2005 Pulitzer Prize for Drama, further cementing its acclaim․ The play’s success was marked by its critically acclaimed productions at Yale Repertory Theatre and Lincoln Center Theater, solidifying its reputation as a modern theatrical masterpiece․ These accolades highlight Sarah Ruhl’s innovative storytelling and her ability to blend magical realism with profound emotional depth, making The Clean House a standout work in contemporary American theatre․

Critical Responses and Analysis

Critics have praised The Clean House for its unique blend of magical realism and emotional depth, with many highlighting its ability to balance humor and poignancy․ Reviewers noted the play’s exploration of love, loss, and identity, calling it a “fresh, funny” take on romantic comedy while tackling darker themes․ The play’s use of symbolic elements, such as the apple, resonated with audiences and critics alike․ Some praised its innovative storytelling, while others admired its nuanced character development․ The play’s ability to evoke both laughter and introspection has made it a standout in contemporary theatre, solidifying its reputation as a thought-provoking and emotionally engaging work․

Legacy and Modern Relevance

The Clean House continues to influence contemporary theatre with its fresh voice and emotional depth, remaining a popular choice for productions and academic study due to its timeless themes․

Influence on Contemporary Theatre

Sarah Ruhl’s The Clean House has significantly influenced contemporary theatre with its innovative use of magical realism and emotional storytelling․ Its exploration of complex themes such as grief, love, and identity has inspired playwrights to experiment with blending the surreal and the mundane․ The play’s success, marked by prestigious awards and widespread productions, has cemented Ruhl’s reputation as a leading voice in modern drama․ Its ability to balance humor with profundity has made it a model for creating works that resonate deeply with audiences․ As a result, The Clean House continues to be a benchmark for contemporary playwrights seeking to push the boundaries of theatrical storytelling․

Continuous Popularity and Performances

The Clean House remains a widely performed and studied play, with its blend of magical realism, humor, and emotional depth continuing to captivate audiences․ Since its premiere at Yale Repertory Theatre in 2004, it has been staged at numerous prominent theaters, including the Goodman Theatre in Chicago and Off-Broadway at Lincoln Center․ Its relatable themes of love, loss, and identity ensure its relevance across diverse audiences․ The play’s ability to balance comedy with profound introspection has made it a favorite among directors and actors, leading to frequent productions nationwide and internationally․ Its enduring popularity underscores Sarah Ruhl’s skill in crafting stories that resonate deeply, making The Clean House a timeless piece of contemporary theatre․

salesforce admin certification dumps 2020 pdf free

The Salesforce Admin Certification is a sought-after credential, with many candidates seeking free Salesforce Admin dumps 2020 PDF for exam preparation and practice.

Overview of Salesforce Admin Certification

The Salesforce Admin Certification is designed to validate skills in managing and configuring Salesforce platforms. It covers essential tasks like user management, data security, and system customization. Many candidates prepare using free Salesforce Admin dumps 2020 PDF and practice exams to gain familiarity with the exam format. These resources provide realistic question scenarios, helping candidates assess their readiness. The certification is highly regarded in the industry, demonstrating expertise in Salesforce administration. Aspirants often seek reliable study materials, including free PDF dumps, to ensure they are well-prepared for the challenges of the exam and real-world applications.

Importance of Salesforce Admin Certification in 2020

In 2020, the Salesforce Admin Certification gained significant importance as businesses increasingly relied on digital transformation. The pandemic accelerated the need for skilled professionals to manage Salesforce platforms efficiently. Obtaining this certification demonstrated expertise in configuring and optimizing Salesforce solutions, which were critical for remote work and customer engagement. Many candidates utilized free Salesforce Admin dumps 2020 PDF to prepare, as these resources provided practical insights into exam topics. The certification not only enhanced career prospects but also equipped admins with the skills to support businesses during unprecedented challenges. Its relevance grew, making it a key credential for professionals aiming to thrive in a rapidly evolving digital landscape.

Understanding the Exam Format

The Salesforce Admin exam evaluates practical skills and knowledge through multiple-choice questions. Utilizing free Salesforce Admin dumps 2020 PDF helps candidates familiarize themselves with the format and content effectively.

Salesforce Admin Exam Structure and Question Types

The Salesforce Admin exam typically consists of 60 multiple-choice questions, with a time limit of 105 minutes. The questions are designed to test practical knowledge and problem-solving skills. Candidates can expect a mix of scenario-based and configuration-focused questions. Free Salesforce Admin dumps 2020 PDF often mirror this structure, providing realistic practice. These dumps include question types like single-select, multi-select, and true/false, aligning with the actual exam format. Practicing with these resources helps candidates understand the weighting of topics and improves their ability to manage time effectively during the exam. This preparation is crucial for achieving a passing score and becoming certified.

Time Limit and Passing Score for the Exam

The Salesforce Admin certification exam has a time limit of 105 minutes (1 hour and 45 minutes) and consists of 60 multiple-choice questions. To pass, candidates must achieve a score of at least 65%. Free Salesforce Admin dumps 2020 PDF often include sample questions that reflect the exam’s timing and scoring format. These resources help candidates familiarize themselves with the pressure of completing the exam within the allotted time. Practicing with dumps allows candidates to refine their time management skills and ensure they meet the passing score threshold. This preparation is essential for successfully obtaining the certification.

Key Topics Covered in Salesforce Admin Certification

The certification covers core areas like user management, data security, and Salesforce configuration. Free Salesforce Admin dumps 2020 PDF often include questions on these topics for practice.

Core Concepts: Salesforce Setup and Configuration

Mastering Salesforce setup and configuration is crucial for admin certification. Key topics include navigating the Salesforce interface, customizing objects, and automating workflows. Free Salesforce Admin dumps 2020 PDF often cover these fundamentals, helping candidates understand system settings, user interfaces, and data management tools. Configuration involves setting up profiles, roles, and permissions, ensuring proper access control. Additionally, learning about automation tools like Process Builder and Workflows is essential. These concepts form the backbone of Salesforce administration, enabling admins to optimize platform functionality. By studying these areas, candidates can confidently handle real-world scenarios and pass the exam with ease, leveraging resources like dumps for practical insights.

Managing Users, Roles, and Permissions

Managing users, roles, and permissions is a critical aspect of Salesforce administration. This topic covers setting up user accounts, defining roles, and assigning permissions to ensure proper access control. Free Salesforce Admin dumps 2020 PDF often include practice questions on configuring role hierarchies, permission sets, and profiles. Understanding Object-Level Security (OLS) and Field-Level Security (FLS) is also essential. These dumps help candidates learn how to grant access to records and fields while maintaining data security. Best practices, such as minimizing access rights, are emphasized to prevent unauthorized data exposure. Mastery of these concepts is vital for passing the exam and effectively managing a Salesforce org.

Data Management and Security Best Practices

Data management and security are foundational skills for Salesforce admins. Best practices include using data validation rules, backup strategies, and encryption to protect sensitive information. Free Salesforce Admin dumps 2020 PDF often cover these topics, emphasizing the importance of data integrity and compliance. Learning how to implement access controls, audit trails, and data recovery processes is crucial. These resources also highlight methods to prevent data loss and ensure proper data governance. By mastering these practices, admins can safeguard their organization’s data while maintaining operational efficiency. These concepts are frequently tested in the exam, making them essential for successful certification.

Free Study Resources for Salesforce Admin Exam

Free study resources for the Salesforce Admin exam include official guides, practice exams, and online communities. Many websites offer free Salesforce Admin dumps 2020 PDF, providing exam questions and answers. These resources help candidates prepare effectively, covering essential topics like data management and security. Additionally, platforms offer free practice exams to test knowledge and identify weak areas. Online forums and groups also share valuable study materials, tips, and experiences. Leveraging these resources ensures comprehensive preparation and improves chances of passing the exam. They are widely available and easily accessible, making exam preparation more convenient and affordable for all candidates.

Official Salesforce Study Guides and Materials

Salesforce provides official study guides and materials to help candidates prepare for the Admin certification exam. These resources are available on the Salesforce website and include detailed study guides, practice workbooks, and Trailhead modules. The official study guide outlines the exam objectives, while the workbooks offer hands-on exercises. Additionally, Salesforce Trailhead provides interactive learning paths tailored to the Admin certification. These materials are designed to ensure candidates gain a deep understanding of core concepts, such as setup, configuration, and data management. Regularly updated, they reflect the latest Salesforce features and best practices. Using official materials is the most reliable way to prepare for the exam and ensure success. They are free and accessible to all candidates, making them an invaluable resource.

Free Practice Exams and Mock Tests

Free practice exams and mock tests are essential tools for preparing for the Salesforce Admin certification. These resources simulate real exam conditions, helping candidates assess their readiness. Many websites offer free Salesforce Admin practice exams in PDF format, covering topics like user management, data security, and configuration. Platforms such as PassITExams and Focus on Training provide mock tests that closely resemble the actual exam. These tests include timed sessions and detailed answer explanations, allowing candidates to identify weak areas. Additionally, community forums and study groups often share free Salesforce Admin mock tests, enabling collaborative learning. Regularly practicing with these exams ensures a thorough understanding of the material and improves problem-solving skills under time constraints. They are a valuable supplement to official study guides and hands-on experience.

Online Communities and Forums for Preparation

Online communities and forums are invaluable for Salesforce Admin certification preparation. Platforms like the Salesforce Trailblazer Community and Reddit’s r/Salesforce offer access to study materials, advice, and real-world insights. Facebook groups such as “Salesforce Admins” and LinkedIn groups dedicated to Salesforce professionals provide spaces to connect with certified individuals and gain tips. Additionally, websites like PassITExams and Focus on Training host forums where users share free Salesforce Admin dumps 2020 PDF and practice exams. These communities allow candidates to discuss challenges, clarify doubts, and learn from others’ experiences. Engaging with these forums fosters a collaborative learning environment and helps candidates stay updated on the latest exam trends and strategies.

Where to Find Salesforce Admin Dumps 2020 PDF

Popular platforms like PassITExams and Focus on Training offer free Salesforce Admin dumps 2020 PDF for exam preparation, providing accessible resources for candidates worldwide.

Popular Websites Offering Free Salesforce Dumps

Several websites provide free Salesforce Admin dumps 2020 PDF, including PassITExams, Focus on Training, and Salesforce Trailhead. These platforms offer updated exam questions, practice tests, and study materials to help candidates prepare effectively. Additionally, online communities like Reddit and Salesforce forums often share links to free resources. These dumps are designed to mimic real exam scenarios, ensuring hands-on practice. While these resources are beneficial, they should be used alongside official study guides for comprehensive preparation. Always verify the credibility of the source to ensure the quality and accuracy of the materials downloaded.

How to Download Salesforce Admin Dumps in PDF Format

To download Salesforce Admin dumps 2020 PDF, visit reputable websites like PassITExams or Focus on Training. Use search terms such as “Salesforce Admin dumps free PDF” to locate files. Once on the site, navigate to the exam section, select the Salesforce Certified Administrator category, and click on the download link. Some platforms may require registration. After downloading, verify the file’s content to ensure it contains updated questions and answers. These PDFs are designed to simulate real exam scenarios, helping candidates assess their readiness. Always check the credibility of the source to avoid outdated or irrelevant materials.

Benefits and Risks of Using Exam Dumps

Using Salesforce Admin dumps 2020 PDF offers several benefits, such as access to realistic practice questions, helping candidates familiarize themselves with the exam format. These dumps often include answers, enabling self-assessment and identification of knowledge gaps. However, risks exist, as some dumps may contain outdated or inaccurate content, leading to poor preparation. Additionally, reliance on dumps alone can result in a superficial understanding, as they may not cover all exam topics comprehensively. It’s essential to balance dumps with official study materials and hands-on practice to ensure well-rounded preparation. Always verify the credibility of the source to avoid potential pitfalls and ensure compliance with ethical guidelines.

Effective Preparation Strategies

Emphasize combining free Salesforce dumps with hands-on Trailhead practice. Create a structured study schedule and supplement with official materials for a comprehensive and effective exam preparation strategy.

Creating a Study Schedule for Salesforce Admin Exam

Developing a structured study schedule is crucial for success in the Salesforce Admin exam. Begin by breaking down the exam topics into manageable sections, such as Salesforce Setup and Configuration, User Management, and Data Security. Assess your familiarity with each area to allocate time effectively, focusing more on weaker topics. Assign specific days or time slots to each subject to ensure comprehensive coverage.

Incorporate regular practice exams using free Salesforce Admin dumps 2020 PDF to identify gaps in knowledge. Schedule weekly practice tests to monitor progress and adjust your study plan accordingly. Utilize Trailhead modules to gain hands-on experience, reinforcing theoretical knowledge with practical skills.

Set aside time for weekly review sessions to revisit challenging topics and consolidate learning. Maintain a balance by dedicating realistic study hours each day, considering personal commitments. Track progress through a journal or app to stay motivated and informed. A well-organized schedule ensures efficient preparation and boosts confidence for the exam.

Hands-On Practice with Salesforce Trailhead

Salesforce Trailhead is an excellent platform for gaining practical experience, complementing study materials like free Salesforce Admin dumps 2020 PDF. This interactive, project-based learning tool allows candidates to explore real-world scenarios, ensuring a deeper understanding of Salesforce administration. By completing trails and modules, learners can apply theoretical knowledge in practical contexts, enhancing their problem-solving skills.

Trailhead offers modules tailored for admin certification, covering essential topics such as user management, data security, and workflow automation. Regular hands-on practice helps build confidence and familiarity with Salesforce’s interface, making it easier to tackle complex exam questions. Combining Trailhead with practice exams ensures a well-rounded preparation strategy, balancing theory with application for optimal exam readiness.

Importance of Understanding Concepts Over Memorization

Mastering Salesforce Admin concepts is crucial for long-term success, rather than relying solely on memorization. While free Salesforce Admin dumps 2020 PDF provide valuable practice, they should not replace deep conceptual understanding. Salesforce exams test practical application and problem-solving skills, requiring candidates to think critically about real-world scenarios. Memorization may help with specific questions, but it doesn’t prepare for unexpected challenges. Understanding core concepts ensures adaptability and confidence in handling diverse situations. Candidates should focus on learning why and how Salesforce features work, rather than just memorizing steps. This approach fosters a stronger foundation and enhances problem-solving abilities, making it easier to apply knowledge in both exams and real-world environments.

Benefits of Salesforce Admin Certification

Earning the Salesforce Admin Certification enhances career prospects, boosts earning potential, and equips professionals with in-demand skills, making them invaluable to organizations leveraging Salesforce CRM solutions effectively.

Career Advancement Opportunities

Obtaining the Salesforce Admin Certification opens doors to lucrative career opportunities, as it validates expertise in managing Salesforce platforms. Professionals with this credential are in high demand across industries, including IT, sales, and marketing. Many organizations prioritize certified admins for roles like Salesforce Administrator, CRM Specialist, or System Analyst. Additionally, having access to resources like Salesforce Admin dumps 2020 PDF free ensures better preparation, making candidates more competitive in the job market. With the certification, professionals can transition into senior roles or specialize in Salesforce implementation and optimization, driving their careers forward in a rapidly growing field.

Enhanced Skills and Knowledge in Salesforce

Earning the Salesforce Admin Certification significantly enhances your technical and administrative skills, equipping you to manage Salesforce platforms effectively. The certification covers core areas like system configuration, user management, and data security, ensuring a deep understanding of Salesforce functionality. By leveraging resources like Salesforce Admin dumps 2020 PDF free, candidates gain insights into real-world scenarios and best practices. This certification also improves problem-solving abilities and familiarity with Salesforce tools, enabling professionals to optimize business processes and workflows. Hands-on practice, combined with theoretical knowledge, prepares admins to handle complex tasks confidently, making them invaluable assets to organizations relying on Salesforce solutions.

Increased Earning Potential

The Salesforce Admin Certification directly correlates with increased earning potential, as certified professionals are in high demand. Employers recognize the value of certified admins, leading to higher salaries and better job offers. According to industry trends, certified Salesforce admins can earn significantly more than their non-certified counterparts. The certification validates expertise in managing Salesforce platforms, making professionals more attractive to employers. Additionally, the ability to optimize Salesforce tools and processes contributes to business growth, further justifying higher compensation. By leveraging resources like Salesforce Admin dumps 2020 PDF free, candidates can efficiently prepare and unlock these financial benefits, advancing their careers and increasing their market value.

magegee keyboard manual

The MageGee Keyboard is a popular mechanical gaming keyboard designed for both performance and style. This manual provides essential guidance for users to maximize its features.

With its plug-and-play functionality and customizable RGB lighting, the MageGee Keyboard offers a seamless experience. It’s an ideal choice for gamers and typists seeking precision and durability.

1.1 Overview of the MageGee Keyboard

The MageGee Keyboard is a versatile mechanical gaming keyboard known for its durability and style. It features customizable RGB lighting, portable design, and plug-and-play functionality, making it ideal for both gaming and everyday use. Available at an affordable price of $29.99, it offers excellent value for its performance and aesthetic appeal.

1.2 Importance of the Manual for Users

The manual is essential for users to fully understand and utilize the MageGee Keyboard’s features. It provides detailed guidance on installation, customization, and troubleshooting, ensuring optimal performance. By following the manual, users can explore advanced settings, resolve common issues, and maintain their keyboard effectively, enhancing both productivity and gaming experiences.

Key Features of the MageGee Keyboard

The MageGee Keyboard features mechanical switches, customizable RGB lighting, a compact design, and plug-and-play connectivity, making it ideal for gaming and typing experiences.

2.1 Mechanical Switches and Their Types

The MageGee Keyboard utilizes high-quality mechanical switches, offering tactile, linear, or clicky feedback. These switches are durable and provide precise actuation, enhancing both gaming and typing accuracy. Users can choose between popular types like Outemu or Kailh switches, each delivering distinct feel and performance, ensuring a personalized experience tailored to individual preferences.

2.2 RGB Lighting and Customization Options

The MageGee Keyboard features vibrant RGB lighting with customizable effects, including static, breathing, and wave modes. Users can adjust brightness and speed to match their preferences, creating a personalized aesthetic experience.

With 18 preset lighting modes and the ability to customize individual key colors, the keyboard offers extensive flexibility. This allows users to tailor the lighting to their gaming setup or personal style without requiring additional software.

2.3 Compact Design and Portability

The MageGee Keyboard boasts a sleek, compact design, making it highly portable for gamers and typists on the go. Its tenkeyless layout saves space while maintaining functionality, allowing users to carry it easily in a bag or case.

With a durable aluminum frame and lightweight construction, the keyboard is designed for versatility. Its compact size ensures it fits neatly on any desk, while its portability makes it ideal for LAN parties or travel.

2.4 Wired Connectivity and Plug-and-Play Functionality

The MageGee Keyboard features a reliable USB wired connection, ensuring stable performance and instant response. Its plug-and-play design eliminates the need for complex setups, making it easy to use across multiple devices, including PCs, laptops, and gaming consoles.

With a durable USB cable and compatibility with various operating systems, the keyboard provides seamless connectivity. This feature is particularly advantageous for gamers who prioritize quick and dependable input without the hassle of wireless configurations.

Installation and Setup Guide

The MageGee Keyboard is designed for easy setup. Simply unbox, connect the USB cable, and enjoy plug-and-play functionality. No additional drivers are required for basic operation.

For optimal performance, install the provided software to access advanced features like RGB customization and macro settings. Follow the on-screen instructions for a seamless experience.

3.1 Unboxing and Initial Setup

Unboxing the MageGee Keyboard reveals a sleek, compact design with a USB cable and quick-start guide. Ensure all components are included before proceeding. For initial setup, connect the USB cable to your device and power on the keyboard. The plug-and-play feature allows immediate use without additional software. Familiarize yourself with the layout and basic functions before exploring advanced features. This ensures a smooth and intuitive user experience from the start.

3.2 Connecting the Keyboard to Your Device

Connect the MageGee Keyboard to your device using the provided USB cable. Plug the USB connector into your computer or gaming console. The keyboard features plug-and-play functionality, requiring no additional drivers for basic use. Ensure your device recognizes the keyboard by checking for LED activity or RGB lighting. Compatible with Windows, Mac, and Linux, the MageGee Keyboard offers versatile connectivity options. For advanced features, install the accompanying software.

3.3 Installing Drivers and Software

To fully utilize the MageGee Keyboard, download the latest drivers and software from the official website. Install the software by following the on-screen instructions. Ensure compatibility with your operating system. Once installed, the software allows customization of RGB lighting, key remapping, and macro settings. Restart your device after installation to ensure proper functionality. This step is crucial for accessing advanced features and optimizing your keyboard experience.

Navigating the MageGee Keyboard Manual

This section guides users through the manual’s structure, helping them locate key information quickly. It covers installation, customization, and troubleshooting, ensuring easy access to essential details.

4.1 Understanding the Layout and Controls

The MageGee Keyboard features a sleek, compact design with a logical layout that enhances user experience. The controls are intuitively placed, providing easy access to essential functions. Users can quickly locate keys, media controls, and customization buttons, ensuring smooth operation. This design caters to both gamers and typists, offering a balance between functionality and aesthetics. Familiarizing yourself with the layout is the first step to unlocking its full potential.

4.2 Exploring Advanced Features

The MageGee Keyboard offers a range of advanced features designed to enhance productivity and gaming. These include customizable macro keys, adjustable RGB lighting, and programmable profiles. Users can assign complex commands to specific keys, creating a personalized experience tailored to their needs. The keyboard also supports multiple profiles, allowing seamless switching between different setups for work, gaming, or multimedia control.

By exploring these features, users can unlock the full potential of their MageGee Keyboard, making it an indispensable tool for both casual and professional use. The intuitive design ensures that even advanced customization remains accessible and user-friendly.

Customization Options

The MageGee Keyboard offers comprehensive customization options, including key remapping, RGB lighting adjustments, and profile customization. Users can tailor their experience to enhance productivity and gaming performance.

5.1 Key Remapping and Macro Keys

The MageGee Keyboard allows users to remap keys and create custom macros, enhancing productivity and gaming efficiency. Using the accompanying software, users can assign specific functions to keys or record complex sequences. This feature is particularly beneficial for gamers who rely on quick commands. The intuitive interface ensures easy customization, enabling users to tailor their keyboard layout to suit their preferences and workflow needs effectively.

5.2 Adjusting RGB Lighting Effects

The MageGee Keyboard offers customizable RGB lighting, allowing users to choose from a variety of effects. Through the software, users can select static colors, dynamic patterns, or even synchronize lighting with gameplay. Adjustments to brightness and effect speed can also be made to personalize the visual experience. This feature enhances both aesthetics and immersion, making it a standout option for gamers and enthusiasts who value customization and visual appeal in their peripherals.

5.3 Customizing Keyboard Profiles

Customizing keyboard profiles allows users to tailor their MageGee Keyboard experience to specific tasks or preferences. Through the software, users can create and save unique profiles for gaming, work, or multimedia control. Each profile can be programmed with custom key mappings, macro settings, and lighting effects. Profiles are easily switchable, enabling seamless transitions between activities. This feature enhances productivity and personalization, making the keyboard adaptable to diverse user needs and preferences.

Troubleshooting Common Issues

Troubleshooting common issues with the MageGee Keyboard involves addressing connectivity problems, key responsiveness, and lighting malfunctions; This section provides solutions to ensure optimal performance and functionality.

6.1 Resolving Connectivity Problems

Connectivity issues with the MageGee Keyboard can often be resolved by checking the USB connection or restarting your device. Ensure the keyboard is properly plugged into a functioning USB port. If issues persist, try using a different USB port or restarting your computer. For wired connections, verify that the cable is undamaged and securely connected to both the keyboard and your device. If problems remain, reinstalling drivers or updating firmware may be necessary.

6.2 Fixing Sticky Keys or Non-Responsive Buttons

To address sticky keys or non-responsive buttons, start by cleaning the keyboard. Use compressed air to remove dust and debris from between the keys. Dampen a soft cloth with water and gently wipe the keys, avoiding liquid contact with electrical components. Allow the keyboard to dry completely before use. If issues persist, inspect for physical obstructions or damage. In severe cases, replacing the affected switches may be necessary.

6.3 Addressing RGB Lighting Malfunctions

If the RGB lighting on your MageGee Keyboard malfunctions, first ensure the keyboard is properly connected and powered. Restart the RGB lighting software and check for firmware updates. Clean any debris that may block the LEDs. If individual keys aren’t lighting up, inspect for loose connections or damaged LEDs. Contact customer support if issues persist after troubleshooting.

Maintenance and Care Tips

Regularly clean the keyboard with compressed air to remove dust. Avoid exposure to liquids and extreme temperatures. Use a soft cloth to wipe surfaces for optimal performance.

7.1 Cleaning the Keyboard

To maintain your MageGee Keyboard, start by turning it off and unplugging it. Use compressed air to gently remove dust and debris between keys. For tougher spots, dampen a soft cloth with water, but avoid liquid contact with electrical components. Regularly cleaning prevents dust buildup and ensures smooth key operation. Dry the keyboard thoroughly before reconnecting it for use. This simple routine enhances performance and longevity.

7.2 Preventing Dust Buildup

Regularly using compressed air to blow out dust from between keys helps prevent buildup. Cover the keyboard when not in use to reduce dust accumulation. Additionally, cleaning your workspace and placing the keyboard in a low-dust area can significantly minimize debris collection. These simple practices ensure your MageGee Keyboard remains functional and visually appealing over time.

User Guide for Optimal Performance

The MageGee Keyboard delivers optimal performance with its mechanical switches and plug-and-play functionality. Regular maintenance and proper hand positioning enhance both gaming and typing experiences effectively.

8.1 Getting Started with the Keyboard

Begin by unboxing and connecting the MageGee Keyboard to your device via USB. Ensure your system recognizes the keyboard and updates drivers if necessary. Familiarize yourself with the layout, including the 60% compact design, media controls, and customizable keys. Use the quick start guide to explore essential functions and customize settings for optimal performance. Experiment with backlighting and macro settings to tailor your experience.

8;2 Tips for Enhancing Typing and Gaming Experience

To enhance your typing and gaming experience with the MageGee Keyboard, practice touch typing to improve speed and accuracy. Utilize macro keys for complex commands, reducing keystrokes. Adjust the RGB lighting to suit your environment, ensuring optimal visibility. Experiment with different switch types to find your preferred actuation force. Regularly clean the keyboard to maintain responsiveness and prevent dust buildup, ensuring smooth performance during long sessions;

Frequently Asked Questions (FAQs)

How much does the MageGee Keyboard cost? It’s currently priced at $29.99 on Amazon, offering great value for its features; Is it easy to set up? Yes, it’s plug-and-play, requiring no complex installation.

9.1 General Inquiries About the MageGee Keyboard

What is the MageGee Keyboard? It’s a budget-friendly mechanical gaming keyboard offering excellent performance and style. Priced at $29.99, it’s a great option for gamers and typists alike.

Is it easy to use? Yes, with plug-and-play functionality, it requires no drivers. Its compact design and customizable RGB lighting make it versatile for various setups and preferences.

Price and Availability

The MageGee Keyboard is currently priced at $29.99, offering a budget-friendly option for mechanical keyboard enthusiasts. It is widely available on platforms like Amazon.

10.1 Current Market Price and Deals

The MageGee Keyboard is currently available for $29.99, discounted from its original price of $37.99, offering a 19% savings. Amazon often provides free shipping, and bundle deals may include additional accessories like keycap sets or cleaning tools, making it an attractive option for budget-conscious buyers seeking quality mechanical keyboards.

10.2 Where to Buy the MageGee Keyboard

The MageGee Keyboard is available for purchase on Amazon and the official MageGee website. Amazon offers free shipping on this product, and it’s often included in their daily deals. Additionally, other online retailers like Newegg and eBay may carry the keyboard, though prices and availability can vary. Checking multiple platforms ensures you find the best option for your needs and budget.

Product Reviews and Feedback

The MageGee Keyboard has received positive reviews for its affordability, compact design, and customizable RGB lighting, making it a great choice for both gaming and everyday use.

11.1 User Reviews and Ratings

The MageGee Keyboard has garnered significant attention on platforms like Amazon, where users praise its value for money and sleek design. Many reviewers highlight its portability and customizable RGB lighting, making it a favorite among gamers and typists. While some users note minor drawbacks, such as limited software functionality, the overall consensus leans positive, with many considering it a strong contender in the budget mechanical keyboard market.

11.2 Expert Opinions and Recommendations

Experts praise the MageGee Keyboard for its excellent value, with many highlighting its sturdy build and responsive mechanical switches. Reviewers often recommend it for its portability and vibrant RGB lighting, making it ideal for both gaming and office use. While some note the software could be more robust, experts agree it’s a top choice for budget-conscious buyers seeking a reliable, compact mechanical keyboard with modern aesthetics.

Comparison with Other Mechanical Keyboards

The MageGee Keyboard stands out for its affordability and compact design, offering excellent portability compared to bulkier options. Its plug-and-play functionality and vibrant RGB lighting make it a strong contender in its price range.

12.1 vs. Popular Mechanical Keyboards in the Market

The MageGee Keyboard offers exceptional value compared to other mechanical keyboards, blending affordability with premium features. While brands like Keychron and Akko dominate the market, MageGee’s compact designs and vibrant RGB lighting make it a standout choice. Its plug-and-play functionality and durable switches rival more expensive models, appealing to gamers and typists seeking quality without the high cost.

Accessories and Add-Ons

Enhance your MageGee Keyboard experience with keycaps, wrist rests, and cleaning tools. Optional software and customizable accessories are also available for personalized performance and style.

13.1 Recommended Keycaps and Accessories

To enhance your MageGee Keyboard, consider upgrading with durable PBT keycaps for a premium feel. Custom keycap sets, such as Cherry MX-compatible designs, offer personalized aesthetics and improved typing accuracy.

Additional accessories like wrist rests and cleaning brushes ensure long-term comfort and maintenance. For advanced users, customizable switch sets and stabilizers can further refine performance and sound quality.

13.2 Customization Accessories for Enhanced Performance

Enhance your MageGee Keyboard with customizable switches, such as linear, tactile, or clicky options, to suit your typing or gaming preferences. Stabilizers and dampeners can improve keystroke consistency and reduce noise.

Additionally, keycap pullers and switch testers allow for easy customization. O-rings and lube kits further refine the typing experience, ensuring smooth and silent operation for optimal performance.

Warranty and Customer Support

The MageGee Keyboard comes with a 1-year limited warranty, covering manufacturing defects. For assistance, contact customer support via email or the official website for prompt service.

14.1 Warranty Details and Coverage

The MageGee Keyboard is backed by a 1-year limited warranty, effective from the date of purchase. This warranty covers defects in materials and workmanship under normal use. It does not apply to damage caused by misuse, accidents, or unauthorized modifications. For warranty claims, users must provide proof of purchase and contact customer support for further instructions. Warranty repairs or replacements are handled free of charge during the coverage period.

14.2 Contacting Customer Support

For any inquiries or issues, customers can reach MageGee support via email at support@magegee.com or by phone at 1-800-MAGEGEE. Live chat is also available on their official website. For efficient assistance, have your product serial number and proof of purchase ready. Visit the official MageGee website for additional contact options and support resources. Ensure to use authorized channels to avoid unauthorized support services.

Pros and Cons

The MageGee Keyboard excels with its mechanical switches and RGB lighting. However, its compact design may lack some keys, and keycaps feel less durable over time.

  • Pros: Durable mechanical switches, customizable RGB lighting, and portable design.
  • Cons: Limited keycaps durability and compact layout may sacrifice functionality for some users.

15.1 Advantages of the MageGee Keyboard

The MageGee Keyboard offers exceptional value with its mechanical switches, providing tactile feedback and durability. Its RGB lighting enhances aesthetics, while the compact design ensures portability. The plug-and-play feature makes it user-friendly, eliminating the need for complex setups. Priced affordably, it’s an excellent choice for gamers and typists seeking quality without breaking the bank. Its versatility and customization options further elevate the overall user experience.

15.2 Limitations and Drawbacks

Despite its strengths, the MageGee Keyboard has some limitations. The compact design may not appeal to users who prefer full-size keyboards. Additionally, the plastic frame and lack of advanced software customization might be drawbacks for enthusiasts. The absence of wireless connectivity and limited macro functionality could also be a downside for some gamers and heavy users seeking more versatility.

climbing shoes size guide

Welcome to our comprehensive guide on climbing shoe sizing! Properly fitting climbing shoes are essential for comfort, performance, and injury prevention. This guide will help you understand key terminology, measure your feet accurately, and choose the right size for your climbing style. Whether you’re a beginner or an experienced climber, finding the perfect fit is crucial for unlocking your full potential on the rocks.

1.1 Welcome to Our Comprehensive Guide

Welcome to our detailed guide on climbing shoe sizing! Whether you’re a seasoned climber or just starting your adventure, finding the right shoe size is crucial for comfort, performance, and safety. Climbing shoes come in various styles and fits, catering to different climbing techniques and preferences. This guide will walk you through everything you need to know, from understanding key terminology to measuring your feet accurately. We’ll explore how to choose the perfect fit for your climbing style, avoid common mistakes, and break in your shoes for optimal comfort. By the end of this guide, you’ll be equipped with the knowledge to select climbing shoes that enhance your climbing experience and help you reach new heights.

1.2 Why Proper Shoe Size Matters in Climbing

Proper shoe size is critical in climbing as it directly impacts comfort, performance, and safety. Ill-fitting shoes can lead to discomfort, blisters, or even injuries, distracting you from your climb. A snug fit enhances precision and control, allowing better foot placement on holds. Conversely, overly tight shoes can cause pain and restrict circulation, while loose shoes may lead to poor grip and confidence loss. The right size ensures optimal support and responsiveness, tailored to your climbing style. Whether sport climbing or bouldering, proper sizing is essential for peak performance and enjoyment, making it a cornerstone of a successful climbing experience.

Understanding Key Terminology

Mastering key terms like “neutral fit,” “performance fit,” and “break-in period” is essential for selecting the right climbing shoes. These terms help you understand shoe design and functionality, ensuring you make informed decisions tailored to your climbing needs and preferences.

2.1 Neutral Fit

A neutral fit in climbing shoes offers a relaxed, comfortable design, ideal for extended wear. These shoes feature a roomier toe box and a flatter sole, promoting better blood circulation and reducing fatigue. Neutral fit shoes are perfect for all-day climbing adventures and are often recommended for beginners. They provide adequate grip on holds while prioritizing comfort, making them versatile for various climbing styles. Popular models like the La Sportiva Tarantula and Five Ten Acopa exemplify this category, balancing comfort with performance. Choose neutral fit shoes for a stress-free climbing experience, especially during long sessions or for those prioritizing ease of use.

2.2 Performance Fit

A performance fit in climbing shoes is designed for maximum precision and responsiveness, ideal for advanced climbers tackling steep terrains. These shoes feature a snug, aggressive downturned shape, allowing for optimal power transfer and sensitivity on small holds. Performance fit shoes are tailored for sport climbing and bouldering, where foot placement is critical. They prioritize support and stability, enabling climbers to push their limits on challenging routes. Popular models like the Scarpa Drago and Evolv Shaman exemplify this category, offering unparalleled performance. Choose performance fit shoes for a tighter, more responsive experience, perfect for climbers seeking to maximize their technical abilities and tackle demanding climbs.

2.3 Shoe Width and Comfort

Shoe width plays a crucial role in comfort and performance. Climbing shoes come in various widths, from narrow to wide, catering to different foot shapes. A proper width ensures your foot sits comfortably without excessive pressure or movement. For narrow feet, a snug width enhances precision, while wider feet benefit from a roomier toe box. Comfort is key for extended climbs; ill-fitting width can lead to discomfort or distraction. Consider brands offering multiple widths to find your ideal fit. Proper width and comfort allow you to focus on your climbing, ensuring a better overall experience and performance on the rock.

2.4 Break-In Period

The break-in period is essential for climbing shoes, especially those made of leather, as they mold to your feet over time. Unlined leather shoes often require a longer break-in, while synthetic materials may need less. During this process, shoes adapt to your foot shape, providing a more personalized fit. It’s important to be patient, as rushing the break-in can cause discomfort. For unlined leather shoes, stretching can take several climbs, but they offer long-term comfort. Synthetic shoes, while quicker to break in, may not mold as extensively. Proper break-in ensures optimal performance and comfort, making the initial effort worthwhile for your climbing sessions.

The Importance of Proper Sizing

Proper sizing ensures comfort, enhances performance, and prevents injuries. Well-fitting shoes allow precise footwork and support, making your climbing experience safer and more enjoyable overall.

3.1 Comfort During Climbing

Comfort during climbing is crucial for a positive experience. Properly sized shoes prevent blisters and hotspots, allowing you to focus on your route. A snug fit ensures your feet stay secure, reducing fatigue and discomfort during long climbs. Ill-fitting shoes can cause pain and distract you from your performance. Prioritizing comfort means you can climb longer and more confidently, making every ascent more enjoyable. Ensure your shoes are not too tight or too loose to maintain optimal comfort and support throughout your climbing sessions.

3.2 Enhanced Performance

Properly sized climbing shoes significantly enhance performance by providing precision and responsiveness. A snug fit allows your feet to feel the rock better, enabling precise foot placement and control. This is especially crucial for sport climbing and bouldering, where small holds require maximum sensitivity. A well-fitting shoe ensures optimal power transfer, helping you tackle challenging routes with confidence. For sport climbing, a slightly tighter fit improves grip on steep terrain, while a more relaxed fit suits all-day comfort. Balancing performance and comfort ensures you can climb efficiently without distractions, making every move more deliberate and effective. The right size lets you connect with the rock seamlessly, boosting overall climbing performance.

3.3 Injury Prevention

Properly fitting climbing shoes play a crucial role in injury prevention. Ill-fitting shoes can lead to discomfort, blisters, or even long-term foot issues. Shoes that are too tight can restrict blood flow, causing pain and numbness, while overly loose shoes may cause feet to slide, leading to poor foot placement and potential accidents. A snug yet comfortable fit ensures stability and support, reducing the risk of injuries during climbs. By prioritizing proper sizing, climbers can minimize discomfort and maintain healthy feet, allowing for more enjoyable and injury-free climbing experiences. Correct sizing is essential for protecting your feet and ensuring long-term climbing health.

Measuring Your Feet Accurately

Stand on a piece of paper, trace your foot outline, and measure the longest part from heel to toe. Use a ruler to determine length and width, then compare to a shoe size chart for precise sizing.

4.1 How to Measure Foot Length

To measure foot length accurately, stand on a flat surface with your weight evenly distributed. Place a piece of paper under your foot and trace the outline of your foot, ensuring the pen is held perpendicular to the paper. Measure the longest distance from the back of the heel to the tip of the longest toe using a ruler or measuring tape. Record this measurement and compare it to the brand’s sizing chart to determine your ideal shoe size. This method ensures precision and helps find the best fit for your climbing shoes.

4.2 How to Measure Foot Width

To measure foot width, stand on a flat surface with your weight evenly distributed. Use a flexible measuring tape or a ruler to measure the widest part of your foot, typically across the metatarsals. Place the measuring tape or ruler perpendicular to your foot, ensuring it is flat and not angled. Record the measurement in centimeters or inches. This width, combined with your foot length, helps determine the best fit for your climbing shoes. Comparing this measurement to brand-specific sizing charts ensures a comfortable and precise fit, especially in the toe box area, which is crucial for climbing performance and comfort.

4.3 Brand-Specific Sizing Charts

Brand-specific sizing charts are crucial for ensuring the perfect fit. Each manufacturer uses its own last, which determines the shoe’s shape and size. For example, La Sportiva, Five Ten, and Black Diamond have distinct sizing patterns. La Sportiva tends to run slightly smaller, so you might need a half size larger than your street shoe. Five Ten offers a more relaxed fit, aligning closely with street shoe sizes. Black Diamond sizing is generally consistent but may vary by model. Always refer to the brand’s chart and consider trying on multiple styles to find your ideal fit, as sizing can differ significantly between brands and even within the same brand’s product line.

Trying On Climbing Shoes

Trying on climbing shoes is essential to ensure a proper fit. Walk around, flex your feet, and mimic climbing movements to assess comfort and performance. This step helps you determine if the shoes meet your needs for various climbing activities, ensuring both support and mobility.

5.1 Best Time to Try Them On

The best time to try on climbing shoes is later in the day, as feet tend to swell throughout the morning and afternoon. This ensures a more accurate fit, as your feet will be at their largest. Bring the same type of socks you plan to climb in to gauge comfort and support. Trying on multiple brands and models allows you to compare fits and identify the most comfortable option for your foot shape. Spending a few minutes walking around and flexing your feet helps assess how the shoes feel during movement, ensuring they meet your needs for both comfort and performance.

5.2 Factors to Consider During Fitting

During the fitting process, ensure the shoes feel snug but not painfully tight. Your heel should sit securely with minimal movement, and the arch support should feel natural. Pay attention to the toe box—your toes should lightly touch the end without curling uncomfortably. If you plan to wear thick socks, bring them along to gauge the fit. Consider the break-in period, as some materials, like leather, will stretch over time. Lastly, try multiple brands and models, as sizing and shapes vary, to find the best match for your foot shape and climbing style. This ensures optimal comfort and performance.

5.3 Importance of Testing the Fit

Testing the fit of climbing shoes is crucial for ensuring comfort and performance. Walk around the store, flex your feet, and mimic climbing movements to assess how the shoes feel. Pay attention to pressure points or hotspots, as these can indicate improper fit. If possible, try the shoes on later in the day, as feet tend to swell slightly. Properly fitted shoes should allow your toes to lightly touch the end without curling, and the heel should stay secure. This testing phase helps prevent discomfort during long climbs and ensures you can maintain precision and control on the rock, enhancing your overall climbing experience.

Types of Climbing Shoes

Climbing shoes come in two main types: neutral fit for comfort and versatility, ideal for beginners, and performance fit for precision on steep terrain, suiting advanced climbers.

6.1 Neutral Fit Shoes

Neutral fit shoes are designed for comfort and versatility, making them ideal for beginners or climbers seeking all-day wear. These shoes feature a roomier toe box and a flatter sole, allowing for better blood circulation and reduced pressure on the feet. They are perfect for long climbing sessions or routes that require endurance rather than intense precision. Popular models like the La Sportiva Tarantula and Five Ten Acopa prioritize comfort while still offering reliable grip on holds. Neutral fit shoes are a great choice for climbers who value ease of use and extended wearability without compromising performance.

6.2 Performance Fit Shoes

Performance fit shoes are engineered for maximum precision and responsiveness, ideal for advanced climbers tackling steep or technical routes. These shoes typically feature an aggressive, downturned design that enhances power transfer and sensitivity on small holds. The snug fit allows for better control, making them perfect for sport climbing and bouldering. Popular models like the Scarpa Drago and Evolv Shaman exemplify this category, offering superior performance on challenging terrains. While they may sacrifice some comfort for tightness, performance fit shoes are essential for climbers seeking optimal grip and precision in demanding situations.

Climbing Style and Shoe Choice

Your climbing style significantly influences shoe choice, with sport climbing requiring a snug fit for precision and bouldering often benefiting from a tighter fit for better control.

7.1 Sport Climbing Considerations

Sport climbing demands precision and grip on varied terrains. Opt for a snug fit to enhance control and sensitivity on holds. Shoes like the La Sportiva Theory, with a downturned design, excel in steep routes by providing power and sensitivity. Ensure your toes are slightly curled but not cramped, allowing for responsiveness. A tight yet comfortable fit around the toe box is crucial for support during vertical and overhanging climbs. Consider models offering a balance of comfort and performance, ensuring your shoes adapt to the route’s demands while maintaining foot health during long climbs.

7.2 Bouldering Fit Recommendations

Bouldering requires a snug, responsive fit for maximum control on dynamic movements. Opt for a tighter fit compared to sport climbing, as bouldering involves shorter, powerful moves. Shoes like the Black Diamond Momentum are ideal, offering a close fit and comfort. A snug fit ensures better grip and precision during explosive movements. However, avoid overly tight shoes that cause discomfort. Consider models with a downturned shape for enhanced power transfer. When sizing for bouldering, prioritize a balance of tightness and comfort to maintain sensitivity and control. This ensures optimal performance on short, intense climbs.

Brand Differences in Sizing

Brands like La Sportiva, Five Ten, and Black Diamond vary in sizing approaches, with some recommending street shoe size as a base and others suggesting tweaks for performance or comfort.

8.1 La Sportiva Sizing

La Sportiva sizing varies slightly depending on the shoe model and intended use. For beginners, they recommend choosing a size 38, which is half a size larger than their standard chart suggests, ensuring a comfortable yet snug fit. Intermediate climbers often find size 37.5 to be ideal, aligning perfectly with the brand’s sizing recommendations. Performance-oriented climbers may opt for a half size smaller than their street shoe size for a tighter, more responsive fit. La Sportiva’s women’s shoes are designed with a slightly different shape and less rigidity, catering to the female foot’s unique needs for enhanced comfort and flexibility.

  • Beginners: Size 38 for comfort and snugness.
  • Intermediate: Size 37.5 as per recommendations.
  • Performance: Half size smaller for responsiveness.
  • Women’s shoes: Tailored shape and flexibility.

8.2 Five Ten Sizing

Five Ten sizing is known for its consistency and comfort across various models. Climbers often find their street shoe size translates well to Five Ten sizes, especially for neutral fit options. However, for performance models like the Hiangle or Team, a snug fit is crucial for precision, suggesting a half size smaller than street shoes. The brand’s patented Stealth rubber and ergonomic design ensure a secure fit without sacrificing comfort. For longer sessions, Five Ten shoes remain comfortable, making them ideal for endurance climbing. Whether sport climbing or bouldering, Five Ten offers a reliable fit that balances performance and comfort.

  • Neutral fit: Match street shoe size.
  • Performance models: Half size smaller.
  • Stealth rubber ensures secure fit.
  • Suitable for endurance climbing.

8.3 Black Diamond Sizing

Black Diamond sizing is straightforward, with most climbers finding their street shoe size translates well to their climbing shoes. For a snug, performance-oriented fit, advanced climbers often opt for half a size smaller than their street shoe size. Black Diamond shoes are known for their comfort and responsiveness, making them versatile for both sport climbing and bouldering. The brand’s sizing remains consistent across models, ensuring reliability. Whether you prefer a neutral or performance fit, Black Diamond offers a secure and comfortable option tailored to your climbing needs.

  • Start with your street shoe size as a base.
  • Advanced climbers: Half size smaller for performance.
  • Consistent sizing across all models.
  • Versatile for sport climbing and bouldering.

Advanced Tips for Choosing the Right Size

For expert climbers, consider foot shape, climbing style, and shoe flexibility. Try multiple brands to find your best fit, and test shoes during actual climbing sessions.

  • Foot shape significantly impacts shoe fit.
  • Test shoes during climbing for accuracy.
  • Consider shoe flexibility for specific routes.

9.1 Trying Multiple Brands

Trying multiple climbing shoe brands is crucial due to varying fits and sizing. Each brand uses a unique last, affecting how shoes conform to your feet. For example, La Sportiva may recommend a half-size larger for comfort, while Five Ten suggests sticking close to your street shoe size. Black Diamond offers straightforward sizing but may require adjustments for performance fits. Testing different brands helps you identify which models align best with your foot shape and climbing style. This step ensures you find the optimal balance of comfort, support, and precision for your adventures.

  • Compare fits across brands to find your best match.
  • Consider how each brand’s sizing aligns with your street shoe size.
  • Test shoes during actual climbing to assess performance.

9.2 Considering Personal Comfort

Personal comfort is a critical factor when choosing climbing shoes. While performance is important, shoes that cause pain or discomfort can hinder your climbing experience. Consider your foot shape, arch support needs, and whether you prefer a snug or roomier fit. For long sessions, comfort-focused shoes with breathable materials are ideal. However, for high-performance climbs, a tighter fit may be necessary. It’s essential to balance comfort with the demands of your climbing style. Prioritize shoes that feel good during both casual and intense climbing to ensure a positive and effective experience on the rock.

  • Assess your foot shape and arch support needs.
  • Choose breathable materials for extended wear.
  • Balance comfort with performance requirements.

9.3 The Break-In Process

The break-in process is crucial for climbing shoes, especially unlined leather models, as they need time to mold to your foot shape. Initially, the shoes may feel tight or stiff, but with patience, they will adapt, offering a personalized fit. Wearing them for short periods and gradually increasing usage helps ease the break-in. Proper break-in ensures comfort during long climbs and improves performance by allowing the shoe to respond better to foot movements. Avoid rushing this process, as it directly impacts your climbing experience. A well-broken-in shoe provides optimal comfort and support, enhancing your overall performance on the rock.

  • Wear shoes for short periods initially.
  • Gradually increase wear time.
  • Allow the shoe to mold to your foot shape.

Common Mistakes to Avoid

Avoid relying solely on street shoe size and not trying shoes before buying. These mistakes can lead to poor fit, discomfort, and reduced performance during climbs.

  • Relying only on street shoe size.
  • Not trying shoes before purchasing.

10.1 Relying Solely on Street Shoe Size

Relying only on your street shoe size is a common mistake when sizing climbing shoes. Climbing shoes often fit differently due to their specialized design. Brands like La Sportiva, Five Ten, and Black Diamond may size their shoes uniquely, so your street size might not translate directly. For example, a climber who wears a size 9 in street shoes might need a size 8;5 in La Sportiva climbing shoes. Ignoring brand-specific sizing charts can lead to poor fit, discomfort, and reduced performance. Always try shoes on and consult brand sizing guides to ensure the best fit for your climbing needs.

10.2 Not Trying Before Buying

Not trying climbing shoes before buying is a mistake that can lead to poor fit and discomfort. Climbing shoes often fit differently than street shoes, and sizes can vary significantly between brands. Without trying them on, you risk ending up with shoes that are too tight or too loose, which can hinder performance and cause pain. Even if you think you know your size, factors like shoe shape and brand-specific sizing can affect the fit. Always try shoes on, walk around, and mimic climbing movements to ensure comfort and support. This step is crucial for avoiding dissatisfaction and ensuring your shoes meet your climbing needs effectively.

Finding the perfect climbing shoe fit is key to unlocking your climbing potential. Take your time, prioritize comfort, and balance performance needs to ensure confidence on every climb.

11.1 Final Thoughts on Shoe Sizing

Proper climbing shoe sizing is a balance of comfort and performance. A snug fit enhances precision and control, while avoiding pain ensures long-term comfort. Remember, sizing varies between brands, so try multiple pairs. Prioritize your climbing style—sport climbers may opt for a tighter fit, while bouldering demands even more precision. Consider your foot shape and personal comfort, and don’t hesitate to size up for all-day wear. Investing time in finding the right fit will elevate your climbing experience, allowing you to focus on the route ahead with confidence and control.

11.2 Encouragement for Climbers

Embark on your climbing journey with confidence by prioritizing proper shoe sizing. Whether you’re tackling boulders or sport routes, the right fit empowers you to perform at your best. Remember, climbing is about progression, not perfection—every step forward is a victory. Invest in shoes that support your unique needs, and don’t be afraid to experiment until you find your ideal pair. With the right fit, you’ll feel more connected to the rock, ready to push limits and enjoy the adventure. Happy climbing, and let your shoes be the foundation that helps you reach new heights!

suds scale 1 10 pdf

The SUDS Scale is a widely used tool for assessing emotional distress‚ ranging from 0 to 10. It helps individuals track their emotional states and develop coping strategies. Available as a downloadable PDF‚ it serves as a practical resource for therapy‚ personal reflection‚ and daily emotional management.

1.1 Definition and Purpose

The SUDS (Subjective Units of Distress Scale) is a self-assessment tool measuring emotional distress on a 0-10 scale. It helps individuals quantify their feelings‚ from calm (0) to extreme distress (10). The scale’s purpose is to provide a simple way to track emotional states‚ enabling users to identify changes over time and develop coping strategies. Widely used in therapy and personal reflection‚ the SUDS Scale empowers individuals to monitor and manage their mental health effectively‚ fostering emotional awareness and resilience.

1.2 Brief History and Development

The SUDS Scale‚ or Subjective Units of Distress Scale‚ was originally developed as a tool for measuring emotional distress in therapy settings. Its origins trace back to the need for a simple‚ client-centered method to assess anxiety and discomfort. Over time‚ the scale evolved into the 0-10 rating system‚ where 0 represents complete calm and 10 signifies extreme distress. This tool gained popularity due to its ease of use and effectiveness in tracking emotional changes. Today‚ it is widely recognized and utilized in various mental health contexts‚ including counseling and personal growth practices‚ as a reliable means of monitoring emotional well-being.

1.3 Importance in Mental Health Assessment

The SUDS Scale plays a crucial role in mental health assessment by providing a clear and measurable way to track emotional distress. It allows individuals and professionals to monitor progress over time‚ making it an essential tool for therapy and treatment planning. The scale’s simplicity and effectiveness enable early intervention and personalized care. By offering a common language for communicating emotional states‚ it enhances collaboration between clients and practitioners. Its widespread use underscores its value in promoting mental health awareness and fostering a proactive approach to emotional well-being.

Understanding the SUDS Scale

The SUDS Scale is a subjective‚ self-assessment tool using a 0-10 rating system to measure emotional distress. It provides a simple‚ effective way to track feelings and progress.

2.1 The 0-10 Rating System

The SUDS Scale uses a simple 0-10 rating system to measure emotional distress. Zero represents a state of complete relaxation‚ while 10 signifies extreme distress or anxiety. This scale allows individuals to self-assess their emotional state easily. Each number corresponds to a specific level of discomfort‚ helping users track changes over time. For example‚ a rating of 5 might indicate moderate anxiety‚ while a 9 suggests intense distress. This system provides a clear framework for personal reflection and communication with professionals‚ making it an effective tool for emotional management and growth.

2.2 What Each Number Represents

The SUDS Scale assigns specific meanings to each number‚ helping users understand their emotional state; A rating of 0 indicates complete relaxation‚ while 10 represents extreme distress or overwhelm. Numbers 1-3 suggest mild discomfort‚ 4-6 indicate moderate anxiety‚ and 7-9 signify intense distress. For example‚ a 5 might mean moderate anxiety‚ while a 9 could indicate feelings of desperation. This clear progression allows individuals to pinpoint their emotional state accurately‚ facilitating better communication with professionals and guiding effective coping strategies. Understanding each number enhances self-awareness and supports personal growth.

2.3 How to Self-Assess Using the Scale

Self-assessment using the SUDS Scale involves rating your current emotional state on a 0-10 scale. Start by identifying your feelings in the moment‚ then assign a number based on intensity. For example‚ a rating of 0 means no distress‚ while 10 indicates extreme overwhelm. Regularly check in with yourself‚ such as once or twice a day‚ to track changes. This practice helps you recognize patterns and triggers‚ enabling early intervention. Use the scale to monitor progress over time and adjust coping strategies as needed. Consistent self-assessment fosters emotional awareness and supports personal growth.

Applications of the SUDS Scale

The SUDS Scale is widely applied in therapy‚ personal reflection‚ and education. It aids in monitoring emotional states‚ facilitating communication‚ and enhancing self-awareness. Its simplicity makes it a valuable tool for mental health professionals and individuals seeking personal growth.

3.1 Therapy and Counseling

The SUDS Scale is a powerful tool in therapy and counseling‚ enabling individuals to communicate their emotional distress effectively. By rating their feelings on a 0-10 scale‚ clients can set clear goals for therapy and track progress over time. This tool fosters open dialogue between clients and therapists‚ allowing for timely interventions. It also helps identify triggers and patterns‚ making it easier to develop personalized coping strategies. The scale’s simplicity ensures it is accessible for all clients‚ making it a valuable resource for mental health professionals to support emotional healing and growth.

3.2 Personal Reflection and Growth

The SUDS Scale is a valuable tool for personal reflection and growth‚ allowing individuals to monitor their emotional states and track progress over time. By regularly assessing their distress levels‚ users can identify patterns and triggers‚ fostering greater self-awareness. This tool empowers individuals to take charge of their emotional well-being‚ enabling them to practice mindfulness and develop healthier coping mechanisms. The SUDS Scale PDF provides a convenient format for daily reflection‚ helping users set goals and celebrate small victories in their journey toward emotional balance and personal development.

3.3 Education and Research

The SUDS Scale is widely utilized in educational settings and research to teach emotional awareness and assessment skills. It serves as a practical tool in lectures and workshops‚ helping students and professionals understand emotional distress measurement. Researchers benefit from its simplicity and reliability‚ using it to collect data on distress levels in various studies. The SUDS Scale PDF format is particularly useful for distributing in classrooms and research settings‚ ensuring consistency and accessibility. This tool bridges education and research by providing a universal language for discussing and analyzing emotional states‚ fostering collaboration and advancing mental health understanding.

How to Use the SUDS Scale Effectively

Using the SUDS Scale effectively involves regular self-assessment to monitor emotional states and track changes over time. Start by rating distress levels on the 0-10 scale‚ identifying how emotions shift in different situations. Practice using the scale consistently‚ perhaps multiple times a day‚ to enhance accuracy and awareness. Apply it before and after activities to measure progress and effectiveness. Integrate the scale into therapy sessions for professional insights and personal reflection for individual growth. Combine it with coping strategies to address identified distress levels‚ ensuring a comprehensive approach to emotional management. Consistency and adaptability are key to maximizing its benefits in various contexts‚ including cultural and individual differences.

4;1 Identifying Emotional States

The SUDS Scale is an effective tool for identifying emotional states by rating distress levels from 0 to 10. By regularly assessing feelings‚ individuals can pinpoint specific emotions and their intensity. This process helps recognize patterns and triggers‚ fostering self-awareness. Users can track changes in emotional states over time‚ observing how distress levels fluctuate in different situations. The scale encourages mindfulness and early intervention‚ allowing individuals to address emotions before they escalate. Its simplicity makes it accessible for personal use or professional guidance‚ ensuring consistent and reliable emotional monitoring. Regular practice enhances emotional regulation and overall well-being.

4.2 Tracking Changes Over Time

Tracking changes over time with the SUDS Scale provides valuable insights into emotional progress. By regularly rating distress levels‚ individuals can monitor fluctuations and identify patterns. This longitudinal approach helps assess the effectiveness of coping strategies and interventions. Over time‚ users can observe reductions in peak distress levels‚ indicating improved emotional regulation. The scale also reveals how specific events or situations impact emotional states‚ enabling targeted responses. Consistent use of the SUDS Scale fosters accountability and motivation‚ as individuals witness their growth and resilience. This ongoing feedback loop supports long-term emotional well-being and personal development.

4.4 Developing Coping Strategies

The SUDS Scale aids in developing coping strategies by helping individuals identify specific distress levels and implement targeted interventions. By understanding their emotional state‚ users can match appropriate strategies to their current needs. For instance‚ a rating of 6 might prompt techniques like deep breathing or grounding. Regular use fosters awareness of what strategies work best. This iterative process allows refinement and adaptation of strategies based on effectiveness. The SUDS Scale empowers individuals to take control of their well-being‚ offering a clear and actionable approach to managing emotions and reducing distress over time.

Benefits of the SUDS Scale

The SUDS Scale enhances emotional awareness‚ improves communication with professionals‚ and empowers individuals through self-monitoring. Its simplicity and practicality make it a valuable tool for mental health management.

5.1 Enhanced Emotional Awareness

The SUDS Scale enhances emotional awareness by allowing individuals to track their emotional states effectively. Regular use helps identify patterns and triggers of distress‚ enabling proactive management of emotions. This tool fosters self-reflection and personal growth‚ aiding individuals in understanding their emotional responses better. Over time‚ users gain insight into their emotional well-being‚ making it easier to address challenges and develop coping strategies. The SUDS Scale’s simplicity makes it accessible for daily use‚ promoting continuous emotional awareness and growth.

5.2 Improved Communication with Professionals

The SUDS Scale facilitates clearer communication between individuals and mental health professionals. By quantifying emotional distress on a 0-10 scale‚ individuals can precisely convey their feelings‚ ensuring professionals understand their experiences. This tool serves as a common language‚ enhancing the accuracy of assessments and therapy plans. Regular use of the SUDS Scale allows professionals to track progress and adjust interventions effectively. It bridges the gap between subjective feelings and objective measures‚ fostering a collaborative approach to mental health care and improving overall therapeutic outcomes.

5.3 Empowerment Through Self-Monitoring

The SUDS Scale empowers individuals by enabling them to take an active role in monitoring their emotional well-being. Regular use of the scale fosters self-awareness‚ allowing users to identify patterns and triggers of distress. This heightened understanding provides a sense of control‚ encouraging proactive steps toward emotional regulation. The availability of a SUDS Scale PDF makes it easily accessible for daily use‚ promoting consistent self-assessment and personal growth. By tracking progress over time‚ individuals gain confidence in managing their emotions‚ leading to greater autonomy and resilience in handling life’s challenges effectively.

Limitations and Considerations

The SUDS Scale is subjective‚ as ratings vary across individuals and cultures. Its reliance on self-assessment may lead to inconsistent interpretations‚ requiring clear guidelines for effective application.

6.1 Subjectivity of the Scale

The SUDS Scale is inherently subjective‚ as it relies on individual self-assessment. Ratings can vary significantly due to personal interpretations‚ emotions‚ and cultural influences. For instance‚ one person’s “10” might be another’s “9‚” as perceived intensity differs. Some individuals may use decimal points (e.g.‚ 5.5)‚ adding complexity. This subjectivity highlights the need for clear guidelines and consistent application to ensure reliability. While the scale is valuable for personal tracking‚ it may not provide universally objective measurements‚ requiring skilled interpretation in therapeutic or clinical settings.

6.2 Cultural and Individual Differences

Cultural and individual differences significantly impact SUDS Scale interpretations. Emotional expression and coping strategies vary across cultures‚ influencing how distress is rated. For example‚ some cultures may emphasize stoicism‚ leading to lower ratings‚ while others may encourage expressing emotions‚ resulting in higher scores. Personal experiences and language barriers can also affect how individuals understand and apply the scale. These differences highlight the importance of cultural sensitivity and clear communication when using the SUDS Scale in diverse populations.

6.3 Potential for Misinterpretation

The SUDS Scale’s subjective nature can lead to misinterpretation‚ as individuals may have different understandings of distress levels. For example‚ one person’s “10” might be another’s “8‚” due to varying emotional thresholds. Language barriers and cultural differences can also affect how the scale is interpreted. Without clear‚ standardized descriptions for each rating‚ consistency across users is challenging. This variability underscores the need for clear communication and context when using the scale to ensure accurate and reliable assessments.

Creating a SUDS Scale 1-10 PDF

Creating a SUDS Scale 1-10 PDF involves designing a clear‚ user-friendly template with instructions and descriptions for each rating‚ ensuring accessibility and ease of use.

7.1 Designing the Template

Designing a SUDS Scale 1-10 PDF template involves creating a clear and visually appealing layout. Start with a clean design‚ ensuring readability and ease of use. Include a numbered scale from 0 to 10‚ with brief descriptions for each number to guide users. Add visual elements like a distress thermometer or color gradients to enhance understanding. Provide instructions on how to use the scale‚ such as assessing current emotional state and tracking changes. Include space for notes or coping strategies to encourage reflection. Ensure the template is adaptable for different needs‚ such as therapy sessions or personal use. Use a professional font and consistent formatting for a polished look. Finally‚ test the template for usability and accessibility to ensure it meets diverse user requirements.

7.2 Including Instructions and Descriptions

When creating a SUDS Scale 1-10 PDF‚ it’s essential to include clear instructions and descriptions to guide users. Start with a brief explanation of the scale‚ defining the range from 0 (no distress) to 10 (extreme distress). Provide examples of what each rating might feel like‚ such as “calm and relaxed” at 0 or “overwhelmed and out of control” at 10. Add step-by-step instructions on how to rate emotions and track changes over time. Include tips for using the scale effectively‚ such as assessing emotions in different situations or after coping strategies. Ensure the language is simple and accessible to promote understanding and consistent use. This makes the tool user-friendly and effective for personal or therapeutic applications.

7.3 Ensuring Usability and Accessibility

Using the SUDS Scale PDF

The SUDS Scale PDF is a versatile tool for tracking emotional distress. Individuals can use it in therapy sessions‚ personal reflection‚ or daily routines to monitor progress and well-being.

8.1 Step-by-Step Guide for Individuals

Using the SUDS Scale PDF begins with identifying your current emotional state. Rate your distress on the 0-10 scale‚ where 0 is complete relaxation and 10 is extreme distress. Reflect on what triggers your emotions and note any patterns. Track your ratings over time to monitor progress. Use the scale daily‚ either in the morning or evening‚ to develop self-awareness. Share your results with a therapist to refine coping strategies. Regular use helps individuals manage emotions effectively and fosters personal growth. This tool is simple‚ accessible‚ and empowers users to take control of their mental well-being.

8.2 Implementing in Therapy Sessions

Therapists can integrate the SUDS Scale into sessions by guiding clients to rate their distress levels at the start and end of each meeting. This helps track progress and measure the effectiveness of interventions. The scale’s simplicity makes it easy for clients to communicate their emotional state‚ allowing therapists to tailor strategies accordingly. Visual aids‚ such as printed or digital PDF versions‚ can be used to facilitate understanding. Consistent use of the scale enables therapists to identify patterns and adjust treatment plans‚ ensuring a more personalized and effective approach to managing distress and anxiety.

8.3 Integrating into Daily Routine

Integrating the SUDS Scale into daily life can enhance emotional awareness and management. Individuals can use the PDF version to rate their distress levels at specific times‚ such as morning and evening‚ to track changes. This practice helps identify patterns and triggers‚ fostering better emotional regulation. By incorporating the scale into routines‚ individuals can develop a proactive approach to managing stress and anxiety. Regular use encourages mindfulness and self-reflection‚ empowering individuals to address emotional challenges effectively and maintain emotional well-being over time.

Examples and Case Studies

Individual A used the SUDS Scale 1-10 PDF to track anxiety before and after a presentation‚ reducing their distress from 8 to 4‚ demonstrating effective progress.

9.1 Real-Life Applications

The SUDS Scale 1-10 PDF is widely applied in real-life scenarios to monitor emotional distress. Individuals use it to track anxiety before public speaking‚ assess stress levels during exams‚ or evaluate mood changes in social situations. Therapists often implement it in sessions to gauge progress and tailor interventions. For example‚ a client might rate their anxiety at 7 before exposure therapy and 4 after‚ showing improvement. It’s also used in educational settings to help students manage exam stress or social anxiety‚ providing a clear framework for emotional regulation and growth. This practical tool bridges therapy and daily life‚ fostering self-awareness and resilience.

9.2 Success Stories and Testimonials

Many individuals have reported positive outcomes using the SUDS Scale 1-10 PDF. For instance‚ a client with public speaking anxiety reduced their SUDS score from 8 to 4 after consistent practice. A student managing exam stress shared how tracking their SUDS helped them drop from 6 to 3‚ enabling better focus. Therapists highlight its effectiveness in communication‚ with one stating‚ “It bridges the gap between client feelings and actionable steps.” Users often describe feeling more in control of their emotions‚ with one testimonial noting‚ “It’s empowering to see progress visualized.” These stories underscore its practical impact on emotional well-being.

9.3 Common Scenarios and Solutions

The SUDS Scale 1-10 PDF is often used in scenarios like managing public speaking anxiety or exam stress. For example‚ an individual with social anxiety might rate their distress at 8 before a presentation but drop to 4 after practicing relaxation techniques. Another common scenario involves tracking progress during therapy‚ where clients use the scale to monitor improvements over time. Solutions include regular self-assessment‚ identifying triggers‚ and developing tailored coping strategies. This tool empowers users to address emotional challenges proactively‚ making it a valuable resource for both personal and therapeutic settings.

Alternatives to the SUDS Scale

Alternatives include anxiety rating scales‚ digital apps‚ and holistic approaches like mindfulness. These tools offer diverse methods for assessing and managing emotional distress effectively.

10.1 Other Anxiety and Distress Scales

Beyond SUDS‚ other tools like the Generalized Anxiety Disorder 7-item scale (GAD-7) and the Perceived Stress Scale (PSS-10) assess anxiety and stress levels. The Hamilton Anxiety Rating Scale (HAM-A) is used for clinical assessments‚ while the State-Trait Anxiety Inventory (STAI) measures both temporary and chronic anxiety. Additionally‚ the Beck Anxiety Inventory (BAI) provides a comprehensive evaluation of anxiety symptoms. These scales offer alternative methods for understanding and managing emotional distress‚ catering to different needs and contexts.

10.2 Digital and Technological Tools

Digital tools like mobile apps and online platforms complement the SUDS Scale by offering interactive and accessible ways to track distress levels. Apps such as Calm and Headspace integrate SUDS-like features‚ enabling users to log their emotions digitally. These tools often include real-time tracking‚ customizable scales‚ and data visualization to monitor progress. Some platforms allow users to set reminders for regular assessments and provide resources for coping strategies. Digital versions of the SUDS Scale‚ such as fillable PDFs‚ can be easily shared with therapists‚ enhancing communication and streamlined documentation.

10.3 Holistic Approaches to Assessment

Holistic approaches to assessment go beyond numerical scales like SUDS‚ incorporating emotional‚ mental‚ and physical well-being. Techniques such as mindfulness‚ journaling‚ and biofeedback provide a comprehensive understanding of distress. These methods help individuals identify patterns and triggers‚ offering a deeper insight into their emotional states. By combining self-reflection with practical strategies‚ holistic approaches empower individuals to manage distress more effectively. This integrative method complements tools like the SUDS Scale‚ fostering a more balanced and nuanced approach to emotional health and personal growth.

The SUDS Scale 1-10 PDF is a simple yet powerful tool for measuring emotional distress and tracking progress. It aids in therapy‚ personal growth‚ and daily emotional management‚ proving effective for enhancing well-being.

11.1 Summary of Key Points

The SUDS Scale 1-10 PDF is a valuable tool for measuring emotional distress‚ offering a simple yet effective way to track and manage feelings of anxiety‚ fear‚ and discomfort. By rating their emotional state on a scale from 0 to 10‚ individuals can identify patterns‚ monitor progress‚ and develop coping strategies. Its versatility makes it useful in therapy‚ personal reflection‚ and educational settings‚ while its accessibility as a PDF ensures ease of use. Overall‚ the SUDS Scale empowers individuals to take control of their emotional well-being‚ making it a widely recognized and effective resource for mental health management.

11.2 Final Thoughts on Effectiveness

The SUDS Scale 1-10 PDF has proven to be an effective tool for assessing and managing emotional distress. Its simplicity and versatility make it accessible for individuals‚ therapists‚ and educators alike. By providing a clear framework to measure emotional intensity‚ the scale empowers users to track progress‚ identify triggers‚ and apply coping strategies. Its widespread adoption and positive testimonials highlight its practical value in promoting mental well-being. As a resource‚ it continues to be a reliable and user-friendly instrument for fostering emotional awareness and resilience in both clinical and personal settings.

11.3 Encouragement for Continued Use

Continued use of the SUDS Scale 1-10 PDF is highly encouraged for its proven benefits in emotional management and self-awareness. Regular practice helps individuals better understand their emotional patterns and triggers‚ fostering resilience. By consistently tracking distress levels‚ users can identify progress and refine coping strategies. Sharing this tool with others or incorporating it into therapy sessions can further enhance its effectiveness. Embrace the SUDS Scale as a lifelong resource for emotional growth and empowerment‚ ensuring a proactive approach to mental well-being.

ashworth scale pdf

The Ashworth Scale is a clinical tool measuring spasticity, focusing on muscle tone resistance during passive stretching, widely used in neurological conditions like multiple sclerosis and spinal injuries.

Overview of the Ashworth Scale PDF

The Ashworth Scale PDF provides a detailed guide to understanding and applying the Modified Ashworth Scale (MAS), a widely used clinical tool for assessing spasticity. It outlines the scale’s structure, grading system (0-4), and its application in evaluating muscle tone resistance during passive stretching. The PDF serves as a comprehensive resource for clinicians, offering insights into the scale’s administration, interpretation, and relevance across conditions like multiple sclerosis, spinal cord injuries, and cerebral palsy. It emphasizes the importance of standardized assessment for consistent clinical decision-making.

Importance of the Ashworth Scale in Clinical Practice

The Ashworth Scale is a cornerstone in clinical practice for assessing spasticity, guiding treatment decisions, and monitoring patient progress. Its ability to quantify muscle tone resistance aids in adjusting medications and physical therapy plans. Widely used in neurology and rehabilitation, it enhances precision in evaluating the effectiveness of interventions. The scale’s simplicity and replicability make it a valuable tool for consistent clinical outcomes, improving patient care across conditions like multiple sclerosis, spinal cord injuries, and cerebral palsy.

History and Development of the Ashworth Scale

The Ashworth Scale was originally developed in 1964 by Dr; Brian Ashworth to assess spasticity in multiple sclerosis patients. It was later modified to enhance reliability.

Original Ashworth Scale

The Original Ashworth Scale, developed by Dr. Brian Ashworth in 1964, was designed to measure spasticity in patients with multiple sclerosis. It introduced a 0-5 grading system to assess muscle tone resistance during passive stretching. While groundbreaking, it had limitations, including poor inter-rater reliability and lack of sensitivity for clinical decision-making. Despite its simplicity, it laid the foundation for further refinement, leading to the development of the Modified Ashworth Scale (MAS), which addressed some of its shortcomings. The original scale remains a historical benchmark in spasticity assessment.

Evolution to the Modified Ashworth Scale (MAS)

The Modified Ashworth Scale (MAS) emerged as an improvement over the original Ashworth Scale, addressing its limitations such as poor inter-rater reliability and lack of sensitivity. Introduced to enhance clinical utility, MAS refined the grading system to a 0-4 scale, focusing on resistance during passive stretching. This adjustment improved reliability and made it more practical for assessing spasticity in diverse neurological conditions. MAS is now widely used in clinical practice and research, offering a more consistent and effective tool for evaluating muscle tone in patients with conditions like multiple sclerosis and spinal cord injuries.

Purpose and Clinical Applications

The Ashworth Scale assesses spasticity in neurological conditions like multiple sclerosis and spinal cord injuries, aiding in clinical management and treatment evaluation.

Assessing Spasticity in Patients

The Ashworth Scale is a valuable tool for assessing spasticity, providing a standardized method to measure muscle tone and resistance during passive stretching. It helps clinicians evaluate the severity of spasticity in patients with neurological conditions such as multiple sclerosis, spinal cord injuries, and cerebral palsy.

By quantifying resistance, the scale enables healthcare providers to guide treatment decisions, monitor progress, and adjust therapies. Its simplicity and reliability make it a cornerstone in both clinical practice and research, aiding in the management of spasticity across diverse patient populations.

Evaluating the Effectiveness of Antispasticity Medications

The Ashworth Scale is widely used to evaluate the effectiveness of antispasticity medications by measuring changes in muscle tone and resistance. It provides a standardized method to assess treatment response, allowing clinicians to monitor improvements or declines in spasticity over time. This tool is particularly valuable in clinical trials and practice for medications like botulinum toxin or baclofen, helping to quantify their impact on reducing spasticity in patients with conditions such as multiple sclerosis or spinal cord injury.

By assigning numerical scores, the scale enables objective comparison of pre- and post-treatment outcomes, guiding dose adjustments and therapeutic decisions. Its simplicity and reliability make it a key instrument in managing spasticity and optimizing patient care.

Structure and Scoring of the Ashworth Scale

The Ashworth Scale is an ordinal tool grading muscle spasticity from 0 (no increase) to 4 (rigidity). It assesses resistance during passive stretching, guiding clinical decisions.

Understanding the Grading Scale (0-4)

The Ashworth Scale grades spasticity from 0 to 4, where 0 indicates no increase in muscle tone, and 4 represents rigidity. Grade 1 signifies slight resistance, grade 2 moderate resistance, and grade 3 marked resistance but still with joint movement. This ordinal scale helps clinicians assess spasticity severity, guiding treatment decisions and monitoring changes over time. The simplicity of the 0-4 grading system makes it a practical tool for consistent clinical assessments across various neurological conditions.

Interpreting Results for Clinical Decision-Making

Interpreting Ashworth Scale results is crucial for tailoring treatment plans. Scores guide clinicians in assessing spasticity severity, monitoring progress, and adjusting therapies. Higher scores indicate greater resistance, aiding decisions on medication, therapy, or assistive devices. The scale helps track changes over time, enabling personalized interventions. While the scale provides a standardized framework, clinical judgment remains essential for comprehensive care, ensuring interventions align with patient-specific needs and goals across conditions like multiple sclerosis or spinal cord injuries.

Reliability and Limitations of the Scale

The Ashworth Scale’s reliability varies, with inter-rater differences affecting consistency. Limited sensitivity and inability to capture spasticity complexity are notable limitations, requiring complementary clinical judgment.

Inter-Rater Reliability in Clinical Settings

Inter-rater reliability of the Ashworth Scale has been a subject of discussion, with studies indicating variability among clinicians. While the scale is widely used, differences in interpretation and administration can lead to inconsistent scores. Research highlights that the reliability varies depending on the clinician’s experience and understanding of spasticity. Efforts to standardize administration and training have been suggested to improve consistency. Despite its limitations, the scale remains a practical tool for clinical assessments, emphasizing the need for careful use and interpretation in diverse settings.

Limitations and Criticisms of the Ashworth Scale

The Ashworth Scale has faced criticism for its subjective nature, leading to variability in scores among clinicians. It does not fully capture the complexity of spasticity, particularly its velocity-dependent properties. The scale lacks sensitivity to detect subtle changes in muscle tone, limiting its utility in monitoring treatment effects. Additionally, it does not differentiate between reflex and non-reflex components of spasticity, potentially oversimplifying the condition. These limitations highlight the need for complementary assessments to ensure a comprehensive evaluation of spasticity in clinical practice.

Measurement and Administration

The Ashworth Scale involves passive stretch testing, assessing resistance in muscles during movement, graded on a 0-4 scale to evaluate spasticity severity in clinical settings.

Passive Stretch Testing Procedure

The Ashworth Scale employs passive stretch testing to assess muscle resistance, grading spasticity on a 0-4 scale. The procedure involves slowly moving the patient’s limb through its range of motion while applying a constant velocity stretch. The tester evaluates the degree of resistance felt, assigning scores based on the muscle’s response. This method allows clinicians to quantify spasticity objectively. Standardized techniques ensure consistency across assessments, aiding in accurate clinical decision-making and reliable outcomes in evaluating muscle tone and treatment effectiveness.

Standardization in Administration

Standardization in the Ashworth Scale ensures consistent and reliable assessments across clinical settings. Administered by trained professionals, the scale requires consistent techniques for passive stretching and resistance evaluation. Testers must adhere to predefined methods, minimizing variability. Clear documentation of scores and observations is essential for accurate tracking. Regular training and calibration among assessors further enhance reliability. These standardized practices ensure that the Ashworth Scale remains a dependable tool for evaluating spasticity and guiding clinical interventions effectively.

Clinical Applications Across Conditions

The Ashworth Scale is widely applied in assessing spasticity across multiple conditions, including multiple sclerosis, spinal cord injuries, stroke rehabilitation, and cerebral palsy, guiding targeted treatments effectively.

Use in Multiple Sclerosis and Spinal Cord Injury

The Ashworth Scale is frequently utilized to assess spasticity in patients with multiple sclerosis (MS) and spinal cord injury (SCI). In MS, it helps evaluate the effectiveness of antispasticity medications and guide treatment plans. Similarly, in SCI, the scale is employed to measure muscle tone and resistance, aiding in the development of personalized rehabilitation strategies. Its simplicity and clinical relevance make it a valuable tool in these populations, ensuring targeted interventions to improve patient outcomes and reduce complications associated with spasticity.

Application in Stroke Rehabilitation and Cerebral Palsy

The Ashworth Scale is widely applied in stroke rehabilitation to measure post-stroke spasticity, guiding physical therapy and medication adjustments. In cerebral palsy, it assesses muscle tone to tailor treatment plans, improving mobility and reducing discomfort. Its clinical utility in these conditions lies in its ability to quantify spasticity, enabling targeted interventions and enhancing patient care outcomes. This tool is instrumental in rehabilitation settings, ensuring personalized approaches for individuals with diverse neurological challenges.

Research and Systematic Reviews

The Ashworth Scale is integral to clinical research, aiding systematic reviews by providing standardized spasticity assessments, thereby enhancing the evaluation of treatment efficacy and data organization.

Comprehensive Search Strategies for Relevant Studies

A comprehensive search strategy for studies on the Ashworth Scale involves systematic efforts to identify all relevant evidence, ensuring replicability. Boolean operators like AND and OR are used to refine searches, targeting specific populations and interventions. The focus is on healthcare applications, with search terms such as “spasticity assessment,” “muscle tone,” and “clinical trials.” Sources like PubMed and Google Scholar are utilized, and inclusion/exclusion criteria are applied to filter studies. This approach ensures a thorough and unbiased review of the Ashworth Scale’s role in clinical research and practice.

Role of the Ashworth Scale in Clinical Research

The Ashworth Scale plays a pivotal role in clinical research by providing a standardized measure of spasticity. It is widely used to assess the efficacy of antispasticity medications and interventions in conditions like multiple sclerosis and spinal cord injuries. Researchers utilize the scale to evaluate changes in muscle tone over time, ensuring reliable data collection. Its simplicity and clinical relevance make it a valuable tool for conducting systematic reviews and meta-analyses, ultimately guiding evidence-based practice and therapeutic decision-making in neurology and rehabilitation medicine.

Practical Applications in Rehabilitation

The Ashworth Scale guides rehabilitation by assessing spasticity, helping tailor physical therapy and adjust treatments. It is crucial for creating effective, personalized rehabilitation plans for patients with spasticity.

Medication Management and Dosing Adjustments

The Ashworth Scale plays a pivotal role in medication management by providing a standardized measure of spasticity. Clinicians use the scale to assess the effectiveness of antispasticity drugs, such as muscle relaxants or botulinum toxin injections. By identifying the degree of spasticity, healthcare providers can adjust dosages to optimize therapeutic outcomes while minimizing side effects. Regular assessments using the scale ensure personalized treatment plans, improving patient functionality and comfort. This tool is particularly valuable in conditions like multiple sclerosis and spinal cord injuries, where spasticity management is critical for rehabilitation.

Physical Therapy and Stretching Exercises

The Ashworth Scale informs physical therapy by guiding tailored stretching exercises based on spasticity severity. Clinicians use the scale to assess muscle tone, enabling targeted interventions like passive stretching or range-of-motion exercises. This approach helps improve joint mobility and reduce stiffness. Regular assessments allow therapists to adjust treatment plans, ensuring optimal progress and functionality. The scale’s insights are particularly beneficial for patients with conditions like cerebral palsy or stroke, aiding in the design of personalized rehabilitation programs.

Use of Assistive Devices

The Ashworth Scale helps determine the need for assistive devices by assessing spasticity levels. High scores may indicate the requirement for braces or splints to support joints and reduce muscle stiffness. Mobility aids, such as wheelchairs or walkers, are often recommended for patients with severe spasticity to enhance independence. These devices are tailored to individual needs, ensuring comfort and functionality. Regular reassessment using the scale guides adjustments in assistive devices, optimizing patient mobility and reducing discomfort.

The Ashworth Scale remains a cornerstone in assessing spasticity, guiding clinical decisions. Future developments may focus on refining its limitations and exploring complementary assessment tools.

Impact of the Ashworth Scale on Clinical Practice

The Ashworth Scale has significantly influenced clinical practice by standardizing spasticity assessment, enabling consistent communication among healthcare professionals. It guides medication adjustments, physical therapy plans, and the use of assistive devices, improving patient outcomes. While its simplicity is advantageous, limitations like poor sensitivity to change and lack of patient-specific insights have spurred discussions on complementary tools. Despite these drawbacks, the Ashworth Scale remains a foundational instrument in neurorehabilitation, balancing practicality with clinical utility.

Future Developments and Alternatives

Future developments of the Ashworth Scale may focus on enhancing its sensitivity and reliability, potentially incorporating technological advancements like wearable devices or digital tools for more precise measurements. Researchers are exploring alternative scales and assessments that address the limitations of the current tool, such as dynamic spasticity evaluation and patient-reported outcomes. These innovations aim to provide a more comprehensive understanding of spasticity, improving clinical decision-making and treatment planning.

honda goldwing service manual free download

Welcome to the Honda Goldwing Service Manual, your essential guide for maintaining and repairing your iconic motorcycle. Designed for both new and experienced riders, this manual provides detailed insights into the inner workings of your Goldwing, ensuring optimal performance and longevity. Whether you’re tackling routine maintenance or complex repairs, this resource empowers you with the knowledge to keep your bike in pristine condition. Explore the comprehensive sections below to discover how to maximize your riding experience and extend the life of your Honda Goldwing.

1.1 Overview of the Honda Goldwing

The Honda Goldwing is a legendary touring motorcycle renowned for its comfort, power, and reliability. Designed for long-distance riding, it features a robust engine, spacious seating, and advanced technology, making it a favorite among touring enthusiasts; Understanding its key components and systems is crucial for owners seeking to perform routine maintenance and repairs, as outlined in the service manual.

1.2 Importance of a Service Manual for Maintenance

A service manual is indispensable for maintaining your Honda Goldwing, offering detailed instructions for repairs, troubleshooting, and routine checks. It empowers riders to perform DIY maintenance, saving costs and fostering a deeper understanding of their bike. By following the manual, owners can ensure safety, prevent damage, and keep their Goldwing in optimal condition. Regular maintenance extends the motorcycle’s lifespan and enhances performance, making the manual an essential resource for every Goldwing enthusiast.

Benefits of Using a Honda Goldwing Service Manual

Using a Honda Goldwing service manual offers cost savings, DIY maintenance empowerment, and access to detailed repair guides, enhancing your riding experience and bike longevity.

2.1 Cost Savings Through DIY Maintenance

Embracing DIY maintenance with a Honda Goldwing service manual can significantly reduce expenses. By performing routine tasks like oil changes, tire rotations, and minor repairs yourself, you avoid costly labor fees; The manual provides step-by-step instructions, enabling you to handle tasks efficiently. This approach not only saves money but also deepens your understanding of your bike, fostering a stronger connection to your vehicle. Over time, these savings can add up, making DIY maintenance a prudent investment.

2;2 Empowering Riders with Knowledge

The Honda Goldwing service manual empowers riders by providing in-depth knowledge about their motorcycle. Understanding how to diagnose and address issues builds confidence and independence. With detailed instructions and diagrams, riders can identify potential problems early, preventing costly repairs. This knowledge not only enhances maintenance skills but also fosters a deeper connection with the bike. By equipping riders with the tools to care for their Goldwing, the manual ensures a safer, more enjoyable, and personalized riding experience, tailored to their specific needs and preferences.

Where to Find a Free Honda Goldwing Service Manual Download

The Honda Goldwing service manual can be downloaded for free from official Honda websites, online forums like Goldwing Doctors, or third-party sites offering free resources.

3.1 Official Honda Website and Resources

The official Honda website offers a wealth of resources, including service manuals and guides for the Goldwing. By visiting www.honda.ca, riders can access online service publications, which may include detailed repair instructions and maintenance schedules. Honda provides these resources to ensure owners can perform necessary tasks efficiently. Additionally, some models have specific sections, such as the GL1500 GOLDWING 1994 service manual, available for download. Always verify the manual corresponds to your bike’s model year for accuracy.

3.2 Online Forums and Communities

Online forums and communities, such as Reddit and specialized Goldwing groups, are invaluable for sourcing service manuals and advice. Enthusiasts often share free downloads of manuals, repair guides, and DIY tips. These platforms foster collaboration, with members discussing common issues and solutions. For instance, threads about the GL1500 GOLDWING 1994 service manual highlight community support. Engaging with these forums can provide cost-effective solutions and practical insights from experienced riders, enhancing your maintenance and repair journey.

3.3 Third-Party Websites Offering Free Downloads

Several third-party websites provide free downloads of Honda Goldwing service manuals, catering to enthusiasts seeking cost-effective solutions. Platforms like forums and specialized motorbike sites often host PDF versions of manuals, such as the Honda GL1500 GOLDWING 1994 service manual. These resources include detailed repair guides, diagrams, and troubleshooting tips. While accessing these materials, ensure the sources are reliable to avoid outdated or incorrect information. Always verify the manual’s compatibility with your specific Goldwing model before downloading or using the content.

Key Contents of the Honda Goldwing Service Manual

The manual includes detailed routine maintenance schedules, step-by-step repair guides, and troubleshooting sections to address common issues. It serves as a comprehensive resource for both novice and experienced riders.

4.1 Routine Maintenance Schedules

The Honda Goldwing Service Manual provides detailed maintenance schedules tailored to your bike’s needs. It outlines oil change intervals, tire pressure checks, and battery maintenance. Regular servicing ensures optimal performance, safety, and longevity. The manual specifies tasks based on mileage or time intervals, helping you stay proactive. By following these schedules, you can prevent issues before they arise, saving time and money. This section is essential for riders aiming to maintain their Goldwing in pristine condition and enjoy a smooth, trouble-free riding experience.

4.2 Detailed Repair and Replacement Guidelines

The Honda Goldwing Service Manual offers comprehensive repair and replacement guides for various components. From engine overhauls to suspension adjustments, it provides step-by-step instructions. Detailed diagrams and torque specifications ensure accuracy. Whether replacing brake pads or rebuilding the transmission, the manual covers it all. It also includes tips for diagnosing faults and selecting the right tools. This section is invaluable for riders who want to tackle complex repairs confidently, ensuring their Goldwing runs smoothly and safely for years to come.

4.3 Troubleshooting Common Issues

The Honda Goldwing Service Manual includes a dedicated troubleshooting section to help identify and resolve common issues. It guides riders through diagnosing problems like electrical system malfunctions or engine performance issues. Detailed symptom-to-cause charts and error code explanations simplify the process. Whether addressing a faulty starter or irregular brake behavior, the manual provides clear, actionable steps. This section ensures riders can quickly pinpoint and fix problems, minimizing downtime and keeping their Goldwing in optimal condition.

DIY Maintenance and Repair Tips

Empower yourself with DIY maintenance and repair tips to keep your Goldwing running smoothly. Learn essential tools, step-by-step guides, and cost-effective solutions for common fixes, boosting confidence and savings.

5.1 Essential Tools for Goldwing Maintenance

Maintaining your Honda Goldwing requires the right tools to ensure efficiency and safety. Essential tools include a torque wrench for precise bolt tightening, a socket set for engine and chassis work, and a multimeter for diagnosing electrical issues. Pliers, screwdrivers, and a tire pressure gauge are also crucial. Specialized tools like a swingarm bushing remover and brake bleeding kit may be needed for specific tasks. Always refer to the service manual for the correct tool usage and safety precautions to avoid damage or injury.

5.2 Step-by-Step Guides for Common Repairs

The Honda Goldwing service manual offers detailed step-by-step guides for common repairs, ensuring riders can tackle tasks confidently. From brake pad replacements to oil changes, each procedure is outlined with precision. Clear instructions and diagrams help diagnose and resolve issues efficiently. Whether addressing electrical faults or suspension adjustments, the manual provides a roadmap for success. By following these guides, riders can save money on professional services and gain hands-on knowledge of their bike’s mechanics, fostering a deeper connection with their Goldwing.

Understanding the Honda Goldwing’s Technical Specifications

The Honda Goldwing’s technical specs reveal its powerful engine, smooth transmission, advanced electrical systems, and refined suspension, ensuring a blend of performance, comfort, and reliability for riders.

6.1 Engine and Transmission Details

The Honda Goldwing features a powerful liquid-cooled, horizontally opposed six-cylinder engine, designed for smooth power delivery and exceptional torque. Its six-speed transmission with overdrive ensures seamless shifting and efficient cruising. The engine’s flat-six configuration provides excellent balance and reduces vibration, while the fuel injection system optimizes performance and fuel efficiency. These details, outlined in the service manual, highlight the engineering prowess behind the Goldwing’s legendary ride quality and reliability.

6.2 Electrical and Suspension Systems

The Honda Goldwing boasts a sophisticated electrical system, featuring advanced components like ABS, traction control, and heated grips for rider comfort. Its suspension system includes adjustable front forks and a Pro-Link rear suspension, ensuring a smooth ride and precise handling. These systems are intricately detailed in the service manual, providing specifications, troubleshooting guides, and maintenance tips to keep your Goldwing performing at its best and tailored to your riding preferences.

Safety Precautions When Using the Service Manual

Always wear protective gear and ensure a stable workspace when performing repairs. Follow manual guidelines to avoid accidents and handle hazardous materials with care.

7.1 General Safety Guidelines

Always prioritize safety when working on your Honda Goldwing. Wear protective gear, including gloves and safety glasses, to prevent injuries. Ensure your workspace is clean, well-lit, and free from hazards. Never attempt repairs near open flames or sparks. Properly support the motorcycle with jack stands to avoid accidental tipping. Follow the manual’s instructions carefully and avoid shortcuts. Keep loose clothing and long hair tied back to prevent entanglement with moving parts. Ensure all tools are in good condition and suitable for the task at hand. Ignoring these precautions can lead to serious harm or damage to your bike.

7.2 Handling Hazardous Materials and Tools

When working with hazardous materials like batteries, cleaning agents, or fuels, always wear gloves and protective eyewear. Ensure proper ventilation to avoid inhaling fumes. Dispose of chemicals and batteries responsibly, adhering to local regulations. Use tools with care, avoiding improper applications that could cause damage or injury. Store tools and materials securely to prevent accidents. Handle sharp or heavy components cautiously, and keep them out of reach of children. Always refer to the service manual for specific safety recommendations tailored to your Goldwing’s maintenance needs.

Legal and Copyright Considerations

The Honda Goldwing service manual is protected by copyright laws. Fair use permits personal downloads for maintenance, but unauthorized redistribution is illegal. Always respect intellectual property rights.

8.1 Copyright Laws and Fair Use

Copyright laws protect the Honda Goldwing service manual, ensuring its content remains exclusive to the publisher. Fair use allows personal downloads for maintenance purposes but prohibits unauthorized redistribution. Respecting these laws is crucial to avoid legal consequences and supports the creators of such valuable resources.

8.2 Proper Use of Downloaded Materials

Downloaded materials from the Honda Goldwing service manual are intended for personal use, aiding in maintenance and repairs. Ensure all usage complies with copyright laws, avoiding illegal distribution. These resources are meant to enhance your riding experience by providing clear, accurate information. Always keep the manual with your motorcycle if resold, respecting intellectual property rights and supporting the creators of these essential guides.

Supplementary Resources for Goldwing Owners

Discover additional guides, videos, and forums that complement your service manual. These resources offer practical tips and expert advice, enhancing your Goldwing ownership experience.

9.1 Owner’s Manual vs. Service Manual

The Owner’s Manual provides basic operation and maintenance guidance, while the Service Manual offers in-depth repair and technical details. Both are essential for comprehensive Goldwing care, but serve different purposes. The Owner’s Manual is ideal for everyday use, while the Service Manual is tailored for DIY repairs and advanced troubleshooting. Understanding their roles ensures you utilize the right resource for your needs, enhancing your overall ownership experience and bike performance.

9.2 Additional Guides and Videos

Supplement your Goldwing service manual with additional guides and videos for enhanced understanding. These resources offer visual tutorials and step-by-step instructions, perfect for complex repairs. Videos often cover specific models, ensuring compatibility and clarity. Online forums and communities also provide valuable insights from experienced riders. By combining the service manual with these supplementary materials, you can tackle even the toughest maintenance tasks with confidence, ensuring your Goldwing remains in top condition and your skills continue to improve over time.

Common Tools and Equipment Needed

Essential tools for Goldwing maintenance include wrenches, screwdrivers, and specialized equipment like swingarm tools. Source these from forums, Honda dealers, or online retailers to ensure compatibility and quality.

10.1 Specialized Tools for Goldwing Maintenance

Specialized tools like the swingarm tool, steering stem socket, and carburetor synchronization tool are essential for Goldwing maintenance. These tools are designed to address specific components of the bike, ensuring precise adjustments and repairs. While general tools suffice for basic tasks, specialized tools are crucial for complex procedures outlined in the service manual. Sourcing these tools from forums, Honda dealers, or reputable online retailers ensures compatibility and quality, helping you maintain your Goldwing effectively and safely.

10.2 Where to Source Tools and Parts

For genuine Honda parts and tools, visit authorized Honda dealers or trusted online retailers like Partzilla, Revzilla, or Rocky Mountain ATV/MC. Online forums and communities, such as Goldwing Owners or Facebook groups, often recommend reliable suppliers. Additionally, websites like eBay or Amazon offer a wide range of tools and parts, but ensure to verify seller ratings. Local motorcycle shops may also carry or order specialized tools, providing convenience and expert advice for your Goldwing maintenance needs;

Model-Specific Service Manuals

Honda Goldwing service manuals are tailored to specific models, ensuring accurate and detailed guidance for each bike’s unique features, systems, and repair requirements.

11.1 Differences Across Goldwing Models

Each Honda Goldwing model, such as the GL1000, GL1100, and GL1500, has unique characteristics, requiring tailored service manuals. Engine specifications, transmission types, and suspension systems vary, affecting maintenance procedures. For instance, the GL1500 features a flat-six engine, while earlier models have different configurations. Additionally, later models may include advanced electronics or ergonomic adjustments. These differences necessitate model-specific guidance to ensure accurate repairs and maintenance, as outlined in their respective manuals.

11.2 Ensuring the Correct Manual for Your Bike

To ensure you have the correct manual for your Honda Goldwing, verify your bike’s model and year. Manuals are tailored to specific models like the GL1000 or GL1500, with details matching your bike’s unique features. Cross-reference your VIN or manufacturer’s documentation to confirm compatibility. Using the wrong manual can lead to incorrect repair procedures or parts identification, potentially causing damage or safety risks. Always prioritize accuracy to maintain your Goldwing effectively and safely.

Community and Forum Support

Engage with online communities and forums dedicated to Honda Goldwing enthusiasts. These platforms offer valuable insights, troubleshooting tips, and access to free service manuals, fostering a supportive environment for riders.

12.1 Online Communities for Goldwing Enthusiasts

Join vibrant online communities and forums dedicated to Honda Goldwing enthusiasts. These platforms offer a wealth of knowledge, troubleshooting tips, and access to free service manuals. Connect with experienced riders who share insights, repair guides, and maintenance advice. Forums like Goldwing Owners and Motorcycle forums provide invaluable resources, helping you diagnose issues and find solutions. Engage with fellow riders, ask questions, and gain confidence in your DIY repairs and upgrades, fostering a sense of camaraderie among Goldwing fans worldwide.

12.2 Seeking Advice from Experienced Riders

Experienced riders within Goldwing communities are invaluable resources for troubleshooting and maintenance. Their hands-on knowledge complements the service manual, offering practical tips and real-world solutions. Whether you’re dealing with a complex repair or a routine task, seasoned enthusiasts can guide you through challenges, ensuring your bike runs smoothly. Engage in discussions, ask specific questions, and leverage their expertise to enhance your DIY skills and confidence, making your ownership experience more rewarding and stress-free.

Future Trends in Motorcycle Maintenance Manuals

Future motorcycle manuals will likely feature interactive digital formats, enhanced with augmented reality and real-time diagnostics, making maintenance more accessible and efficient for riders worldwide.

13.1 Digital and Interactive Manuals

Digital and interactive manuals are revolutionizing motorcycle maintenance by offering enhanced accessibility and user-friendly features. Riders can now access manuals via smartphones or tablets, ensuring convenience on the go. Interactive elements like 3D diagrams, video tutorials, and search functions simplify complex tasks. These formats also enable real-time updates, keeping riders informed about the latest maintenance practices and technical advancements.

Additionally, digital manuals reduce storage space and environmental impact compared to traditional paper versions. With free downloads available, riders can easily access the information they need without extra costs, making maintenance more affordable and efficient.

13.2 Integration with Modern Technology

The integration of modern technology into service manuals enhances the maintenance experience. Riders can now access digital manuals through smartphone apps, featuring interactive diagnostics and real-time data synchronization. Augmented reality (AR) tools provide visual guidance for complex repairs, while integrated systems allow direct communication with the motorcycle’s onboard diagnostics. This seamless connectivity ensures precise troubleshooting and efficient repairs, saving time and improving overall riding satisfaction. Modern technology transforms traditional manuals into dynamic, user-centric resources, elevating motorcycle maintenance to new heights.

The Honda Goldwing Service Manual is an essential resource for every rider, offering comprehensive guidance for maintenance and repairs. By empowering riders with detailed knowledge, it ensures optimal performance and longevity. Embrace the journey of DIY maintenance and explore the wealth of information available to enhance your Goldwing experience. Happy riding!

14.1 Final Thoughts on Using a Service Manual

The Honda Goldwing Service Manual is an invaluable resource for riders, offering detailed guidance for maintenance and repairs. It empowers riders with the knowledge to save money and understand their bike better. From routine checks to complex fixes, the manual ensures your Goldwing runs smoothly. By following its instructions, you can troubleshoot issues, perform repairs confidently, and extend your motorcycle’s lifespan. Embrace the manual as your go-to guide for a safer, more enjoyable riding experience.

14.2 Encouragement to Explore and Learn

Embrace the journey of discovery with your Honda Goldwing by diving into the service manual and exploring its wealth of information. Learning about your bike’s mechanics fosters a deeper connection and confidence in maintaining it. Don’t hesitate to experiment with DIY repairs or seek guidance from online forums and experienced riders. The manual is your gateway to understanding and preserving your Goldwing’s performance. Take pride in mastering its care, and enjoy the satisfaction of keeping your motorcycle in peak condition for years to come.

1 2 3