manual cuisinart ice cream maker

Welcome to the Cuisinart Ice Cream Maker manual! This guide helps you master your appliance, from setup to creating delicious frozen treats. Ensure safety and optimal performance for endless dessert possibilities.

Overview of the Cuisinart Ice Cream Maker

The Cuisinart Ice Cream Maker is a versatile kitchen appliance designed to craft delicious frozen treats with ease. It offers automatic functionality, allowing users to create ice cream, frozen yogurt, and sorbet effortlessly. The machine features a double-insulated freezer bowl, ensuring efficient chilling and consistent results. Compact in design, it fits seamlessly into most kitchens, with dimensions of approximately 229mm width, 241mm depth, and 268mm height. Perfect for both beginners and experienced cooks, this appliance simplifies the process of making homemade desserts, providing a practical and enjoyable experience for all users.

Importance of Reading the Manual

Reading the Cuisinart Ice Cream Maker manual is crucial for safe and effective use. It provides essential safety guidelines, such as avoiding electrical hazards and proper handling. The manual outlines setup steps, including pre-chilling the freezer bowl and assembling components. It also explains key features, troubleshooting common issues like motor overheating, and maintenance tips. Understanding the warranty and customer support options ensures you’re prepared for any assistance needs. By following the manual, you’ll achieve optimal performance and delicious results. It’s your comprehensive guide to mastering your appliance and enjoying homemade frozen treats with confidence.

Key Features of the Cuisinart Ice Cream Maker

The Cuisinart Ice Cream Maker offers automatic frozen yogurt, ice cream, and sorbet making with a double-insulated freezer bowl. It features easy operation, multiple dessert options, and a sleek design for homemade treats.

Automatic Frozen Yogurt, Ice Cream, and Sorbet Making

The Cuisinart Ice Cream Maker is designed for effortless creation of frozen yogurt, ice cream, and sorbet. Its automatic feature allows users to simply pour ingredients into the machine and let it churn to perfection. The double-insulated freezer bowl ensures even freezing, while the motor handles mixing effortlessly. This feature is perfect for homemade desserts, offering customization and convenience. With a typical churning time of 15-20 minutes, you can enjoy soft-serve consistency or transfer for a firmer texture. The machine’s versatility makes it ideal for crafting unique flavors and healthy alternatives, all from the comfort of your kitchen.

Double Insulated Freezer Bowl

The Cuisinart Ice Cream Maker features a double-insulated freezer bowl designed for efficient chilling and even freezing. This bowl eliminates the need for ice or rock salt, simplifying the process. Pre-chilling the bowl in the freezer for 6-8 hours ensures optimal performance. The double insulation maintains low temperatures, preventing ice crystals from forming and resulting in a smoother texture. This innovative design allows for faster freezing and consistent churning, making it easier to achieve professional-quality ice cream, yogurt, or sorbet at home. Proper use of the freezer bowl is essential for achieving the best results with your Cuisinart Ice Cream Maker.

Setting Up Your Cuisinart Ice Cream Maker

Welcome to the setup guide for your Cuisinart Ice Cream Maker! Start by unboxing and preparing the appliance. Pre-chill the freezer bowl for optimal performance.

Unboxing and Initial Preparation

Unboxing your Cuisinart Ice Cream Maker is an exciting first step! Carefully unpack the base, freezer bowl, lid, mixing paddle, and instruction booklet. Before first use, wash all parts with warm, soapy water, then rinse and dry thoroughly. Ensure the freezer bowl is pre-chilled for at least 6-8 hours to achieve optimal churning results. Place the bowl in the freezer, ensuring it’s completely frozen before use. Once prepared, your maker is ready to craft delicious homemade treats. Refer to the manual for detailed setup and safety guidelines to ensure a smooth experience.

Pre-Chilling the Freezer Bowl

Pre-chilling the freezer bowl is essential for optimal performance. Place the bowl in the freezer for at least 6-8 hours or overnight to ensure it is fully frozen. Avoid adding any ingredients until the bowl is completely chilled, as this ensures proper churning and texture. If the bowl isn’t pre-chilled, the mixture may not churn correctly, resulting in a soft or icy texture. Always store the bowl in the freezer when not in use to maintain its readiness for future batches. This step is crucial for achieving the perfect consistency in your homemade ice cream.

Understanding the Components

The Cuisinart Ice Cream Maker includes a freezer bowl, lid, mixing paddle, and control panel. These components work together to churn ingredients into smooth, creamy treats.

Key Parts of the Ice Cream Maker

The Cuisinart Ice Cream Maker features a double-insulated freezer bowl, a lid with an ingredient spout, and a mixing paddle. The control panel includes a timer and power button. The freezer bowl must be pre-chilled for optimal performance, while the mixing paddle ensures even churning. The lid’s spout allows easy ingredient addition. These components work together to create smooth, creamy desserts. Understanding each part ensures proper usage and maintenance, helping you achieve perfect results every time with your homemade ice cream, yogurt, or sorbet creations.

Accessories and Additional Equipment

The Cuisinart Ice Cream Maker comes with essential accessories like a recipe booklet, mixing paddle, and a lid with an ingredient spout. Additional equipment, such as extra freezer bowls, can be purchased separately for convenience. The recipe booklet provides inspiration and guidance for creating various frozen treats. Optional accessories, like measuring cups and spatulas, enhance the user experience. For more information on compatible accessories, visit the Cuisinart website or authorized retailers. These tools and resources help you maximize the potential of your ice cream maker and explore a wide range of dessert possibilities.

Operating the Cuisinart Ice Cream Maker

Pre-chill the freezer bowl, pour in your mixture, and set the timer. The machine churns ingredients into smooth, creamy ice cream in about 20-30 minutes, ensuring perfect results every time with minimal effort required for a delicious homemade treat.

Step-by-Step Churning Process

  1. Pre-chill the freezer bowl in the freezer for at least 6 hours or overnight to ensure optimal performance.
  2. Pour your prepared ice cream mixture into the chilled freezer bowl through the lid opening.
  3. Secure the lid properly and ensure all components are locked in place.
  4. Turn on the machine and set the timer according to your recipe or desired consistency.
  5. The machine will churn the mixture into smooth, creamy ice cream within 20-30 minutes.
  6. Monitor the process periodically to ensure even churning and avoid over-mixing.
  7. Once the timer goes off, stop the machine and transfer the ice cream to an airtight container for firmer texture.

Always follow the manual’s safety guidelines and recipe instructions for the best results.

Setting the Timer and Starting the Machine

To begin, ensure the freezer bowl is properly pre-chilled and the lid is securely locked. Pour your prepared mixture into the bowl through the opening in the lid. Set the timer according to your recipe, typically between 20-30 minutes. Press the Start button to activate the machine. The churn will begin mixing the ingredients, gradually thickening them into smooth, creamy ice cream. Allow the machine to run uninterrupted until the timer completes. If the mixture becomes too thick or the motor overheats, the machine will automatically stop. Always follow the recommended timing for the best results.

Safety Precautions

Always keep the appliance and its cord away from water to avoid electric shock. Supervise children when using the machine, and ensure proper handling of hot or cold components.

Electrical Safety Guidelines

To ensure safe operation, keep the appliance and its cord away from water or any liquid. Avoid submerging the base or plug in water, as this can cause electric shock. Never use a damaged cord or plug, as this poses a significant risk. Keep children supervised when the machine is in use. Do not touch electrical parts with wet hands. Always unplug the unit when not in use or during cleaning. Failure to follow these guidelines may result in injury or damage and could void the warranty. Proper electrical safety ensures reliable performance and user protection.

Handling and Storage Tips

Handle the Cuisinart Ice Cream Maker with care to ensure longevity. Store the appliance in a cool, dry place, away from direct sunlight. After use, clean all parts thoroughly with mild soap and water, avoiding abrasive cleaners. Dry components completely before storage to prevent rust or mold. The freezer bowl should be stored in the freezer when not in use. Regularly inspect and clean the machine to maintain performance. Always follow the manufacturer’s guidelines for handling and storing accessories. Proper storage ensures the machine remains in optimal condition for future use. Regular maintenance will extend the product’s lifespan and ensure consistent results.

Recipes and Customization

Discover an extensive collection of recipes, from classic vanilla to unique flavor combinations. Customize your creations with mix-ins, extracts, and ingredients to create personalized frozen treats effortlessly.

Classic Ice Cream Recipes

Indulge in timeless flavors with classic ice cream recipes provided in the Cuisinart manual. From creamy vanilla and rich chocolate to fruity strawberry, these recipes are simple yet delicious. Perfect for beginners, they use basic ingredients like cream, sugar, and flavorings. Follow the step-by-step instructions to achieve smooth, professional-quality results. These recipes are great for mastering the churning process and serve as a foundation for experimentation. With minimal prep and straightforward mixing, you can enjoy homemade classics in no time. Let these traditional favorites inspire your dessert creations!

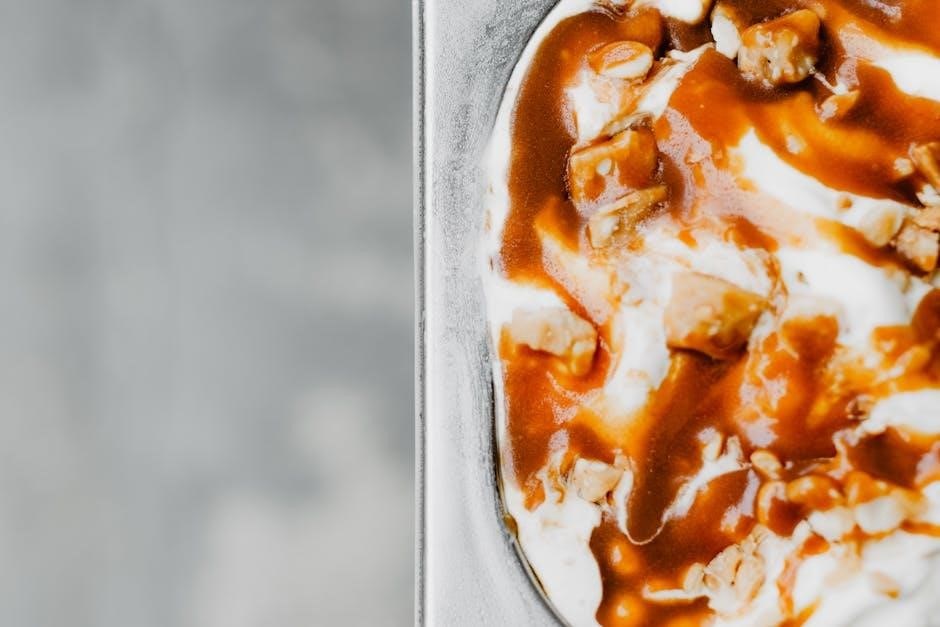
Unique and Creative Flavor Ideas

Elevate your ice cream game with innovative flavors inspired by the Cuisinart manual. Try unique twists like matcha green tea, olive oil, or abooza (Middle Eastern pistachio). Experiment with browned butter and candied bacon for a savory-sweet mix or infuse spices like cardamom or cinnamon. For adventurous palates, craft spicy mango habanero or boozy bourbon pecan. The manual also suggests adding fresh fruits, nuts, or cocoa nibs for texture. These creative ideas let you explore global cuisines and personal preferences, ensuring every batch is a new culinary adventure. Let your imagination run wild and create one-of-a-kind flavors!

Troubleshooting Common Issues

Address motor overheating and texture issues by ensuring proper pre-chilling and ingredient ratios. Consult the manual for detailed solutions and maintenance tips.

Motor Overheating and Automatic Shutdown

The Cuisinart Ice Cream Maker may overheat and shut down automatically if the mixture is too thick or ingredients are too large. This safety feature prevents damage. Ensure all ingredients are finely chopped and the mixture is well-balanced. Avoid overloading the machine, as this can strain the motor. If overheating occurs, unplug the unit, let it cool, and restart. Regularly check the consistency of your mixture and follow the manual’s guidelines for optimal performance. Proper maintenance and adherence to instructions can help prevent this issue and extend the lifespan of your appliance.

Issues with Consistency and Texture

Common issues with consistency and texture in your Cuisinart Ice Cream Maker often stem from ingredient ratios or churning processes. If the mixture is too icy, it may lack creaminess, while overly soft results indicate insufficient churning. Ensure all ingredients are pre-chilled and properly measured. Avoid overloading the bowl, as this disrupts even mixing. For firmer textures, transfer the mixture to an airtight container and freeze for 2-3 hours after churning. Adjusting ingredient ratios, such as increasing cream or reducing water content, can also improve results. Proper maintenance and adherence to manual guidelines help achieve smooth, professional-quality textures consistently.

Maintenance and Cleaning

Regularly clean and sanitize all parts after use. Wash with warm, soapy water, rinse thoroughly, and dry. Avoid abrasive cleaners to prevent damage. Store components properly.

Regular Cleaning and Sanitization

After each use, wash the freezer bowl, lid, and paddle with warm, soapy water. Use a soft sponge or cloth to avoid scratching surfaces. Rinse thoroughly and dry to prevent water spots. For tougher residue, soak parts in warm water before cleaning. Sanitize by mixing 1 tablespoon of unscented chlorine bleach with 1 gallon of water, then rinse thoroughly. Regular cleaning ensures optimal performance and prevents bacterial growth. Avoid using abrasive cleaners or scouring pads, as they may damage the finish. Always dry and store components properly to maintain hygiene and longevity.

Storing the Ice Cream Maker

To maintain your Cuisinart Ice Cream Maker, store it properly after cleaning. Place the freezer bowl in the freezer when not in use, ensuring it is completely dry to avoid ice buildup. The lid, paddle, and other accessories should be stored in a clean, dry location. Keep the main unit away from direct sunlight and moisture. For organization, store small parts in a labeled container. Avoid leaving ingredients or mixtures in the bowl during storage. Regularly inspect and clean before reuse to ensure optimal performance and hygiene.

Advanced Features and Modes

Explore advanced modes like gelato and sorbet settings for precise control. Customize churning time and speed for unique textures. Utilize built-in timers for perfect results every time.

Using the Gelato and Sorbet Modes

The Cuisinart Ice Cream Maker offers specialized modes for crafting authentic gelato and refreshing sorbet. Gelato mode operates at a slower speed to ensure a denser, creamier texture, while sorbet mode is designed for fruit-based desserts, ensuring a smooth consistency without ice crystals. To use these modes, simply select the appropriate setting on your machine. For gelato, use a mixture with a higher fat content, and for sorbet, opt for pureed fruit with a touch of sugar. Both modes typically take between 20 to 30 minutes, depending on the mixture. Always refer to your specific model’s manual for precise instructions.

Customizing Churning Time and Speed

The Cuisinart Ice Cream Maker allows you to customize churning time and speed for tailored results. For gelato, set a slower speed to achieve a denser texture, while sorbet benefits from a faster churn to break down ice crystals. Adjust the timer based on your mixture’s thickness and desired consistency. Typically, gelato takes 25-35 minutes, while sorbet requires 20-30 minutes. Refer to your model’s manual for specific guidance, as some machines offer pre-set modes. Experiment with settings to perfect your creations and ensure optimal flavor and texture. Always monitor the process to avoid over-churning, which can lead to an icy finish.

USER MANUAL HIGHLIGHTS

USER MANUAL HIGHLIGHTS

The Cuisinart manual highlights essential sections like safety precautions, setup guides, recipes, and troubleshooting. It also covers maintenance tips for optimal performance and longevity.

Quick Start Guide

Get started with your Cuisinart Ice Cream Maker by following these easy steps. First, pre-chill the freezer bowl for at least 6 hours. Next, prepare your ingredients and pour the mixture into the bowl through the lid opening. Secure the lid and ensure the dispensing bracket is locked. Turn on the machine, set the timer according to your desired consistency, and press Start. The churning process typically takes 20-30 minutes. Once done, transfer the ice cream to an airtight container and freeze for a firmer texture. Enjoy your homemade treat!

Detailed Instructions for First-Time Users

Before first use, carefully unpack and wash all accessories with warm soapy water. Ensure the freezer bowl is pre-chilled for at least 6 hours. Pour your prepared mixture into the bowl through the lid opening, making sure the dispensing bracket is locked. Turn on the machine, set the timer (typically 20-30 minutes), and press Start. Allow the machine to churn uninterrupted. Once done, transfer the mixture to an airtight container and freeze for a firmer texture. Always refer to the recipe booklet for ingredient proportions and safety guidelines. This ensures perfect results every time!

WARRANTY AND SUPPORT

The Cuisinart Warranty offers a 5-year limited warranty for defects in materials and workmanship. Contact Customer Support for assistance or repair at 1-800-726-0190 or visit Cuisinart.com.

Understanding the Cuisinart Warranty

The Cuisinart Warranty provides a 5-year limited warranty for defects in materials and workmanship. It applies to products purchased at retail for personal, family, or household use. The warranty does not cover damage caused by misuse, neglect, or commercial use. For warranty claims, contact Cuisinart Customer Support at 1-800-726-0190 or visit their official website. Ensure to register your product and retain proof of purchase for warranty validation. This coverage ensures peace of mind and protection for your investment in the Cuisinart Ice Cream Maker.

Contacting Customer Support

For assistance with your Cuisinart Ice Cream Maker, contact customer support at 1-800-726-0190 or visit the official Cuisinart website. Support is available to address questions, troubleshooting, or warranty inquiries. Ensure your product is registered for extended warranty benefits and exclusive content. Visit the support section online for troubleshooting guides, manuals, and repair center locations. Representatives are ready to help you maximize your appliance’s performance and resolve any issues promptly. Reach out today for reliable assistance.

Master your Cuisinart Ice Cream Maker with this manual! Explore endless dessert possibilities, ensure optimal performance, and enjoy homemade treats with confidence and creativity;

Final Tips for Optimal Use

For the best results with your Cuisinart Ice Cream Maker, always pre-chill ingredients and the freezer bowl to ensure a smooth churning process. Use high-quality ingredients for better flavor and texture. Experiment with unique recipes but follow measurements carefully. Regularly clean and sanitize the machine to maintain hygiene. Store the appliance properly when not in use to prolong its lifespan; If issues arise, refer to the troubleshooting section in the manual. By following these tips, you’ll enjoy perfect homemade ice cream every time and extend the life of your machine.

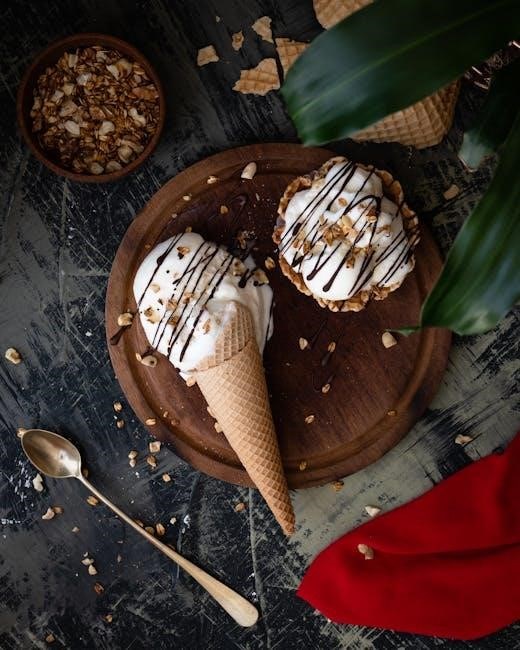
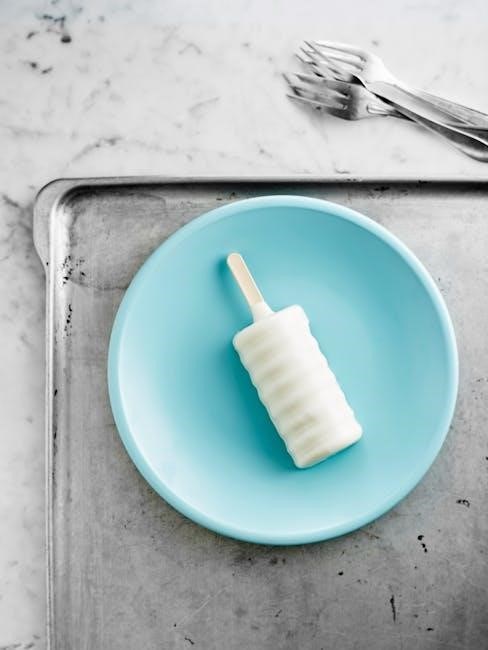
Enjoying Your Homemade Ice Cream

Once your ice cream is churned to perfection, transfer it to an airtight container and freeze for a firmer texture. Customize with toppings, mix-ins, or sauces for endless creativity. Share your creations with family and friends or enjoy as a personal treat. For inspiration, explore the recipe section in your manual, featuring classic and unique flavors. Whether you prefer creamy vanilla, fruity sorbet, or rich gelato, your Cuisinart Ice Cream Maker makes every dessert a delight. Savor the joy of homemade ice cream and the satisfaction of crafting it yourself!

shiftkey timesheets pdf

ShiftKey Timesheets PDF is a digital tool designed to streamline time tracking for healthcare professionals, offering a convenient and organized way to record work hours efficiently․

1․1 What is ShiftKey?

ShiftKey is a digital platform designed to connect licensed healthcare professionals with facilities nationwide, offering a technology-driven approach to staffing․ It provides tools like timesheets to streamline time tracking, payroll processes, and compliance․ ShiftKey aims to enhance efficiency and accuracy for healthcare providers, eliminating paper-based logs and ensuring seamless record-keeping․ Its user-friendly interface and comprehensive features make it an essential resource for modern healthcare staffing needs․

1․2 Importance of Timesheets in Healthcare Staffing

Timesheets are crucial for accurate tracking of work hours, ensuring proper payroll processing and compliance with labor laws․ In healthcare staffing, they provide a transparent record of shifts, reducing errors and disputes․ By maintaining detailed logs, facilities can ensure fair compensation and adhere to regulatory requirements, fostering trust and efficiency in workforce management․

Purpose of ShiftKey Work Log PDF

ShiftKey Work Log PDF provides a clear record of work hours, simplifying payroll processing and ensuring compliance with healthcare staffing regulations and accurate time tracking․

2․1 Tracking Work Hours Accurately

ShiftKey Work Log PDF ensures precise tracking of work hours, eliminating errors in time recording․ By replacing paper-based logs with a digital format, it minimizes discrepancies and enhances clarity․ The tool allows healthcare professionals to log their shifts effortlessly, providing an organized and accurate record of hours worked․ This feature is crucial for payroll accuracy and ensures compliance with labor regulations, making it an essential tool for healthcare staffing management․

2․2 Maintaining Records for Healthcare Providers

ShiftKey Work Log PDF serves as a comprehensive tool for maintaining detailed records of healthcare providers’ shift assignments․ It organizes information such as provider names, facilities, specialties, and dates, ensuring all data is securely stored and easily accessible․ This digital solution enhances record-keeping efficiency, reducing the risk of lost or misplaced documents․ By maintaining accurate and organized records, healthcare facilities can streamline operations, ensure compliance, and facilitate seamless communication between providers and administrative teams․

2․3 streamlining Payroll Processes

2․3 Streamlining Payroll Processes

ShiftKey Work Log PDF simplifies payroll processes by eliminating manual calculations and reducing errors․ It provides clear, organized data on work hours, making it easier for payroll teams to process payments accurately․ This digital solution minimizes delays and discrepancies, ensuring healthcare providers are compensated promptly․ By automating time tracking, ShiftKey enhances overall payroll efficiency, saving time and reducing administrative burdens for healthcare facilities․

Benefits of Using ShiftKey Timesheets

ShiftKey Timesheets PDF offers a digital solution to eliminate paper-based logs, reduce errors, and enhance accuracy․ It simplifies time tracking, saving time and improving efficiency for healthcare professionals․

3․1 Eliminating Paper-Based Logs

ShiftKey Timesheets PDF replaces traditional paper-based systems, reducing clutter and minimizing the risk of lost or damaged records․ By transitioning to a digital format, healthcare professionals can easily access and manage their timesheets, enhancing organization and efficiency; This shift also supports environmental sustainability by reducing paper usage․ Digital timesheets are more secure, eliminating the need for physical storage and streamlining the overall time-tracking process for both providers and facilities․

3․2 Enhancing Accuracy and Efficiency

ShiftKey Timesheets PDF minimizes manual entries, reducing errors and ensuring precise time tracking․ Automation streamlines payroll processes, enabling accurate payments and reducing administrative burdens․ Real-time updates and digital records facilitate better schedule management, while built-in validation ensures data consistency․ This approach enhances overall efficiency, allowing healthcare professionals to focus on patient care rather than administrative tasks, and ensures compliance with labor regulations through accurate and reliable timekeeping solutions․

3․3 Simplifying Time Tracking for Healthcare Professionals

ShiftKey Timesheets PDF eliminates the need for cumbersome manual entries, providing a user-friendly solution for tracking work hours․ The digital format allows healthcare professionals to easily log their shifts, reducing administrative burdens․ With pre-built templates and intuitive design, the timesheet simplifies the process of recording and managing work hours, enabling professionals to focus more on patient care and less on paperwork․ This streamlined approach saves time and enhances overall productivity․

How to Use ShiftKey Timesheets PDF

Access the template, fill in work details accurately, and submit for approval, streamlining the process for efficient time tracking and payroll management․

4․1 Accessing and Downloading the Template

Accessing and downloading the ShiftKey Timesheets PDF is straightforward․ Users can obtain the template through the ShiftKey app or the official website․ The document is available in various formats, including PDF, Microsoft Word, and PowerPoint, catering to different preferences․ Once downloaded, ensure the template is the latest version to avoid discrepancies․ This step is crucial for accurate time tracking and compliance with healthcare staffing requirements․ Always verify the source to ensure authenticity and security․

4․2 Filling Out the Timesheet Correctly

Filling out the ShiftKey Timesheets PDF requires careful attention to detail․ Start by accurately entering the provider’s name, facility, and dates of shifts․ Record work hours precisely, noting start and end times, and include any breaks or overtime․ Ensure all shift details align with assignments and verify the accuracy of the information․ Use clear handwriting or digital text for readability․ Double-check the data before submission to avoid errors, ensuring compliance with healthcare staffing requirements and payroll accuracy․

4․3 Submitting the Completed Timesheet

Once the timesheet is filled out accurately, it must be submitted promptly․ Submission can be done digitally via email or through the ShiftKey app, ensuring quick processing․ Verify that all required fields are complete and that the document is legible․ Digital submission reduces the risk of delays and errors, streamlining the payroll process․ Ensure timely submission to avoid payment delays and maintain smooth operations for healthcare providers and facilities․

Key Features of ShiftKey Timesheets

ShiftKey Timesheets offer essential features like provider assignment records, detailed shift information, and compatibility with multiple formats, ensuring efficient and organized time tracking for healthcare professionals․

5․1 Provider Assignment Record

The Provider Assignment Record within ShiftKey Timesheets PDF allows healthcare professionals to track their shift details, including provider name, facility, specialty, and dates․ This feature ensures accurate documentation of assignments, reducing administrative errors․ It also helps in maintaining a clear record of work history, which is essential for payroll processing and compliance․ The record is easily accessible and can be downloaded in various formats, making it a reliable tool for both providers and facilities to manage scheduling efficiently․

5․2 Detailed Shift Information

ShiftKey Timesheets PDF includes detailed shift information, such as start and end times, dates, locations, and shift duration․ This feature ensures precise tracking of work hours, helping healthcare professionals and facilities maintain accurate records․ The detailed logs simplify payroll processing and reduce discrepancies; By providing a clear overview of each shift, it enhances transparency and accountability for both providers and employers, making it easier to manage schedules and ensure compliance with labor regulations effectively․

5․3 Compatibility with Multiple Formats

ShiftKey Timesheets PDF is compatible with multiple formats, including Microsoft Word and PowerPoint, ensuring flexibility for healthcare professionals․ This feature allows easy editing and sharing, catering to various user preferences․ The compatibility streamlines payroll processes and reduces manual entries, enhancing accuracy․ Healthcare providers can manage schedules efficiently, while facilities benefit from seamless integration with existing systems, promoting overall operational efficiency and compliance with labor regulations․

ShiftKey as a Nationwide Connector

ShiftKey serves as a nationwide connector, linking licensed professionals with healthcare facilities across the U․S․ Its technology-driven approach enhances staffing efficiency and industry connectivity․

6․1 Connecting Licensed Professionals and Facilities

ShiftKey acts as a bridge between licensed healthcare professionals and facilities nationwide, offering a platform that simplifies staffing needs․ By leveraging technology, it enables seamless connections, ensuring facilities find qualified providers efficiently while professionals access diverse opportunities․ This platform fosters a robust network, enhancing workforce flexibility and addressing healthcare staffing challenges effectively․ Its user-friendly interface and comprehensive tools make it an essential resource for both parties, streamlining the hiring and scheduling process․

6․2 Technology-Driven Approach in Healthcare Staffing

ShiftKey’s technology-driven approach modernizes healthcare staffing by offering real-time tracking and digital documentation․ This innovative method enhances efficiency, accuracy, and transparency in managing shift assignments and payroll processes․ By integrating advanced tools, ShiftKey streamlines communication between professionals and facilities, ensuring seamless scheduling and reducing administrative burdens․ This approach not only improves productivity but also supports compliance with healthcare regulations, making it a reliable solution for modern workforce management needs․

Managing Shift Assignments with ShiftKey

ShiftKey simplifies managing shift assignments by connecting healthcare professionals with facilities, offering detailed tracking and organization of schedules while ensuring compliance with industry standards․

7․1 Tracking Shift Details

ShiftKey enables precise tracking of shift details, ensuring accurate documentation of work hours, locations, and roles․ The platform provides real-time updates and digital records, allowing healthcare professionals to monitor their assignments effortlessly․ This feature helps in maintaining clear visibility over shift specifics, reducing errors, and ensuring seamless communication between providers and facilities․ It also supports compliance with healthcare regulations by keeping detailed and organized records of all shift activities․

7․2 Organizing Work Schedules

ShiftKey’s platform simplifies the organization of work schedules, allowing healthcare professionals to manage their assignments efficiently․ The system provides a clear overview of upcoming shifts, enabling better time management and reducing scheduling conflicts․ With features like calendar views and role-based scheduling, professionals can easily track their commitments․ This tool ensures seamless coordination between providers and facilities, optimizing workforce deployment and improving operational efficiency․ It also helps in minimizing last-minute changes and ensuring proper alignment of skills with patient needs․

7․3 Ensuring Compliance with Healthcare Regulations

ShiftKey ensures compliance with healthcare regulations by providing accurate timesheets and secure storage of records․ The platform helps healthcare providers adhere to labor laws and maintain proper documentation of shifts․ This enables facilities to meet regulatory requirements efficiently and avoid legal issues․ With ShiftKey, compliance is streamlined, allowing professionals to focus on patient care while ensuring all standards are met․

Legal and Compliance Considerations

ShiftKey Timesheets ensure adherence to legal requirements and healthcare regulations, providing accurate time tracking and secure record storage to meet compliance standards effectively․

8․1 Accuracy in Time Tracking

Accuracy in time tracking is crucial for compliance and fair compensation․ ShiftKey Timesheets PDF ensures precise recording of hours worked, eliminating manual errors․ The digital format allows real-time tracking, reducing discrepancies and ensuring payroll accuracy․ By automating time capture, ShiftKey helps healthcare providers adhere to labor laws and maintains transparent records, fostering trust and accountability in workforce management․

8․2 Adherence to Labor Laws

ShiftKey Timesheets PDF ensures compliance with labor laws by accurately tracking hours, breaks, and overtime․ The digital format helps prevent underpayment or overpayment, aligning with legal requirements․ By maintaining clear, tamper-proof records, ShiftKey supports healthcare facilities in adhering to wage regulations and avoiding legal disputes․ This tool is designed to uphold fairness and transparency, ensuring all labor standards are met efficiently․

8․3 Secure Storage of Timesheet Records

ShiftKey Timesheets PDF ensures secure storage of records through encrypted digital formats․ This prevents unauthorized access and data breaches․ By maintaining timesheets electronically, healthcare facilities can store them securely, adhering to privacy regulations like HIPAA․ The PDF format is tamper-proof, preserving the integrity of the records․ Secure storage ensures compliance and provides peace of mind for healthcare providers and facilities, safeguarding sensitive workforce data effectively․

Best Practices for Using ShiftKey Timesheets

Regularly updating and submitting timesheets ensures accuracy․ Verify shift details before submission and maintain backup copies for future reference and compliance purposes․

9․1 Regular Updates and Submissions

Healthcare professionals should update their ShiftKey timesheets frequently to ensure accuracy and prevent errors․ Submitting completed timesheets promptly helps maintain seamless payroll processing and compliance with facility policies․

9․2 Verification of Shift Details

Verifying shift details ensures accuracy and prevents errors in timesheets․ Healthcare professionals should cross-check their ShiftKey timesheets with schedules or emails to confirm dates, hours, and locations․ This step is crucial for maintaining compliance and preventing discrepancies in payroll processing․ Regular verification also helps in promptly addressing any mismatches or issues before submission․

9․3 Maintaining Backup Copies

Maintaining backup copies of ShiftKey timesheets ensures data security and prevents loss of critical information․ Regularly saving PDF copies in multiple locations, such as cloud storage or external drives, is highly recommended․ This practice safeguards against accidental deletion or system failures․ Backup copies also serve as reliable references during audits or payroll disputes, ensuring compliance and smooth operations for healthcare professionals and facilities․

Troubleshooting Common Issues

Troubleshooting common issues with ShiftKey Timesheets PDF involves addressing technical difficulties, such as JavaScript errors, and ensuring accurate data entry to prevent discrepancies․

10․1 Resolving Discrepancies in Timesheets

Resolving discrepancies in ShiftKey Timesheets PDF involves verifying shift details, ensuring accurate data entry, and addressing any mismatches promptly․ Regular audits and cross-referencing with payroll records help identify errors․ Healthcare professionals should notify administrators of any inconsistencies to maintain compliance with labor laws and ensure timely corrections․ This systematic approach prevents payment issues and ensures transparency in time tracking processes․

10․2 Addressing Technical Difficulties

Addressing technical difficulties with ShiftKey Timesheets PDF involves troubleshooting common issues like login errors or form formatting problems․ Users should ensure stable internet connections and check browser compatibility․ Clearing cache or using supported browsers often resolves display issues․ For persistent problems, contacting ShiftKey support is recommended․ Regular updates and proper device settings can prevent technical glitches, ensuring seamless functionality of the timesheet system․

10․3 Ensuring Timely Approvals

Ensuring timely approvals for ShiftKey Timesheets PDF involves submitting completed timesheets promptly and accurately․ Verify all shift details and provider information before submission to avoid delays․ Regularly check for notifications or updates from facilities or administrators․ Follow up with approvers if delays occur to ensure smooth processing․ Maintaining open communication and adhering to deadlines helps in securing timely approvals and efficient payroll processing for healthcare professionals․

ShiftKey Timesheets PDF offers a streamlined solution for accurate time tracking, enhancing efficiency and compliance in healthcare staffing, while connecting professionals nationwide with innovative technology․

11․1 Summary of ShiftKey Timesheets PDF

ShiftKey Timesheets PDF is a digital solution designed to simplify time tracking for healthcare professionals, ensuring accuracy and compliance with labor laws․ It streamlines payroll processes, reduces administrative burdens, and provides a clear record of work hours for both providers and facilities․ By eliminating paper-based logs, it enhances efficiency and supports healthcare staffing agencies in managing shifts effectively․ The tool is part of ShiftKey’s broader platform, which connects licensed professionals with healthcare facilities nationwide․

Its user-friendly design and compatibility with multiple formats make it a versatile option for modern healthcare staffing needs․ The PDF format ensures easy access and submission, while its detailed fields help maintain organized records․ ShiftKey Timesheets PDF is a practical tool for healthcare professionals seeking to manage their work hours seamlessly and efficiently․

11․2 Future of Digital Timesheet Management

The future of digital timesheet management lies in advanced automation, AI integration, and seamless mobile accessibility․ Tools like ShiftKey Timesheets PDF will likely evolve to include real-time tracking, automated approvals, and advanced analytics․ As healthcare staffing grows, digital solutions will prioritize compliance, security, and user-friendly interfaces, ensuring accurate and efficient time tracking for professionals and facilities alike;

ShiftKey is well-positioned to lead this evolution, offering innovative features that adapt to industry needs while maintaining simplicity and reliability for users nationwide․

cell structure and function worksheet pdf

Understanding cell structure and function is fundamental to biology․ Worksheets and PDF resources offer interactive ways to explore cell components, their roles, and interrelationships, enhancing learning through practical exercises․

1․1 Definition of a Cell

A cell is the smallest structural and functional unit of living organisms, often referred to as the “basic unit of life․” It is a compact, self-contained entity that performs all essential life functions․ Cells are universally present in all living things, from single-celled organisms like bacteria to multicellular organisms like plants and animals․ The cell consists of cytoplasm, genetic material (DNA), and various organelles that specialize in specific functions․ Cells are the building blocks of life, and their study is fundamental to understanding biology․ Worksheets and PDF resources provide detailed definitions and diagrams to help students grasp the concept of cells and their significance in living systems․

1․2 Importance of Cells in Living Organisms

Cells are the foundational units of life, essential for the survival and function of all living organisms․ They are responsible for growth, reproduction, and maintaining life processes․ Cells specialize to perform specific roles, enabling organisms to adapt to their environments․ In multicellular organisms, cells work together, forming tissues and organs that carry out complex functions․ Without cells, life as we know it would not exist․ Worksheets and educational resources emphasize the importance of cells, helping students understand their role in sustaining life and enabling biological processes․ This knowledge is crucial for comprehending health, disease, and the intricate mechanisms of living systems․

1․3 Overview of Cell Organelles and Their Functions

Cell organelles are specialized structures within cells that perform specific functions essential for cellular survival and activity․ The mitochondria, known as the powerhouse, generate energy through ATP production․ The nucleus stores genetic material and regulates cell growth and reproduction․ The endoplasmic reticulum synthesizes proteins and lipids, while ribosomes produce proteins․ Lysosomes act as digestive units, breaking down waste and foreign substances․ The Golgi complex processes and transports molecules within the cell․ These organelles work together to maintain cellular homeostasis and enable complex biological processes․ Worksheets and PDF resources often include diagrams and exercises to help students identify and understand the roles of these critical cell components․

Cell Membrane

The cell membrane is a protective barrier regulating entry and exit of substances, maintaining internal conditions while allowing essential nutrients and waste to pass through selectively․

2․1 Structure and Components of the Cell Membrane

The cell membrane, also known as the plasma membrane, is a thin, semi-permeable structure composed primarily of a phospholipid bilayer with embedded proteins․ These proteins serve various functions, including acting as channels, receptors, and enzymes, facilitating transport and communication․ The fluid mosaic model describes the membrane’s dynamic nature, where components move and adjust to maintain cellular homeostasis․ Cholesterol molecules are also present, contributing to the membrane’s stability and fluidity․ This complex structure ensures the membrane’s selective permeability, allowing certain substances to pass while restricting others, thereby protecting the cell and regulating its internal environment․ Worksheets often include labeling exercises to identify these components and their roles․

2․2 Functions of the Cell Membrane

The cell membrane performs several vital functions essential for cellular survival and operation․ It acts as a protective barrier, safeguarding the cell’s internal components while allowing the passage of necessary nutrients and expulsion of waste products․ The membrane also facilitates communication through signaling molecules, enabling cells to respond to external stimuli․ Additionally, it plays a role in maintaining cellular identity by displaying specific surface proteins․ Worksheets often include fill-in-the-blank exercises and diagrams to help students understand these functions, emphasizing how the membrane’s structure supports its roles in transport, protection, and interaction with the cell’s environment․

2․3 Selective Permeability and Transport Mechanisms

The cell membrane’s selective permeability allows it to regulate the movement of substances in and out of the cell, ensuring proper internal conditions․ Transport mechanisms include passive transport, such as diffusion and osmosis, which require no energy, and active transport, which uses energy to move substances against concentration gradients․ Worksheets often include diagrams and exercises to illustrate these processes, helping students understand how the membrane maintains cellular homeostasis․ These mechanisms are vital for nutrient uptake, waste removal, and ion balance, ensuring the cell functions efficiently․ Educational resources, like PDF guides, provide detailed explanations and activities to reinforce these concepts․

Cell Organelles

Cell organelles are specialized structures within cells, each performing unique functions essential for cellular operation․ Worksheets and PDF resources provide detailed diagrams and exercises to explore their roles and interactions․

3․1 Mitochondria: Structure and Function

The mitochondria, often called the powerhouse of the cell, generate energy through cellular respiration․ Worksheets and PDF guides detail its structure, including inner and outer membranes, cristae, and matrix, emphasizing their roles in ATP production․ Interactive exercises help students visualize how mitochondria convert glucose into energy, essential for cellular functions․ These resources also cover the importance of mitochondria in maintaining cellular homeostasis and their involvement in processes like apoptosis․ By engaging with these materials, learners gain a comprehensive understanding of mitochondrial dynamics and their critical role in sustaining life․

3․2 Nucleus: Role in Cell Growth and Reproduction

The nucleus is the control center of the cell, housing genetic material essential for growth and reproduction․ Worksheets and PDF resources highlight its role in storing DNA, regulating gene expression, and initiating cell division․ Interactive activities, such as labeling diagrams and completing fill-in-the-blank exercises, help students understand how the nucleus directs cellular activities․ These materials also explore the nucleus’s function in protein synthesis and its role in maintaining cellular integrity․ By studying the nucleus, learners gain insights into how cells regulate their functions and respond to environmental changes, reinforcing the nucleus’s importance as the cell’s command center․

3․3 Endoplasmic Reticulum: Types and Functions

The endoplasmic reticulum (ER) is a vital organelle involved in protein synthesis, lipid production, and calcium storage․ Worksheets and PDF resources detail its two forms: the rough ER, studded with ribosomes for protein synthesis, and the smooth ER, which produces lipids and detoxifies chemicals․ Educational materials often include diagrams and labeling exercises to help students distinguish between these types․ Fill-in-the-blank questions and crossword puzzles reinforce knowledge of ER functions, such as transporting materials within the cell and aiding in membrane formation․ These activities highlight the ER’s role in maintaining cellular health and efficiency, making it a key focus in cell structure studies․

3․4 Ribosomes: Site of Protein Synthesis

Ribosomes are small, spherical organelles found throughout the cytoplasm, either free-floating or attached to the endoplasmic reticulum․ They are the primary sites of protein synthesis, translating mRNA into specific amino acid sequences․ Worksheets often include diagrams of ribosomes, highlighting their two subunits and the role of rRNA․ Activities such as labeling exercises and fill-in-the-blank questions help students understand how ribosomes function in transcription and translation․ Additionally, matching games link ribosomes to their roles in producing enzymes, hormones, and structural proteins․ These resources emphasize the ribosome’s essential role in cellular function, making them a focal point in studies of cell structure and biochemistry․

3․5 Lysosomes: Digestive and Protective Roles

Lysosomes are membrane-bound organelles containing digestive enzymes that break down cellular waste, foreign substances, and pathogens․ They play a crucial role in cellular digestion and protection by recycling damaged organelles and maintaining cellular cleanliness․ Worksheets often include diagrams of lysosomes, highlighting their acidic environment and enzyme storage․ Activities such as fill-in-the-blank questions and labeling exercises help students understand lysosomal functions․ PDF resources emphasize lysosomes’ role in autophagy and immune responses, while puzzles reinforce their importance in cellular defense․ These interactive tools make learning about lysosomes engaging and comprehensive, ensuring students grasp their vital role in maintaining cellular health and homeostasis․

3․6 Golgi Complex: Processing and Transporting Molecules

The Golgi complex, or Golgi apparatus, is a complex organelle responsible for processing, modifying, and transporting molecules within the cell․ It receives proteins and lipids from the endoplasmic reticulum, further modifies them, and distributes them to their final destinations․ Worksheets often include diagrams and labeling exercises to illustrate the Golgi’s structure and function․ PDF resources detail its role in protein synthesis and secretion, while interactive activities like matching games help students understand the flow of molecules through the Golgi․ These educational tools emphasize the Golgi’s importance in cellular logistics, ensuring students comprehend its vital role in maintaining cellular organization and function․

Cell Energy and Metabolism

Cells generate energy through photosynthesis and cellular respiration, producing ATP, the energy currency․ Worksheets and PDFs explore these processes, enhancing understanding of metabolic pathways and energy conversion․

4․1 Photosynthesis and Its Organelle (Chloroplast)

Photosynthesis is the process by which plants, algae, and some bacteria convert light energy into chemical energy, producing glucose and oxygen․ This vital process occurs in the chloroplast, an organelle found in plant cells․ The chloroplast contains pigments like chlorophyll, which absorbs light energy, and structures such as thylakoids and the stroma, where light-dependent and light-independent reactions take place․ Worksheets and PDF resources provide detailed diagrams, fill-in-the-blank exercises, and labeling activities to help students understand the structure and function of chloroplasts․ These materials also explore the importance of photosynthesis in sustaining life and its relationship with cellular respiration․ Interactive exercises make learning engaging and effective․

4․2 Cellular Respiration: Process and Importance

Cellular respiration is the process by which cells break down glucose to produce energy in the form of ATP․ It occurs in three main stages: glycolysis, the Krebs cycle, and the electron transport chain․ Glycolysis takes place in the cytosol, while the Krebs cycle and electron transport chain occur in the mitochondria․ This process is essential for converting glucose into usable energy, supporting cellular functions like growth, repair, and metabolic activities․ Worksheets and PDF resources provide detailed diagrams, fill-in-the-blank exercises, and matching games to help students understand the stages of cellular respiration and its importance in sustaining life․ These materials also highlight its relationship with photosynthesis, as both processes involve energy conversion and storage․

4․3 ATP: Energy Currency of the Cell

ATP (Adenosine Triphosphate) is the primary energy carrier in cells, often referred to as the “energy currency․” It stores energy in phosphate bonds and is essential for various cellular activities like muscle contraction, transport of molecules, and biosynthesis․ ATP is produced during cellular respiration, primarily in the mitochondria, and is broken down to release energy when needed․ Educational resources, such as worksheets and PDF guides, provide detailed diagrams and exercises to explain ATP’s structure, function, and role in energy transfer․ These materials help students understand how ATP is synthesized from ADP and inorganic phosphate and how it powers cellular processes, making it a critical concept in cell biology․

Worksheet Activities

Engage with cell structure and function through interactive worksheets, including matching exercises, fill-in-the-blanks, and diagrams․ These tools help students explore and apply knowledge of cellular components effectively․

5․1 Identifying Cell Organelles: Matching and Labeling Exercises

Matching and labeling exercises are essential for recognizing cell organelles․ Worksheets often feature diagrams of organelles like mitochondria, ribosomes, and lysosomes, requiring students to identify and label them accurately․ These activities enhance visual recognition and understanding of cellular structures․ Some exercises pair organelle names with their functions, reinforcing memory and knowledge retention․ Interactive PDFs allow students to drag-and-drop labels or match terms, making learning engaging․ These tools are particularly effective for visual learners, helping them associate organelle shapes with their roles in the cell․ By mastering these exercises, students build a strong foundation for understanding cellular processes and functions․

5․2 Fill-in-the-Blank Questions on Cell Functions

Fill-in-the-blank questions are a popular tool for assessing understanding of cell functions․ Worksheets often include sentences with missing terms, such as “The powerhouse of the cell is the ______” or “The cell membrane is responsible for ______․” These exercises help students recall and reinforce key terminology and concepts․ For example, questions might focus on organelle functions, cellular processes, or membrane transport mechanisms․ Answers are typically provided separately or at the end of the worksheet for self-assessment; These exercises are widely available in PDF formats and are ideal for independent practice, ensuring students grasp fundamental cell biology concepts effectively․

5․3 Diagrams for Coloring and Describing Cellular Components

Diagrams for coloring and describing cellular components are an engaging way to learn about cell structure․ Worksheets often include detailed illustrations of cells, labeling key organelles like mitochondria, ribosomes, and the nucleus․ Students are encouraged to color-code different parts to enhance visualization and understanding․ Accompanying questions or prompts ask learners to describe the functions of each component, reinforcing their roles within the cell․ These activities are particularly effective for visual and kinesthetic learners, making complex cellular concepts more accessible․ PDF resources frequently include such diagrams, offering an interactive and hands-on approach to studying cell biology․ This method helps students develop a clearer understanding of cellular organization and functionality․

Case Studies and Practical Examples

Case studies and practical examples provide real-world applications of cellular concepts, helping students connect theoretical knowledge to practical scenarios, enhancing understanding of cell structure and function․

6․1 Comparing Plant and Animal Cells

Comparing plant and animal cells helps students understand their structural and functional differences․ Worksheets often include activities like fill-in-the-blank questions, labeling diagrams, and crossword puzzles․ Plant cells have features like cell walls, chloroplasts, and vacuoles, while animal cells lack these but may have centrioles․ Activities focus on identifying these organelles and explaining their roles․ For example, chloroplasts enable photosynthesis in plant cells, while animal cells rely on other organelles for energy․ Such comparisons highlight cellular specialization and adaptation to different environments․ Practical exercises, like creating Venn diagrams, encourage critical thinking and visual learning․ These tools make complex biological concepts engaging and accessible for students of all ages․

6․2 Relating Cell Organelles to Community Functions

Relating cell organelles to community functions helps students visualize their roles in a larger system․ Worksheets often include exercises where organelles like mitochondria, nuclei, or lysosomes are compared to community structures such as power plants, city halls, or recycling centers․ This analogy emphasizes how organelles collaborate to maintain cellular function, much like community members work together for societal needs․ Activities may involve creating charts or essays to draw these connections․ Such comparisons make abstract cellular processes more relatable and engaging, fostering a deeper understanding of how cells operate as miniature societies․ These exercises are particularly effective in helping students grasp the interconnectedness of cellular components and their importance in sustaining life․

6․3 Solving Puzzles on Cell Structure and Function

Solving puzzles on cell structure and function engages students in an interactive learning experience․ Worksheets often include crosswords, word searches, or matching games that focus on identifying cell parts and their roles․ These activities help reinforce memory and understanding of cellular components․ Puzzles may involve matching organelles to their functions or arranging cell structures in the correct order․ For example, students might solve a crossword where clues relate to mitochondria, ribosomes, or the cell membrane․ Such exercises are ideal for visual and kinesthetic learners, making complex concepts more accessible․ They also encourage critical thinking and problem-solving skills in a fun and competitive way, suitable for various age groups, including middle school students․

Mastering cell structure and function is essential for understanding biology․ Additional resources, like PDF worksheets, offer further practice and review opportunities to reinforce learning and retention․

7․1 Summary of Key Concepts

7․2 Recommended PDF Worksheets for Further Practice

For further practice, several PDF worksheets are available online, offering comprehensive exercises on cell structure and function․ Resources like “WORKSHEET 2․2 Cell Structure and Function” provide multiple-choice questions, fill-in-the-blank exercises, and diagrams for coloring․ These tools cover key topics such as cell organelles, their functions, and processes like photosynthesis and cellular respiration․ Additionally, interactive puzzles and labeling activities reinforce understanding of cellular components․ Websites like Docsity and educational platforms offer downloadable PDFs tailored for various grade levels, ensuring students can deepen their knowledge through practical exercises․ These resources are ideal for reinforcing classroom learning and preparing for assessments․

insect lore caterpillar instructions

Insect lore, particularly surrounding caterpillars, is rich with cultural and symbolic meaning. The woolly bear caterpillar, for instance, is famously linked to winter weather prediction folklore, reflecting humanity’s deep connection to nature and its rhythms. This tradition highlights the transformative journey of caterpillars, embodying resilience and change, while also showcasing the blend of myth and observation in predicting seasonal shifts.

The Cultural and Historical Significance of Caterpillars

Caterpillars have long held a special place in human culture and history, often symbolizing transformation, resilience, and the cycles of nature. In many societies, they are viewed as harbingers of change, reflecting the natural world’s rhythms. The woolly bear caterpillar, for example, is central to winter weather folklore, with its color bands and direction of travel believed to predict seasonal severity. This tradition, rooted in observation and superstition, highlights humanity’s deep connection to the environment. Historically, caterpillars have also appeared in myths and legends, embodying themes of growth and metamorphosis. Their life cycle, from crawling creature to soaring butterfly, has inspired stories and symbolism across cultures, making them a cherished and enduring motif in folklore and tradition.

Understanding the Role of Caterpillars in Folklore

Caterpillars have played a significant role in folklore worldwide, often serving as symbols of transformation and natural cycles. In many cultures, they are seen as harbingers of change, embodying the mystery of growth and metamorphosis. The woolly bear caterpillar, for instance, is central to weather prediction lore, with its 13 body segments believed to represent the 13 weeks of winter. Folklore suggests that the width of its color bands—orange and black—indicates the severity of the coming winter, with darker bands signaling colder weeks. This tradition reflects humanity’s attempt to connect with nature’s rhythms and predict the unpredictable. Beyond weather prediction, caterpillars often symbolize resilience and renewal, inspiring stories and beliefs that transcend generations. Their ability to transform into entirely new creatures has made them a powerful metaphor in cultural and spiritual narratives.

Origin of Caterpillar Folklore

The origins of caterpillar folklore trace back to colonial American traditions, where the woolly bear caterpillar’s color bands were believed to predict winter severity. Dr. C.H. Curran’s 1948 study popularized this belief, blending observation with cultural symbolism to create a lasting legend.

The Legend of the Woolly Bear Caterpillar

The woolly bear caterpillar, also known as the woolly worm, is central to a popular weather folklore tradition. According to legend, its 13 body segments correspond to the 13 weeks of winter, with the coloration of these segments predicting winter’s severity. A wider black band allegedly signals a harsher winter, while a broader brown band suggests a milder season. This belief, rooted in colonial American folklore, gained prominence after Dr. C.H. Curran’s 1948 study, which attempted to correlate the caterpillar’s banding with winter weather patterns. Though scientifically inconclusive, the legend endures as a charming cultural practice, blending nature observation with traditional storytelling.

Historical Background of Winter Weather Prediction

Winter weather prediction has ancient roots, with early societies relying on natural signs to anticipate seasonal changes. Insect behavior, particularly that of the woolly bear caterpillar, became a focal point in folklore. This tradition likely began with observations of caterpillars seeking shelter in autumn, signaling the approach of colder months. The idea that their coloration could forecast winter’s severity emerged in colonial America, where farmers and settlers sought any advantage in preparing for harsh seasons. While modern science dismisses such methods as mere superstition, the practice remains a cherished part of cultural heritage, reflecting humanity’s enduring connection to nature and its rhythms. The blend of observation and storytelling in this tradition underscores its lasting appeal.

Cultural Symbolism of Caterpillars

Caterpillars symbolize transformation and resilience across cultures, embodying change and renewal. Their life cycle inspires reflections on growth and metamorphosis in human experiences and natural cycles.

Caterpillars as Symbols of Transformation

Caterpillars are profound symbols of transformation, mirroring life’s journey of growth and metamorphosis. Their remarkable process, from crawling earthbound creatures to soaring butterflies, captivates human imagination globally. This transformation is often seen as a metaphor for personal change and renewal, inspiring reflections on resilience and adaptability. In many cultures, the caterpillar represents the potential for rebirth and the cyclical nature of existence. Its ability to endure harsh conditions and emerge transformed resonates deeply, offering lessons in perseverance and the beauty of natural cycles.

Native American Perspectives on Caterpillars

Native American cultures often view caterpillars with reverence, seeing them as symbols of humility and meekness. In Navajo mythology, caterpillars hold a special place, representing resilience and adaptability. They are sometimes depicted in stories as quiet, unassuming creatures that thrive through determination. The Navajo people also associate caterpillars with the wisdom of transformation, as they undergo their remarkable life cycle. This perspective aligns with the broader theme of nature’s interconnectedness, emphasizing the balance between life stages and the environment. While not always central to their legends, caterpillars are valued for their subtle strength and enduring spirit, offering lessons in patience and the beauty of gradual change.

European Folklore and the Caterpillar’s Meaning

In European folklore, caterpillars often symbolize transformation and renewal, reflecting their remarkable life cycle. They are sometimes seen as omens, with their presence believed to signal future events. In some traditions, caterpillars are associated with witchcraft, representing mystery and hidden powers. The woolly bear caterpillar, in particular, has been a focal point of European weather lore, with its color bands supposedly predicting winter’s severity. This folklore highlights the deep cultural significance of caterpillars, blending natural observation with symbolic interpretation. Their ability to endure harsh conditions and transform into beautiful butterflies has captivated imaginations, making them enduring symbols in European storytelling and tradition.

The Woolly Bear Caterpillar in Folklore

The woolly bear caterpillar is a key figure in folklore, with its 13 segments and color bands predicting winter severity. Its travel direction also signals winter’s approach, enhancing its predictive lore.

The 13 Segments and Winter Weeks

The woolly bear caterpillar’s body is divided into 13 distinct segments, a feature central to its folklore. According to tradition, each segment corresponds to one week of winter, making the caterpillar a natural calendar for the season. The black segments are believed to signify colder weeks, while the brown segments represent milder ones. This belief, popularized in the 1940s by Dr. C.H. Curran’s study, suggests that the caterpillar’s coloration and band width can predict winter’s severity. While the study was localized and not scientifically conclusive, it fueled the widespread notion that the woolly bear’s appearance holds prophetic value. The 13 segments, therefore, serve as a symbolic bridge between nature and human attempts to forecast the future, blending observation with cultural storytelling.

Color Bands and Winter Severity

The woolly bear caterpillar’s color bands are believed to predict winter severity, with wider black bands signaling harsher winters. According to folklore, the more predominant the black segments, the colder and snowier the winter will be. Conversely, a wider brown band suggests a milder season. This belief, rooted in traditional weather lore, has been passed down through generations. Dr. C.H. Curran’s 1948 study, though limited in scope, popularized the idea that the caterpillar’s coloration could forecast winter conditions. While modern science disputes its accuracy, the color band theory remains a charming and enduring part of cultural tradition, reflecting humanity’s fascination with nature’s potential to predict the future.

Direction of Travel as a Predictor

Another aspect of woolly bear caterpillar folklore involves their direction of travel. Legend suggests that if a caterpillar is moving south, it is attempting to escape harsh winter conditions. This directional behavior is thought to indicate the approaching severity of cold weather. Observing caterpillars migrating toward warmer areas may signal a particularly harsh winter ahead. While this theory lacks scientific backing, it remains a popular element of weather prediction lore. The combination of color bands and travel direction creates a multifaceted system of natural forecasting, captivating the imagination of many. These beliefs highlight the creative ways cultures have connected insect behavior to environmental changes, blending observation with storytelling to predict seasonal patterns.

Scientific Perspective on Caterpillar Folklore

The scientific community views caterpillar folklore as anecdotal, with studies like Dr. Curran’s lacking broad applicability. There’s no empirical evidence supporting these weather predictions, making it a cultural phenomenon rather than scientific fact.

The Study by Dr. C.H. Curran

In 1948, Dr. C.H. Curran, an entomologist at the American Museum of Natural History, conducted a study on woolly bear caterpillars to explore their potential for predicting winter weather. His research focused on the caterpillar’s 13 body segments and the width of their black and brown bands. According to folklore, the wider the black bands, the colder the winter, while more brown bands indicated a milder season. Curran’s findings, published in the New York Herald, suggested a possible correlation, though the study’s small sample size and localized data limited its scientific validity. Despite this, Curran’s work popularized the idea, blending scientific curiosity with cultural tradition, and remains a notable example of how folklore intersects with scientific inquiry.

Modern Scientific Views on Weather Prediction

Modern science largely views caterpillar-based weather prediction as folklore rather than reliable methodology. While the idea of using woolly bear caterpillars to predict winter severity persists in cultural traditions, most entomologists and meteorologists dismiss it as anecdotal. Studies, including Dr. C.H. Curran’s, lack robust scientific backing due to small sample sizes and localized data. The coloration of caterpillars is influenced by factors like age and environmental conditions, not future weather patterns. Advanced meteorological tools, such as satellite imaging and computer models, provide far greater accuracy. Thus, while the folklore remains charming, it is not a scientifically validated method for predicting weather, emphasizing the distinction between cultural tradition and empirical evidence.

Biology and Behavior of the Woolly Bear Caterpillar

The woolly bear caterpillar, the larval stage of the Isabella tiger moth, is recognized by its fuzzy appearance and black and orange banding. These caterpillars emerge in summer, feeding on plants before seeking shelter in fall. Their distinctive 13-segment body is often linked to winter prediction lore. The caterpillar’s coloration is determined by its age and environmental factors, not weather forecasting. During winter, they enter a state of dormancy, protected by their woolly coats. In spring, they pupate and transform into adult moths. This life cycle exemplifies resilience and adaptation, captivating both scientific interest and cultural imagination.

Caterpillar Folklore in Different Cultures

Caterpillars hold symbolic roles in diverse cultures, representing transformation and resilience. Native American tribes view them as symbols of humility, while European folklore often ties them to weather and destiny, reflecting their universal fascination and cultural significance.

Navajo Culture and Caterpillar Mythology

In Navajo culture, caterpillars are imbued with symbolic meaning, often representing transformation and resilience. Unlike other Native American tribes where caterpillars are minor figures, Navajo mythology elevates them to notable status. They are seen as symbols of humility and patience, teaching the importance of quiet endurance. The caterpillar’s life cycle mirrors the Navajo belief in the interconnectedness of life and the balance of nature. Stories often depict caterpillars as messengers or teachers, guiding individuals through times of change. Their ability to transform into butterflies underscores themes of renewal and spiritual growth, making them significant in both cultural and spiritual contexts.

Chinese Folklore and Caterpillar Symbolism

In Chinese folklore, caterpillars are often seen as symbols of resilience and endurance, embodying the ability to thrive in challenging conditions. Their transformative life cycle is viewed as a metaphor for personal growth and spiritual elevation. According to tradition, the caterpillar’s journey from earth to winged beauty reflects the balance between opposing forces in nature. In some stories, caterpillars are associated with patience and determination, while their cocoons symbolize renewal and rebirth. This symbolism is deeply rooted in Chinese philosophy, emphasizing harmony with nature and the cyclical nature of life. The caterpillar’s ability to endure hardships and emerge transformed resonates with cultural values of perseverance and hope.

Other Global Perspectives on Caterpillars

Beyond North America and Europe, caterpillars hold diverse symbolic meanings in cultures worldwide. In many African traditions, caterpillars are seen as omens of change, while in parts of Asia, they are revered for their role in silk production, symbolizing wealth and prosperity. Indigenous Australian stories often depict caterpillars as ancestral beings, linking them to the land and its creation. In some South American cultures, caterpillars are associated with fertility and abundance, reflecting their role in agricultural ecosystems. These varied perspectives highlight the universal fascination with caterpillars, blending natural observation with cultural storytelling to create rich, meaningful narratives about life, transformation, and the environment.

Practical Instructions for Interpreting Caterpillars

Identify the woolly bear caterpillar by its fuzzy appearance and 13 distinct segments. Observe color bands: more black indicates a harsher winter, while brown suggests milder conditions. Note its direction of travel and behavior patterns for additional insights.

How to Identify the Woolly Bear Caterpillar

The woolly bear caterpillar, also known as the woolly worm, is easily recognizable due to its distinctive fuzzy appearance and 13 body segments. It typically has a rusty brown or black coloration, with varying band widths. To identify it, look for its fuzzy coat and segmented body structure. The caterpillar is the larval stage of the Isabella tiger moth and is commonly found in autumn. Its body is covered in thick, bristle-like hairs, giving it a woolly texture. The color bands—ranging from black to brown—play a key role in folklore predictions. Observing its size, color, and behavior can help in accurate identification. This caterpillar is often seen crawling on surfaces during fall, seeking shelter for overwintering.

Understanding the Color Banding

The woolly bear caterpillar’s color banding is central to its folklore significance. The caterpillar has 13 distinct segments, with varying widths of black and brown bands. According to tradition, the width of these bands predicts winter severity. A wider black band allegedly indicates a harsher winter, while broader brown bands suggest milder conditions. The number of black segments is believed to correspond to the number of cold winter weeks. This folklore, though not scientifically proven, has been popularized by studies like Dr. C.H. Curran’s 1948 research, which attempted to correlate band widths with weather patterns. While the coloration is actually influenced by the caterpillar’s age and environmental factors, the bands remain a fascinating element of seasonal lore, blending nature observation with cultural tradition.

Recording and Analyzing Caterpillar Behavior

Observing and documenting caterpillar behavior is a fascinating way to engage with insect lore. Start by noting the caterpillar’s direction of travel, as folklore suggests southerly movement indicates escaping harsh winter. Record the color banding, measuring the widths of black and brown segments to predict winter severity. Track the caterpillar’s activity over days, observing its foraging and shelter-seeking habits. Use a journal to log observations, including dates and environmental conditions. Share findings with local communities or online forums to compare insights. While scientific validation is limited, this practice fosters a deeper connection to nature and cultural traditions. Many festivals, like the Woolly Worm Festival, even celebrate such observations, blending folklore with community engagement. This hands-on approach makes insect lore accessible and enjoyable for all ages.

Festivals and Celebrations

Festivals celebrating caterpillar folklore, like the Woolly Worm Festival, blend tradition with community fun, highlighting the cultural significance of these creatures in predicting winter weather through their unique behaviors.

Woolly Worm Festivals in the United States

Woolly Worm Festivals are vibrant fall events celebrating the folklore surrounding the woolly bear caterpillar. Held annually in various U.S. towns, these festivals blend tradition, community spirit, and weather prediction fun. The most famous occurs in Ohio, featuring caterpillar races, live music, and local food. Participants believe the caterpillar’s color bands predict winter severity, with darker bands signaling colder weeks. These events highlight the cultural significance of insect lore while fostering community bonding. While scientifically unproven, the festivals remain popular, offering a lighthearted way to engage with nature and folklore.

Community Events and Caterpillar Predictions

Community events centered around caterpillar predictions, like Woolly Worm Festivals, foster cultural engagement and entertainment. These gatherings often feature caterpillar races,where the creatures’ movements are humorously interpreted as weather indicators. Participants examine the color bands on woolly bears, believing broader black segments signal harsher winters. Such events blend folklore with science, sparking discussions on weather prediction methods. They also promote environmental awareness and appreciation for insects’ roles in ecosystems. While the predictions lack scientific backing, they serve as a fun, communal activity, strengthening local ties and celebrating nature’s intriguing lore. These events remind us of the enduring charm of traditional beliefs intertwined with modern community spirit.

Modern-Day Celebrations and Their Significance

Modern-day celebrations, such as Woolly Worm Festivals, continue to honor the folklore surrounding caterpillars, blending tradition with contemporary entertainment. These events, held across the U.S., often feature caterpillar races and weather prediction contests, drawing crowds eager to engage in the whimsical lore. The festivals serve as a platform to celebrate nature, fostering a sense of community and connection to the environment. By incorporating educational elements, they also highlight the ecological role of caterpillars and their life cycles.

The significance of these celebrations lies in their ability to preserve cultural heritage while adapting to modern times. They offer a lighthearted way to explore the intersection of folklore and science, inspiring curiosity about the natural world. Ultimately, these events remind us of the enduring appeal of traditions rooted in nature and storytelling.

Caterpillar folklore, blending tradition and science, captivates cultures worldwide, symbolizing transformation and resilience. The woolly bear’s enduring legacy in weather lore and festivals highlights our timeless connection to nature’s rhythms and community celebrations.

The Enduring Appeal of Caterpillar Folklore

The fascination with caterpillar folklore endures due to its blend of tradition and natural observation. The woolly bear caterpillar, with its 13 segments symbolizing winter weeks, captivates people globally. Its color bands, believed to predict weather severity, merge science and myth, offering a sense of connection to nature. Cultural celebrations like the Woolly Worm Festival highlight its symbolic role in community life. Beyond weather lore, the caterpillar’s transformation into a butterfly embodies resilience and change, resonating deeply with human experiences. This timeless appeal ensures caterpillar folklore remains a cherished part of our collective heritage, bridging generations and inspiring both scientific curiosity and cultural celebration.

Combining Tradition and Science

The appeal of caterpillar folklore lies in its unique blend of tradition and scientific curiosity. While the woolly bear caterpillar’s ability to predict winter weather remains unproven scientifically, it has sparked fascinating research, such as Dr. C.H. Curran’s 1948 study. This blend of myth and science captivates audiences, as it bridges cultural traditions with natural observations. Festivals celebrating the woolly bear caterpillar highlight this intersection, where communities embrace both the whimsy of folklore and the intrigue of scientific inquiry. While scientists remain skeptical about the caterpillar’s predictive powers, the cultural significance endures, offering a charming example of how tradition and science can coexist in our understanding of nature.

Final Thoughts on Caterpillar Instructions

Exploring caterpillar lore offers a fascinating journey through culture, science, and tradition. The woolly bear caterpillar, with its 13 segments and color bands, captivates us as a symbol of transformation and a whimsical weather predictor. While scientific studies, like Dr. Curran’s, show limited evidence for their predictive accuracy, the cultural significance remains strong. The blend of folklore and natural observation creates a unique way to engage with nature. Whether participating in festivals or simply observing these creatures, caterpillars remind us of the beauty in combining tradition with scientific inquiry. Their enduring appeal invites us to appreciate both the myths they inspire and the biological marvels they represent, fostering a deeper connection to the natural world.

medicare chiropractic billing guide

Medicare chiropractic billing involves specific guidelines for CPT codes, documentation, and reimbursement. Understanding these rules ensures accurate claims and compliance with Medicare regulations for chiropractic services.

Overview of Medicare Coverage for Chiropractic Services

Medicare Part B covers chiropractic services for manual manipulation of the spine to correct subluxations. Covered services include CPT codes 98940, 98941, and 98942, which represent treatments for 1-2, 3-4, and 5 spinal regions, respectively. However, Medicare excludes extraspinal chiropractic treatments and maintenance therapy without a clear medical necessity. The AT modifier is required for acute treatment claims to ensure reimbursement. Documentation must justify the medical necessity of the procedure. Understanding these guidelines is crucial for chiropractors to provide covered services effectively and avoid claim denials. Proper adherence ensures patients receive necessary care while maintaining compliance with Medicare regulations.

Importance of Understanding Billing Guidelines

Accurate billing is essential for chiropractors to avoid claim denials and delays. Understanding Medicare guidelines ensures compliance with specific CPT codes, modifiers, and documentation requirements. Proper use of codes like 98940, 98941, and 98942, along with the AT modifier for acute treatment, is crucial for reimbursement. Incomplete or incorrect documentation can lead to denied claims, affecting practice revenue. Adhering to guidelines also ensures patients receive necessary care while maintaining trust and financial stability for the practice. Staying updated on billing rules helps chiropractors navigate the complex Medicare system efficiently and effectively, ensuring seamless claims processing and optimal patient outcomes.

CPT Codes for Chiropractic Services

CPT codes 98940, 98941, and 98942 are used for chiropractic manipulative treatment, covering 1-2, 3-4, and 5 spinal regions, respectively. Accurate coding ensures proper reimbursement.

CPT Code 98940: Chiropractic Manipulative Treatment (CMT) for 1-2 Spinal Regions

CPT code 98940 is used for chiropractic manipulative treatment (CMT) involving 1-2 spinal regions. It covers manual adjustments to the cervical, thoracic, lumbar, or pelvic areas. This code is essential for billing Medicare for treatments targeting up to two regions. Proper documentation, including the AT modifier for acute treatment, is required to ensure reimbursement. Accurate use of this code helps chiropractors comply with Medicare guidelines and avoid claim denials. Understanding the specifics of 98940 ensures efficient billing for services provided to Medicare beneficiaries.

CPT Code 98941: CMT for 3-4 Spinal Regions

CPT code 98941 is designated for chiropractic manipulative treatment (CMT) involving three to four spinal regions. This code applies when adjustments are made to multiple areas, such as the cervical, thoracic, and lumbar regions, or a combination of these. Proper documentation, including the AT modifier for acute treatment, is required for Medicare reimbursement. It is essential to bill this code accurately to reflect the extent of treatment provided. Failure to adhere to guidelines may result in claim denials. Understanding the correct use of 98941 ensures compliance with Medicare billing standards for treatments involving three to four spinal regions.

CPT Code 98942: CMT for 5 Spinal Regions

CPT code 98942 is used for chiropractic manipulative treatment (CMT) involving five spinal regions, covering the cervical, thoracic, lumbar, sacral, and pelvic areas. This code represents comprehensive treatment across multiple regions. Medicare requires the AT modifier for acute treatment to be included with this code. Proper documentation, including the regions treated, is essential for reimbursement. Billing 98942 accurately reflects extensive spinal adjustments. Noncompliance with guidelines may lead to denied claims. Correct usage ensures adherence to Medicare standards for treatments involving five spinal regions, ensuring timely and accurate reimbursement for chiropractic services provided.

Documentation Requirements for CPT Codes

Accurate documentation is crucial for Medicare reimbursement of chiropractic services. Claims must include specific CPT codes (e.g., 98940, 98941, 98942) and the AT modifier for acute treatment. Documentation should detail medical necessity, treatment plans, and patient progress. Records must justify the use of specific codes, including the number of spinal regions treated. Proper documentation ensures compliance with Medicare guidelines and prevents claim denials. Chiropractors must maintain detailed records, including dates, procedures, and outcomes, to support billing accuracy and adherence to regulations. Failure to meet documentation standards can result in delayed or denied payments.

Billing Guidelines for Chiropractic Services

Medicare billing for chiropractic services requires adherence to specific guidelines, including proper use of CPT codes, modifiers, and submission of claims via the CMS-1500 form. Accurate documentation and compliance with NCCI edits ensure timely reimbursement and avoid denials. Chiropractors must verify patient eligibility and submit claims within required timeframes. Understanding these guidelines is essential for efficient and compliant billing processes.

Medicare Claims Submission Process

Chiropractors must submit claims using the CMS-1500 form, ensuring all required fields are completed accurately. Claims must include the appropriate CPT codes (e.g., 98940, 98941, 98942) and modifiers, such as the AT modifier for acute treatment. Submission can be done electronically or via mail, but electronic filing is recommended for faster processing. Claims must be submitted within Medicare’s timely filing deadline, typically one year from the date of service. Accurate documentation, including medical necessity and treatment details, must accompany each claim to avoid delays or denials. Compliance with NCCI edits is also essential to ensure proper reimbursement.

Use of CMS-1500 Claim Form

The CMS-1500 form is the standard for billing Medicare for chiropractic services. It requires precise completion of all fields, including patient demographics, service details, and provider information. Chiropractors must list the appropriate CPT codes (e.g., 98940, 98941, 98942) and apply necessary modifiers like AT for acute treatment. The form must be signed and dated by the provider to validate the claim. Accurate completion ensures timely processing and reimbursement, while errors may lead to delays or denials. Proper use of the CMS-1500 form is crucial for compliance with Medicare billing regulations and seamless claims submission.

Prior Authorization and Referral Requirements

Prior authorization is generally not required for chiropractic services under Medicare, but specific conditions may apply. Referrals are typically needed when services are provided in certain settings or for patients with complex conditions. For Medicare Part A, referrals are often required for inpatient or outpatient services. Under Part B, referrals may be necessary for services like manual manipulation of the spine. Failure to obtain a valid referral can result in denied claims. Chiropractors must ensure services are medically necessary and documented appropriately to meet Medicare’s referral and authorization criteria. Compliance with these requirements is essential for successful reimbursement and patient care continuity.

National Correct Coding Initiative (NCCI) Edits

National Correct Coding Initiative (NCCI) edits ensure proper coding practices by preventing incorrect combinations of codes. Chiropractors must adhere to these guidelines to avoid denied claims. NCCI edits identify code pairs that should not be billed together, such as duplicate services or unrelated procedures. For example, billing multiple CMT codes for the same spinal regions in one session may trigger NCCI edits. Compliance is essential to prevent payment denials or audits. Regular updates to NCCI edits require chiropractors to stay informed about coding changes. Proper understanding of these rules ensures accurate billing and avoids reimbursement issues for Medicare chiropractic services.

Modifiers in Chiropractic Billing

Modifiers like AT, 26, and 59 are essential in chiropractic billing to specify treatment type, professional services, and distinct procedures, ensuring accurate Medicare reimbursement and compliance with guidelines.

AT Modifier for Acute Treatment

The AT modifier is required for Medicare reimbursement of chiropractic services when treating acute or chronic subluxations. It signifies active/corrective treatment, distinguishing it from maintenance therapy. Proper use ensures claims are processed correctly and avoids denials. The AT modifier must accompany CPT codes 98940, 98941, and 98942 to validate medical necessity. Chiropractors must document the need for active treatment to justify its use. Without the AT modifier, Medicare considers the service as maintenance, which is non-reimbursable. Thus, accurate application of the AT modifier is crucial for successful claims submission and compliance with Medicare guidelines.

26 Modifier for Professional Services

The 26 modifier is used to indicate the professional component of a service, distinguishing it from the technical component. In chiropractic billing, it is rarely applicable since most services are bundled. However, when a procedure involves both professional and technical aspects, the 26 modifier identifies the portion requiring professional expertise. It ensures proper reimbursement for services like diagnostic interpretations. Chiropractors should use this modifier only when the professional service is separate from the technical service. Proper application avoids claim denials and ensures accurate payment for professional-based care, adhering to Medicare’s billing guidelines for distinct procedural services.

59 Modifier for Distinct Procedural Services

The 59 modifier is used to indicate that a procedure or service is distinct or separate from another service performed on the same day. It is often required when billing for multiple services that are not typically bundled together. In chiropractic billing, the 59 modifier helps prevent claim denials by clarifying that the services are unrelated or performed at different anatomical sites. Proper use of the 59 modifier ensures accurate reimbursement and avoids issues with National Correct Coding Initiative (NCCI) edits. It is essential to document the medical necessity of each distinct service to comply with Medicare guidelines and avoid potential audits or claim rejections.

Documentation and Compliance

Accurate documentation is essential for Medicare compliance, ensuring medical necessity and proper coding. Maintain detailed records, including treatment plans and progress notes, to support claims and avoid audits.

Medical Necessity and Documentation Requirements

Medical necessity is a cornerstone of Medicare chiropractic billing. Documentation must clearly justify treatments as reasonable and necessary for diagnosis or treatment. Chiropractors must maintain detailed records, including treatment plans, progress notes, and outcomes. The AT modifier is required for acute treatment claims, ensuring services are deemed medically necessary. Proper documentation prevents claim denials and ensures compliance with Medicare guidelines. Accurate records also support audits and demonstrate adherence to coverage policies.

Record-Keeping Best Practices

Effective record-keeping is essential for Medicare chiropractic billing. Maintain detailed, organized files, including treatment plans, progress notes, and patient consent forms. Ensure all records are secure, both physically and digitally, to protect patient information. Regularly audit files for accuracy and completeness. Use centralized systems for easy access and retrieval. Train staff on proper documentation and confidentiality protocols. Keep records updated with the latest Medicare guidelines. Proper record-keeping ensures compliance, facilitates audits, and supports efficient billing processes. It also helps maintain patient trust and streamlines communication with Medicare and other stakeholders.

Compliance with Medicare Regulations

Compliance with Medicare regulations is crucial for accurate chiropractic billing. Adhere to specific guidelines for CPT codes, modifiers, and documentation. Ensure all claims align with Medicare’s coverage policies, especially for manual manipulation of the spine. Stay updated on NCCI edits and OPPS requirements to avoid denied claims. Use the AT modifier for acute treatment and ensure proper documentation of medical necessity. Regularly review Medicare updates and attend training sessions to stay informed. Compliance ensures timely reimbursement, avoids penalties, and maintains trust with Medicare and patients. Always verify the latest regulations to ensure your practice remains compliant and efficient.

Coverage and Limitations

Medicare Part B covers chiropractic services for spinal manipulative treatments, but excludes extraspinal therapies and maintenance care. Coverage is limited to medically necessary treatments for subluxations.

Medicare Part B Coverage for Chiropractic Services

Medicare Part B covers chiropractic care for manual manipulation of the spine to correct subluxations. Coverage includes CPT codes 98940, 98941, and 98942, which specify treatment regions. The AT modifier is required for acute or chronic care. Services must be medically necessary, and documentation must support the treatment’s necessity. Chiropractors must use the CMS-1500 form for claims submission. Non-covered services include extraspinal treatments and maintenance therapy. Understanding these guidelines ensures proper reimbursement and compliance with Medicare regulations for chiropractic services.

Exclusions: Non-Covered Services

Medicare Part B excludes coverage for chiropractic services not meeting specific criteria. Extraspinal manipulations, such as treatments for the head, upper/lower extremities, rib cage, or abdomen (CPT code 98943), are non-covered. Maintenance therapy, defined as care provided without a clear therapeutic goal, is also excluded. Additionally, services lacking proper documentation or the required AT modifier for acute/chronic care are denied. Medicare does not reimburse for treatments deemed unnecessary or unrelated to subluxation correction. Understanding these exclusions is crucial for accurate billing and avoiding claim denials.

Limitations on Extraspinal Treatments

Medicare imposes strict limitations on chiropractic treatments for extraspinal regions, such as the head, upper/lower extremities, rib cage, and abdomen. These treatments are considered non-reimbursable under Medicare Part B. CPT code 98943, which pertains to extraspinal manipulative treatment, is explicitly excluded from coverage. Medicare only reimburses for manual manipulation of the spine to correct subluxation, limiting chiropractic services to spinal regions. This restriction ensures that coverage aligns with Medicare’s definition of medically necessary care, focusing solely on spinal adjustments for subluxation correction.

Billing for Specific Services

Medicare focuses on spinal manipulative treatment, reimbursing CPT codes 98940-98942 for spinal subluxation. Coverage excludes extraspinal treatments, adhering to specific guidelines.

Billing for Manual Manipulation of the Spine

Medicare covers manual spinal manipulation to correct subluxations, using CPT codes 98940-98942. Each code specifies the number of spinal regions treated, from 1-2 to 5 regions. Proper documentation, including the AT modifier for acute treatment, is required for reimbursement. Claims must be submitted on the CMS-1500 form, with accurate procedure codes and modifiers to avoid denials. Chiropractors should ensure services are medically necessary and align with Medicare’s guidelines to optimize reimbursement and maintain compliance.

Billing for Acute vs. Chronic Care

Medicare distinguishes between acute and chronic chiropractic care for billing purposes. Acute treatment, focused on correcting subluxations, requires the AT modifier on claims using CPT codes 98940-98942. Chronic care, deemed maintenance therapy, does not require the AT modifier but must be documented as medically necessary. Proper documentation and coding ensure accurate reimbursement. Chiropractors should clearly differentiate between acute and chronic treatments in patient records and claims to comply with Medicare guidelines and avoid claim denials. Understanding these distinctions is crucial for effective billing and maintaining compliance with Medicare regulations. Accurate coding and documentation are essential for proper reimbursement.

Billing for Maintenance Therapy

Maintenance therapy, aimed at preventing future issues rather than treating current conditions, is not covered by Medicare for chiropractic services. Medicare requires that all billed treatments be medically necessary, such as active or corrective care for acute or chronic subluxations. Maintenance therapy lacks this medical necessity and thus is non-reimbursable. Chiropractors should avoid using the AT modifier for maintenance care, as it does not qualify for reimbursement. Proper documentation and clear coding are essential to differentiate between covered and non-covered services, ensuring compliance with Medicare guidelines and preventing claim denials. Always verify patient eligibility and treatment purpose before billing.

Common Billing Errors and Solutions

Common errors include missing AT modifiers, incorrect CPT codes, and insufficient documentation. Solutions involve verifying codes, ensuring proper documentation, and adhering to Medicare guidelines to avoid claim denials.

Common Reasons for Claim Denials

Medicare chiropractic claims are often denied due to missing or incorrect CPT codes, lack of required modifiers like AT, and insufficient documentation of medical necessity. Failure to include proper procedure codes (e.g., 98940, 98941, 98942) or omitting the AT modifier for acute treatment can result in denied claims. Additionally, claims may be rejected if services are deemed non-covered, such as extraspinal treatments or maintenance therapy without proper justification. Ensuring accurate coding, complete documentation, and adherence to Medicare guidelines is crucial to avoid claim denials and ensure timely reimbursement for chiropractic services.

How to Avoid Billing Mistakes

To avoid billing mistakes, ensure accurate use of CPT codes (98940, 98941, 98942) and required modifiers like AT for acute treatment. Verify documentation includes medical necessity and proper procedure codes. Use the CMS-1500 claim form correctly, ensuring all fields are completed accurately. Double-check for missing or incorrect information before submission. Stay updated on Medicare guidelines and coding changes to prevent errors. Regular staff training on billing practices can also reduce mistakes. Proper record-keeping and compliance with Medicare regulations are essential to avoid claim denials and ensure smooth reimbursement for chiropractic services.

Resolving Denied Claims

If a claim is denied, review the reason for denial, such as missing modifiers (e.g., AT) or incorrect CPT codes (98940-98942). Correct the claim and resubmit with proper documentation. Understand Medicare’s appeals process for disputed claims. Ensure all required fields on the CMS-1500 form are accurately completed. Regularly review denial reasons to identify patterns and improve future submissions. Maintain detailed records of denied claims and communications with Medicare. Follow up promptly to resolve issues and minimize delays in reimbursement for chiropractic services.

Appeals and Reimbursement

Medicare chiropractic appeals involve submitting additional documentation to dispute denied claims. Reimbursement rates for chiropractic services are determined by Medicare and vary based on CPT codes and regional adjustments.

Understanding the Appeals Process

Chiropractors can appeal denied Medicare claims through a structured process. The first step is redetermination, followed by reconsideration, and potentially a hearing. Each level requires detailed documentation, including patient records and rationale for services. Providers must address specific denial reasons and submit corrected claims with supporting evidence. Timely filing is crucial, as appeals have strict deadlines. Understanding Medicare’s appeals process ensures chiropractors can effectively dispute denied claims and recover rightful reimbursements. Proper documentation and adherence to guidelines are key to successful outcomes.

Reimbursement Rates for Chiropractic Services

Medicare reimbursement rates for chiropractic services are determined by the Medicare Fee Schedule, which outlines payment amounts for specific CPT codes. Reimbursement is based on the complexity and scope of the procedure, with CPT codes 98940, 98941, and 98942 being the most commonly billed. Medicare typically covers 80% of the allowable amount for covered services, while the patient pays the remaining 20%. However, reimbursement rates may vary depending on the region and patient-specific factors. Accurate coding and documentation are essential to ensure proper payment. Chiropractors should regularly review Medicare updates to stay informed about rate changes and billing requirements.

Software and Tools for Billing

Efficient billing requires specialized software, such as EHR systems and practice management tools, to streamline claims submission, track payments, and ensure compliance with Medicare regulations.

Electronic Health Records (EHR) for Chiropractors

Electronic Health Records (EHR) systems are essential for chiropractors to streamline documentation, billing, and patient care. They ensure compliance with Medicare guidelines by accurately capturing treatment details and CPT codes like 98940, 98941, and 98942. EHR software often includes features such as real-time eligibility checks, automated coding suggestions, and NCCI edit integration to prevent billing errors. These tools improve efficiency, reduce claim denials, and enhance patient outcomes. Chiropractors can use EHRs to generate detailed reports, track treatment progress, and maintain secure, HIPAA-compliant patient records. Additionally, EHRs often integrate with practice management software for seamless billing and scheduling processes.

Practice Management Software for Billing

Practice management software simplifies billing processes for chiropractors by automating key tasks such as claim submission, insurance verification, and patient scheduling. These systems often integrate with EHRs to ensure seamless data flow and accurate claim generation. Features like real-time insurance eligibility checks and automated CPT code suggestions help reduce errors and improve reimbursement rates. Many platforms also offer reporting tools to track financial performance and identify trends. By streamlining administrative tasks, practice management software allows chiropractors to focus more on patient care while maintaining compliance with Medicare billing guidelines and optimizing their practice’s financial health.

Mastering Medicare chiropractic billing ensures compliant and efficient reimbursement. Utilize CMS guidelines, coding manuals, and practice management tools for success. Additional resources like CMS manuals and chiropractic associations provide ongoing support.

Final Tips for Effective Medicare Billing

For effective Medicare billing, chiropractors should stay updated on coding guidelines, ensure accurate documentation, and use appropriate modifiers like AT for acute treatments. Submitting claims via the CMS-1500 form and adhering to NCCI edits is crucial. Regularly reviewing Medicare resources and utilizing practice management software can streamline the billing process, reducing errors and ensuring timely reimbursement. Proper record-keeping and compliance with medical necessity requirements are also essential to avoid claim denials and maintain a smooth billing workflow.

Additional Resources for Chiropractors

Chiropractors can access resources like the CMS Medicare Coverage Database, which provides detailed guidelines for billing and coding. The National Correct Coding Initiative (NCCI) offers edits to ensure proper code usage. Utilizing practice management software and electronic health records (EHRs) can streamline billing processes. Regular updates from the American Chiropractic Association (ACA) and Medicare Learning Network (MLN) are also valuable. These tools help chiropractors stay compliant with regulations and improve reimbursement outcomes, ensuring accurate and efficient Medicare billing for their services.

flowclear sand filter pump manual

This section introduces the Flowclear Sand Filter Pump, highlighting its purpose, components, and the importance of the manual for safe and efficient operation.

1.1 Overview of the Flowclear Sand Filter Pump

The Flowclear Sand Filter Pump is a high-efficiency water filtration system designed for above-ground swimming pools. It combines advanced sand filtration technology with a robust control valve to ensure clean and circulating water. The pump is manufactured by Bestway, a trusted brand in pool equipment, and is built for durability and performance. Its compact design makes it suitable for various pool sizes, while the intuitive control system allows for easy operation. The pump operates on intermittent cycles, typically 30 minutes to an hour, with cooldown periods to prevent overheating. It is essential to use pool-grade filter sand or Flowclear Polysphere for optimal performance. This system is designed for storable pools and requires proper installation and maintenance for safe and efficient use.

1.2 Importance of the Manual

The Flowclear Sand Filter Pump manual is essential for ensuring safe and effective operation of the system. It provides detailed instructions for installation, maintenance, and troubleshooting, helping users avoid potential hazards. The manual outlines critical safety precautions, such as grounding requirements and electrical safety measures, to prevent accidents. Additionally, it guides users through proper assembly and operation, ensuring optimal performance and longevity of the pump. By following the manual, users can maintain clean pool water, extend the lifespan of the equipment, and comply with manufacturer recommendations. Regular reference to the manual helps prevent errors and ensures the pump operates efficiently and safely throughout its service life.

Safety Precautions

This section outlines essential safety instructions, including electrical precautions, grounding requirements, and general safety measures to ensure safe operation of the Flowclear Sand Filter Pump.

2.1 General Safety Instructions

To ensure safe operation, always place the pump on a solid, level surface, preferably a concrete slab. The pump is designed for intermittent use, typically in cycles of 30 minutes to an hour, allowing it to cool down. Avoid continuous operation to prevent overheating. Never use the pump with permanently installed pools; it is intended for storable pools only. Handle the pump with care—do not pull or carry it by the power cord, and avoid yanking the plug from the outlet. Always disconnect the pump before performing maintenance or repairs. Read the manual thoroughly, follow all instructions, and keep it for future reference. Proper handling and adherence to these guidelines ensure safe and efficient operation.

2.2 Electrical Safety

To ensure electrical safety, connect the pump only to a grounding-type receptacle. This minimizes the risk of electric shock. If a Ground Fault Circuit Interrupter (GFCI) trips without pressing the test button, it indicates a ground current. Do not use the pump in such cases. Use a residual current device (RCD) with a rated residual operating current not exceeding 30mA. Avoid using damaged cords or plugs. Never submerge electrical components in water. Keep the pump at least 10 feet away from the pool to prevent accidental submersion. Always unplug the pump before maintenance or repairs. Following these guidelines ensures safe electrical operation and protects against potential hazards. Regularly inspect electrical components for damage or wear.

2.3 Grounding Requirements

Proper grounding is essential for safe operation. Connect the pump to a grounding-type receptacle to prevent electric shock. Use a residual current device (RCD) with a rated residual operating current not exceeding 30mA. If the GFCI interrupts power without pressing the test button, a ground current is present, indicating a potential shock hazard. Do not use the pump until the issue is resolved. Ensure all grounding connections are secure and meet local electrical codes. If unsure, consult a licensed electrician. Regularly inspect grounding components for damage or corrosion. Never bypass safety devices or alter grounding connections, as this can lead to serious safety risks. Proper grounding ensures safe and reliable operation of the pump.

Components and Parts

The Flowclear Sand Filter Pump includes essential components like the sand filter tank, control valve, skimmer, and collector hub. These parts work together to ensure efficient water filtration and circulation. Always use pool-grade filter sand or Flowclear Polysphere for optimal performance. Proper installation and maintenance of these components are crucial for the pump’s longevity and safe operation.

3.1 Sand Filter Components

The Flowclear Sand Filter Pump includes a durable sand filter tank, control valve, skimmer, and collector hub. The tank houses the filter sand, which traps impurities. The control valve directs water flow for filtration, backwashing, and rinsing. The skimmer and collector hub help distribute water evenly. Ports on the tank connect hoses for circulation. Use pool-grade silica sand (0.45-0.85 mm) or Flowclear Polysphere for optimal filtration. These components work together to ensure clean water and efficient pump operation. Regular maintenance, like backwashing, is essential to keep the system functioning properly. Always follow manual guidelines for component care and replacement to maintain performance and longevity.

3.2 Control Valve Functions

The control valve is a critical component of the Flowclear Sand Filter Pump, enabling multiple operating modes. It allows users to direct water flow for filtration, backwashing, rinsing, and draining. The valve ensures efficient water circulation by adjusting flow direction. Always switch off the pump before changing valve positions to avoid damage. The valve’s functions include filter mode for normal operation, backwash to clean the sand, rinse to clear debris, and drain to remove water. Proper use of the control valve maintains water clarity and system efficiency. Refer to the manual for detailed instructions on operating the valve safely and effectively. Regular inspection and maintenance of the valve are essential for optimal performance.

3.4 Skimmer and Collector Hub

The Skimmer and Collector Hub are essential components of the Flowclear Sand Filter Pump system. The Skimmer collects debris from the pool surface, ensuring clean water circulation. The Collector Hub distributes water evenly to the sand filter, enhancing filtration efficiency. Proper installation and alignment of these parts are crucial for optimal performance. Always submerge the Skimmer in water when adding sand to avoid damage. Regular inspection and maintenance of these components ensure uninterrupted operation. Follow the manual’s guidelines for handling and cleaning to prevent clogging and maintain water clarity. Proper care extends the lifespan of the Skimmer and Collector Hub, ensuring reliable pool filtration.

Installation

This section guides you through the installation process of the Flowclear Sand Filter Pump, including site preparation, assembly, and connecting hoses and ports for proper setup and functionality.

4.1 Choosing a Location

When installing the Flowclear Sand Filter Pump, selecting the right location is crucial for optimal performance. The sand filter should be placed on solid, level ground, ideally a concrete slab, to ensure stability and prevent vibration. Position it near the pool to minimize hose lengths and avoid kinking. Ensure the location is well-ventilated and protected from direct sunlight and weather conditions. Additionally, the area should allow easy access for maintenance and backwashing. Proper grounding is essential, so ensure the pump is connected to a grounding-type receptacle. Avoid placing the pump in low-lying areas where water may collect. By choosing a suitable location, you ensure safe and efficient operation of the Flowclear Sand Filter Pump. Always follow the manufacturer’s guidelines for installation.

4.2 Preparing the Site

Proper site preparation ensures the Flowclear Sand Filter Pump operates efficiently and safely. Begin by selecting a flat, stable surface, such as a concrete slab, to prevent unevenness and vibration. Ensure the area is level to maintain proper water flow and filtration. Clear the site of debris, rocks, and obstructions to avoid damage to the pump or hoses. If placing on grass, create a firm base to prevent sinking. Ensure good drainage to prevent water from pooling around the pump. Keep the area clean and accessible for routine maintenance. Finally, verify that the site is close to a power source with a grounding-type receptacle, as specified in the manual. Proper preparation ensures long-term functionality and safety.

4.3 Assembling the Sand Filter

Assembling the Flowclear Sand Filter requires attention to detail to ensure proper functionality. Start by attaching the control valve to the top of the filter tank, ensuring all connections are secure. Next, connect the skimmer and collector hub to the bottom tank, making sure they are submerged in water to prevent damage during sand addition. Pour pool-grade silica sand into the tank, filling it to the recommended level. For easier installation, add water to the tank before introducing sand to minimize dust. Once the sand is in place, reattach the control valve and ensure all ports are correctly aligned. Tighten all connections firmly but avoid over-tightening to prevent damage. Finally, connect the pump to the filter, ensuring all hoses are securely attached. Proper assembly is crucial for effective filtration and pump performance.

4.4 Connecting Hoses and Ports

To connect the hoses and ports correctly, start by attaching the pump to the sand filter using the appropriate adapters. Ensure the pump outlet is securely connected to Port A on the control valve. Next, connect the return hose to Port B, directing it back to the pool. The skimmer hose should be attached to Port C, ensuring proper water intake. Finally, connect the drain hose to Port D for backwashing. Tighten all connections firmly and use hose clips to secure them. Double-check all connections for leaks before starting the pump. Properly connected hoses and ports are essential for efficient filtration and safe operation of the Flowclear Sand Filter Pump.

Operating the Pump

To operate the pump, prime it first by filling the pump basket with water. Turn on the power and adjust the control valve as needed. Monitor pressure and ensure proper flow. Regularly check for debris and backwash when pressure increases. Avoid running the pump dry to prevent damage. Follow the manual’s guidelines for optimal performance and safety.

5.1 Priming the Pump

Primining the pump is essential to ensure it operates efficiently. Start by switching off the sand filter and unplugging it from the power source. Open the strainer cover and fill the pump basket with water from the pool. Replace the cover securely to prevent air leaks. Plug in the pump and turn it on, allowing it to run for 3-5 minutes until the water flows clear. This process removes air pockets and ensures proper water circulation. If the pump doesn’t prime, check for blockages in the hoses or strainer. Repeat if necessary until consistent water flow is achieved. Proper priming prevents damage and maintains optimal performance.

5.2 Starting the Pump

After priming, ensure the pump is properly connected to a grounded electrical outlet. Set the control valve to the desired function, such as “Filter” or “Recirculate.” Plug in the pump and turn it on. Allow it to run for a few minutes to ensure smooth operation. Monitor the system for any leaks or unusual noises. If the pump does not start, check the power connection and ensure the control valve is in the correct position. Regularly inspect the strainer basket for debris, as blockages can hinder performance. Always follow the manual’s guidelines for startup to maintain efficiency and longevity of the Flowclear Sand Filter Pump. Proper startup ensures optimal water circulation and filtration.

5.3 Understanding the Control Valve

The control valve is a critical component of the Flowclear Sand Filter Pump, allowing you to regulate water flow and filter functions. It typically features multiple settings, such as “Filter,” “Recirculate,” “Backwash,” “Rinse,” and “Drain.” The “Filter” setting directs water through the sand for purification, while “Recirculate” bypasses the sand, allowing clean water to circulate without filtration. “Backwash” reverses water flow to clean the sand, and “Rinse” ensures no dirty water remains after backwashing. Always switch off the pump before changing valve settings to avoid damage. Proper use of the control valve ensures efficient operation and maintains the integrity of the filtration system. Refer to the manual for specific valve functions and operation guidelines.

Maintenance

Regular maintenance ensures optimal performance and longevity of the Flowclear Sand Filter Pump. Tasks include backwashing, draining, and inspecting components. Follow the manual for guidelines.

6.1 Regular Maintenance Tasks

Regular maintenance is crucial for the optimal performance and longevity of the Flowclear Sand Filter Pump. Key tasks include inspecting and cleaning the skimmer basket, checking the sand level, and ensuring the control valve functions properly. It is also important to backwash the filter periodically to remove debris and sediment. Additionally, the pump should be drained and stored during winter months to prevent damage from freezing temperatures. Always refer to the manual for specific instructions on these tasks to ensure safety and efficiency. Proper maintenance will extend the life of the pump and keep your pool water clean and clear.

6.2 Backwashing the Filter

Backwashing the filter is essential to maintain its efficiency and ensure clean water circulation. To backwash, switch the control valve to the “Backwash” position and run the pump for 3-5 minutes, or until the water flows clear. After backwashing, set the valve to “Rinse” and run the pump for 1 minute to clear debris. Regular backwashing prevents sand compaction and maintains optimal filtration. For best results, perform this process every 1-2 weeks, depending on pool usage. Always follow the manual’s instructions for proper backwashing techniques to keep your Flowclear Sand Filter Pump functioning effectively and prolong its lifespan.

6.3 Winterizing the Pump

Winterizing the Flowclear Sand Filter Pump is crucial to protect it from freezing temperatures and ensure optimal performance in the next season. Start by switching off the pump and unplugging it from the power source. Drain all water from the pump, hoses, and filter by opening the drain valves or using the built-in drainage system. For added protection, pour a small amount of swimming pool antifreeze into the pump chamber to prevent any remaining water from freezing. Store the pump in a dry, sheltered area, such as a garage or storage shed, to avoid exposure to harsh weather conditions. Regular winterization helps prevent damage and extends the pump’s lifespan.

Troubleshooting

This section helps identify and resolve common issues with the Flowclear Sand Filter Pump, such as low pressure or leaks, ensuring optimal performance and longevity.

7.1 Common Issues and Solutions

Common issues with the Flowclear Sand Filter Pump include low water flow, sand entering the pool, or the pump not starting. Low water flow may result from clogged sand or polysphere, a dirty skimmer basket, or closed valves. To resolve, backwash the filter, clean the basket, and ensure all valves are open. Sand or debris in the pool indicates dirty sand or a compromised underlayer. Replace the sand or polysphere and inspect the underlayer for damage. If the pump fails to start, check for electrical issues or a tripped GFCI. Ensure the pump is properly grounded and the power supply is stable. Always refer to the manual for specific solutions and safety precautions to maintain optimal performance and safety.

7.2 Diagnosing Pump Problems

Diagnosing issues with the Flowclear Sand Filter Pump involves identifying symptoms and tracing their causes. Common problems include low water flow, excessive sand in the pool, or the pump failing to start. For low flow, check if the sand is dirty, the skimmer basket is clogged, or the control valve is misaligned. Sand in the pool may indicate worn gaskets or improper sand levels. If the pump doesn’t start, ensure it’s properly plugged into a grounded outlet and the GFCI hasn’t tripped. Inspect the power cord and internal components for damage. Always refer to the manual for step-by-step troubleshooting guides and safety precautions to resolve issues effectively.

Replacing the Sand

To replace the sand, switch off the pump, unplug it, and remove the stopper. Drain the water, then replace the sand with pool-grade filter sand or Flowclear Polysphere. Reset the system after refilling.

8.1 Steps to Replace the Sand

Step 1: Switch off the sand filter and unplug it from the power outlet to ensure safety during maintenance.

Step 2: Drain the water from the tank by opening the drain valve or removing the drain plug.

Step 3: Remove the old sand by scooping it out or using a vacuum designed for wet sand. Clean the tank thoroughly;

Step 4: Pour in the new pool-grade filter sand or Flowclear Polysphere, ensuring the recommended amount is used.

Step 5: Reassemble the filter, plug it back in, and run the pump on rinse mode for 1-2 minutes to clear any debris.

This process ensures optimal filtration performance and extends the pump’s lifespan.

8.2 Using Flowclear Polysphere

Flowclear Polysphere is an alternative to traditional sand, designed for improved filtration efficiency. Use 28g of Polysphere to replace 1kg of sand, reducing weight and enhancing performance. When adding Polysphere, ensure the tank is partially filled with water to prevent skimmer damage. This medium requires the same maintenance as sand, including backwashing. It is eco-friendly and lasts longer than sand, making it a cost-effective option. Always follow the manufacturer’s guidelines for optimal results and extended pump lifespan.

Safety

Always follow safety guidelines to prevent accidents. Use GFCI-protected outlets and avoid exposure to electricity near water. Proper grounding and handling are essential to ensure safe operation.

9.1 Precautions During Operation

Ensure the sand filter is placed on a level, solid surface, preferably a concrete slab, to prevent instability. Always unplug the pump before performing maintenance or changing settings. Avoid operating the pump near open flames or sparks, and never use it in areas where chemicals are stored. Keep children and pets away from the equipment while it is running. Regularly inspect the power cord for damage, and do not use the pump if the cord is frayed or worn. Always follow the manufacturer’s guidelines for electrical connections and grounding to prevent shock hazards. Proper ventilation is essential to avoid accumulation of harmful fumes.

9.2 Emergency Procedures

In case of an electrical malfunction, immediately switch off the pump and unplug it from the power source. Do not attempt to repair the unit yourself. If water is leaking, turn off the pump and inspect the connections. For any electrical shock symptoms, disconnect the power and seek medical help immediately. If the pump overheats, stop operation and let it cool down. Always refer to the manual for specific troubleshooting steps. Keep emergency contact numbers handy, such as the manufacturer’s customer service. Ensure all safety measures are followed to prevent accidents and injuries during emergencies. Regular maintenance can help prevent unexpected issues, ensuring safe and reliable operation of the sand filter pump.

First-Time Use Instructions

Before initial use, perform a backwash and rinse cycle to prepare the sand filter. Prime the pump according to the manual, then start and monitor operation.

10.1 Preparing for First Use

Before the first use, ensure all components are properly assembled and the sand filter is filled with pool-grade sand or Flowclear Polysphere.

10.2 Initial Backwash and Rinse

To prepare the pump for first use, perform an initial backwash and rinse. Plug in the sand filter and run it for 3-5 minutes until the water flows clear. Switch off the pump, set the control valve to the Rinse function, and run for 1 minute to circulate water backward through the filter. Repeat this process if the water remains cloudy. After rinsing, ensure the waste line is empty and all connections are secure. This step ensures the sand is clean and ready for efficient filtration. Always follow the manufacturer’s guidelines to avoid dry-running the filter, which can damage the system.

Disposal and Environmental Considerations

Properly dispose of the pump by recycling or safely discarding electrical components. Use eco-friendly methods to handle sand and materials, adhering to local environmental regulations and guidelines.

11.1 Proper Disposal of the Pump

Proper disposal of the Flowclear Sand Filter Pump involves safely handling electrical components and materials. Disconnect and remove any electrical parts, recycling them when possible. Drain all water and clean the pump thoroughly. Sand and filter media should be disposed of in an environmentally responsible manner, adhering to local regulations. Do not discard the pump in regular waste; instead, take it to a designated recycling center or landfill that accepts electrical appliances. Ensure all components are handled safely to prevent environmental harm. Always follow local guidelines for hazardous waste disposal to minimize ecological impact. Proper disposal helps maintain environmental safety and reduces waste.

11.2 Environmental Safety Measures

Environmental safety is crucial when handling the Flowclear Sand Filter Pump. Always dispose of electrical components responsibly, recycling when possible. Ensure no hazardous materials leak into the environment by properly sealing and handling waste. Use eco-friendly disposal methods for sand and filter media, adhering to local environmental regulations. Avoid releasing chemicals or contaminated water into natural water systems. Regular maintenance, such as backwashing, should be done in a way that prevents unnecessary water waste. Use approved facilities for disposing of large appliances to minimize ecological impact. By following these measures, you contribute to preserving the environment and reducing waste effectively.

Thank you for taking the time to read through this manual for the Flowclear Sand Filter Pump. Proper installation, maintenance, and operation are essential for optimal performance and longevity. By following the guidelines outlined in this manual, you can ensure your pool remains clean and safe for enjoyment. Remember to always prioritize safety precautions and environmental considerations. For any further assistance, refer to the troubleshooting section or contact Bestway customer support. Happy swimming!

three step instructions

Three-step instructions are structured guides that break tasks into manageable parts, promoting clear communication and effective execution. They enhance listening skills, organization, and task completion in various settings.

Overview of Three-Step Instructions

Three-step instructions involve breaking tasks into three distinct, sequential actions, ensuring clarity and ease of understanding. They are widely used in education, therapy, and daily activities to enhance listening and organizational skills. These instructions often incorporate temporal (time-based), spatial (location-based), and conditional concepts to add complexity. For example, “Stand up, clap your hands, and turn in a circle” combines physical actions with sequencing. They are particularly effective for children and individuals learning to follow multi-step directions, as they promote focus and task completion. The structure helps users progress logically, making them ideal for teaching and skill development across various age groups and settings.

Importance of Following Directions

Following directions is a critical skill that enhances learning, communication, and task execution. It fosters independence, reduces errors, and builds confidence. In educational settings, adhering to instructions ensures students meet expectations and achieve academic goals. For younger learners, mastering this skill lays the foundation for more complex tasks. In therapy, following directions aids in developing listening and cognitive abilities. Effective direction-following also improves workplace efficiency and safety. By practicing three-step instructions, individuals refine their ability to process information, prioritize actions, and complete tasks successfully, making it a vital skill across all age groups and environments.

Benefits of Structured Step-by-Step Guidance

Structured step-by-step guidance offers numerous benefits, particularly in educational and therapeutic settings. It simplifies complex tasks, making them easier to understand and execute. This approach enhances learning outcomes by ensuring clarity and reducing confusion. For children, it aids in developing essential skills like sequencing and problem-solving. In speech therapy, step-by-step instructions help improve listening and comprehension abilities. Additionally, this method fosters independence as learners gain confidence in completing tasks without constant supervision. The structured nature of three-step guidance also promotes better retention and application of instructions in real-world scenarios, making it a valuable tool for educators and therapists alike.

Understanding the Components of Three-Step Instructions

Three-step instructions involve temporal, spatial, and conditional concepts, ensuring tasks are structured logically. These components help individuals understand sequences, locations, and conditions, making instructions clear and actionable.

Temporal Concepts in Instructions

Temporal concepts involve time-related terms like “before,” “after,” and “next.” These words help structure multi-step tasks, ensuring actions are performed in the correct sequence. For example, “First, circle the A, then underline the B.” Such language aids in understanding order and timing, crucial for task completion. Temporal terms can be tricky, as their placement alters meaning. Practice with varying placements, like “Before you touch your nose, clap hands,” enhances comprehension. Mastering these concepts improves ability to follow complex directions accurately and efficiently in educational and real-life scenarios.

Spatial Concepts and Their Role

Spatial concepts, such as “above,” “below,” and “right/left,” are essential in three-step instructions for understanding object positioning. These terms help individuals locate and move objects relative to others. For example, “Place the book on the table to the left of the lamp” requires spatial awareness. Spatial concepts are particularly important in tasks involving multiple objects or locations. They enhance clarity and precision, ensuring actions are performed correctly. Mastering spatial concepts aids in following complex directions, from simple classroom activities to real-life tasks like assembling furniture or organizing materials.

Conditional Concepts and Their Application

Conditional concepts introduce “if” statements, adding complexity to instructions. They require understanding of cause-effect relationships, such as “If it’s raining, take an umbrella.” These concepts challenge individuals to think critically and make decisions based on given conditions. In speech therapy, conditional directions like “If today is Tuesday, circle the K” help students practice listening and logical reasoning. Such applications enhance problem-solving skills and prepare learners for real-life scenarios where decisions depend on specific conditions, making them invaluable in education and everyday tasks.

Creating Effective Three-Step Directions

Effective three-step directions involve breaking tasks into clear, manageable steps using higher-level vocabulary and concise language. This method ensures clarity and promotes successful task completion.

Breaking Down Complex Tasks into Manageable Steps

Breaking down complex tasks into three-step directions involves simplifying processes while maintaining clarity. Start by identifying key actions and organizing them sequentially. Use higher-level vocabulary to challenge understanding without causing confusion. Ensure tasks are age-appropriate and engaging, avoiding overly simplistic language. For example, direct students to write their name in the top left corner, circle the third letter, and underline the last word. This approach helps build focus and ensures each step is executed accurately. Incorporate temporal, spatial, and conditional concepts to enhance complexity. This method fosters independence and improves listening skills, making it ideal for educational settings.

Using Clear and Concise Language

Using clear and concise language in three-step instructions ensures that each directive is easily understood and executed. Avoid vague terms or overly complex vocabulary that may confuse the listener. Instead, use specific actions and straightforward terms, such as “touch your toes,” “count to seven,” or “spell your name.” This clarity minimizes misinterpretation and ensures each step is followed accurately. For example, instructions like “Wave at me, jump up and down two times, and say ‘Look over there!'” are direct and leave little room for error. Clear language fosters confidence and improves task completion, making it essential for effective communication.

Incorporating Higher-Level Vocabulary

Incorporating higher-level vocabulary into three-step instructions enhances comprehension and challenges learners to expand their language skills. Using terms like “before,” “after,” or “between” introduces temporal concepts, while phrases such as “top left corner” or “nearest chair” incorporate spatial awareness. Conditional language, like “if today is Tuesday,” adds complexity. These advanced terms help students or individuals understand nuanced directions and apply them in real-world scenarios. By integrating higher-level vocabulary, instructions become more engaging and intellectually stimulating, particularly in educational or therapeutic settings where language development is a key focus.

Examples of Three-Step Instructions

Examples include actions like “Stand up, clap your hands, and turn in a circle” or “Touch your toes, pat your head, and pretend to comb your hair.” These demonstrate clear, sequential tasks.

Actions Involving Multiple Objects

Three-step instructions often involve multiple objects, requiring clear organization. For example, “Bring me the shoe, cup, and ball” involves three objects in one action. Another example is, “Get the cup, go to the kitchen, and put the cup in the sink,” which combines three actions with one object. These instructions help improve listening and organizational skills, especially in educational settings. They challenge individuals to follow sequential steps while managing multiple elements, enhancing task completion abilities and attention to detail. Such instructions are practical for daily activities and educational exercises, making them versatile tools for skill development. They promote clarity and efficiency in communication.

Actions Involving a Single Object

Three-step instructions can focus on a single object, guiding users through sequential actions. For instance, “Get the cup, fill it with water, and place it on the table” involves one object but multiple steps. This approach simplifies complex tasks, making them easier to follow. It enhances problem-solving skills and attention to detail. Such instructions are particularly useful in educational settings, helping individuals master task completion by breaking activities into clear, manageable parts. They also improve listening skills and the ability to follow precise directions, making them effective tools for learning and development in various contexts. This method ensures clarity and reduces confusion.

Combining Related Objects in Instructions

Three-step instructions often involve combining related objects to achieve a common goal. For example, “Pick up the spoon, stir the coffee, and place the spoon in the dishwasher” integrates multiple steps with interconnected objects. This method ensures tasks are completed efficiently and logically. By linking related objects, instructions become more coherent, aiding in understanding and execution. Such strategies are widely used in educational and therapeutic settings to enhance organizational skills and attention to detail. They also promote cognitive development by encouraging users to connect actions and objects, fostering a deeper comprehension of sequential tasks and their practical applications.

Activities to Practice Following Directions

Games like Simon Says and Robot Game enhance listening skills, while group challenges promote attention to multi-step commands, fostering better comprehension and execution of instructions.

Simon Says Game for Multi-Step Commands

Simon Says is a classic game that excels at teaching multi-step commands. Start with simple instructions like “Simon says touch your toes,” then gradually increase complexity. For example, “Simon says clap your hands, then turn in a circle.” This activity improves listening skills and the ability to follow sequential directions. It’s engaging and fun, making it ideal for practicing three-step instructions. The game can be adapted for different age groups, ensuring it remains challenging yet achievable. Incorporating higher-level vocabulary and concepts like “before” or “after” adds depth, helping participants understand temporal relationships in commands. It’s a versatile tool for developing focus and comprehension.

Robot Game for Listening Skills

The Robot Game is an engaging activity designed to enhance listening skills through three-step instructions. Blindfold the “robot” to emphasize auditory focus. Provide commands like, “Take three steps forward, then turn right and pick up the object.” This game challenges participants to follow precise sequences, improving their ability to process and execute multi-step directions. It’s effective for developing attention and spatial awareness. The robot’s reliance on clear instructions mimics real-life scenarios, making it a practical tool for refining listening and comprehension abilities in a fun and interactive manner. It’s particularly useful in educational and therapeutic settings.

Following Directions Challenges in Groups

Group challenges enhance listening and teamwork by requiring participants to follow three-step instructions collectively. These activities foster accountability and collaboration, as each member’s contribution impacts the outcome. Challenges often involve completing tasks like puzzles or obstacle courses, where clear communication and precise execution are crucial. Group settings allow for peer learning, as students observe and correct each other. Such exercises also promote problem-solving and adaptability, as teams must adjust their strategies based on feedback. These collaborative challenges prepare individuals for real-world scenarios requiring teamwork and attention to detail, making them invaluable for developing both social and cognitive skills. They are engaging and effective tools for learning.

Teaching Children to Follow Three-Step Instructions

Teaching children involves clear communication, breaking tasks into steps, and using positive reinforcement. Visual aids and patient guidance help them grasp and execute complex instructions effectively.

Developmental Milestones in Following Directions

Children progress from understanding simple commands to complex sequences. By 2-3 years, they follow two-step directions, while 4-5 year olds grasp three-step instructions with spatial and temporal concepts. Around 5, they handle conditional tasks. These milestones build foundational skills for academic and social success. Consistent practice and positive reinforcement accelerate mastery, enabling children to apply these abilities in real-life situations. Growth in listening and comprehension supports their ability to perform tasks accurately and independently.

Age-Appropriate Activities for Different Skill Levels

Activities tailored to age and skill levels enhance the mastery of three-step instructions. For younger children, games like Simon Says introduce basic commands. As skills progress, interactive tasks such as the Robot Game challenge listening and execution. Advanced learners benefit from complex directions involving conditional and spatial concepts. Using visual aids and incorporating real-life scenarios make activities engaging. These activities ensure children develop at their own pace, building confidence and competence in following multi-step directions effectively. This structured approach fosters independence and prepares them for more complex tasks in academic and real-world environments.

Using Visual Aids to Support Verbal Instructions

Visual aids, such as charts, pictures, and step-by-step diagrams, complement verbal instructions by providing a clear reference point. They help learners understand complex tasks and retain information better. For younger children, images can break down actions into manageable parts. For older learners, diagrams or videos can illustrate sequences and spatial relationships. Combining visual and verbal cues enhances comprehension, especially for those with learning difficulties. Visual aids also allow learners to revisit steps independently, reducing confusion and improving task completion. This dual approach ensures instructions are both engaging and effective, catering to diverse learning styles and needs.

Advanced Strategies for Complex Directions

Advanced strategies involve introducing temporal and sequential concepts, targeting spatial awareness, and practicing conditional directions. These approaches enhance understanding and application of multi-step instructions effectively.

Introducing Temporal and Sequential Concepts

Temporal and sequential concepts are essential for understanding multi-step instructions. Temporal concepts involve time-related terms like “before,” “after,” and “during,” which help in ordering actions. Sequential concepts focus on the order of events, using terms like “first,” “next,” and “last.” These concepts are crucial for tasks requiring specific timing and sequence, such as following recipes or completing assignments. By incorporating these into instructions, individuals can better grasp the flow of actions, improving task execution and overall comprehension. Practice with varied examples enhances mastery of these concepts in both educational and real-world scenarios.

Targeting Spatial Awareness in Instructions

Spatial awareness in instructions involves understanding the physical placement and relationships between objects. Terms like “above,” “below,” “left,” and “right” guide individuals to locate and manipulate objects accurately. For instance, “Place the book on the table to your left” combines spatial and action-based directives. Such instructions are crucial for tasks requiring precise positioning, such as assembly or organization. By incorporating spatial concepts, instructions become clearer, reducing confusion and ensuring tasks are completed correctly. This approach is particularly effective in educational and therapeutic settings, helping individuals develop better spatial understanding and task execution skills.

Practicing Conditional Directions for Better Understanding

Conditional directions introduce “if-then” scenarios, enhancing critical thinking and adaptability. For example, “If it’s Tuesday, clap your hands; if not, touch your nose.” These directions teach students to evaluate conditions before acting, improving decision-making. Such exercises are particularly beneficial in speech therapy, where understanding conditional language is vital for clear communication. By practicing these directions, individuals develop the ability to process complex information and respond appropriately, making them more effective in real-world situations that require conditional thinking and precise action.

Applications of Three-Step Instructions in Education

Three-step instructions enhance learning by improving listening, organization, and task execution. They are used in classrooms for structured activities, speech therapy for clearer communication, and homework for reinforcement.

Classroom Activities for Improved Listening Skills

Classroom activities using three-step instructions enhance listening skills through engaging tasks. Games like “Simon Says” and “Robot Game” encourage students to follow sequential commands accurately. Teachers use worksheets with multi-step directions to practice focus and attention. Group challenges involve tasks like touching specific objects or performing actions in order. These activities promote organizational skills and ensure students understand the importance of each step. By incorporating temporal and spatial concepts, educators help students develop better comprehension and execution of instructions, making learning both fun and effective for all skill levels.

Speech Therapy Exercises for Clearer Communication

Speech therapy exercises using three-step instructions focus on improving listening and communication skills. Activities involve following complex directions with temporal, spatial, and conditional concepts. For example, “Touch your toes, clap your hands, and say your name” incorporates sequential actions. These exercises enhance vocabulary understanding and attention to detail. Conditional directions, like “If it’s Tuesday, circle the cat,” challenge students to think critically. By practicing these skills, individuals develop clearer communication and better comprehension, essential for real-life interactions and academic success. These exercises are tailored to various skill levels, ensuring progressive learning and confidence-building.

Homework Assignments to Reinforce Learning

Homework assignments involving three-step instructions help students practice listening and following directions at home. Examples include tasks like, “Bring me the shoe, cup, and ball” or “Get the cup, go to the kitchen, and put it in the sink.” These assignments can be adapted to different age groups, with younger students focusing on simpler tasks and older students tackling more complex, multi-object instructions. Visual aids, like worksheets with step-by-step directions, can also be used to reinforce learning. Such homework bridges classroom instruction with home practice, ensuring consistent skill development and improved understanding of sequential tasks.

Tools and Resources for Creating Directions

Utilize worksheets, interactive games, and activities to practice following three-step instructions. Resources like the “Following Directions Game” and task-specific worksheets enhance learning and engagement effectively.

Worksheets for Practicing Following Directions

Worksheets are an excellent tool for practicing three-step directions, offering structured tasks that enhance listening and cognitive skills. They often include activities like writing names in specific corners, circling letters with conditions, or completing sequences. These resources are adaptable for different skill levels, with visual aids to support understanding. Worksheets are widely used in education and therapy to reinforce direction-following abilities, providing clear, actionable steps. They help learners develop focus and attention, making them ideal for both individual and group settings. Regular practice with worksheets improves task completion accuracy and confidence over time.

Games and Interactive Activities for Engagement

Interactive games and activities make learning three-step instructions enjoyable and effective. Games like “Simon Says” and “Robot Directions” challenge students to listen carefully and follow complex commands. These activities improve focus and attention while fostering teamwork. Incorporating elements like temporal and spatial concepts helps deepen understanding. Blindfolded tasks and role-playing further enhance engagement. Interactive activities are versatile, suitable for both individual and group settings, and cater to diverse skill levels. They provide immediate feedback, encouraging students to refine their listening and execution skills in a dynamic, motivating environment.

Assessment Tools for Measuring Progress

Assessment tools play a crucial role in tracking mastery of three-step instructions. Worksheets with specific tasks allow educators to evaluate accuracy and completion. Tools like checklists and observation logs help monitor progress over time. Data collection systems, such as quick check or minus systems, provide clear feedback. These tools are invaluable in both educational and therapeutic settings, enabling targeted adjustments to instruction. By measuring progress, educators can identify strengths, address challenges, and tailor activities to meet individual needs, ensuring continuous improvement in following complex directions.

Best Practices for Delivering Instructions

Deliver instructions clearly, using examples and positive reinforcement. Break tasks into steps, ensure understanding, and provide feedback to enhance learning and task completion effectively.

Providing Written and Spoken Directions

Combining written and spoken directions ensures clarity and reinforces understanding. Written directions provide a visual reference, while spoken directions offer real-time guidance. This dual approach caters to different learning styles, improving task execution. For complex tasks, breaking instructions into smaller steps with clear examples helps avoid confusion. Using specific language and highlighting key actions ensures that both visual and auditory learners can follow effectively. This method is particularly beneficial in educational settings, where it supports diverse learning needs and enhances overall comprehension.

Encouraging Focus and Attention to Detail

Encouraging focus and attention to detail is crucial when providing three-step instructions. Using higher-level concepts and vocabulary ensures tasks are engaging yet challenging. Activities like writing names in specific corners or circling letters before underlining others require careful listening. These exercises teach students to prioritize details and avoid rushing. By incorporating spatial or temporal aspects, such as “before” or “after,” you help students develop patience and precision. This approach not only improves their ability to follow directions but also enhances their overall cognitive skills, preparing them for more complex tasks in the future.

Using Positive Reinforcement for Success

Positive reinforcement is a powerful tool for encouraging success when teaching three-step instructions. Verbal praise, such as “Great job!” or “Perfect!”, motivates students to focus and complete tasks accurately. Non-verbal cues, like a thumbs-up or smile, also reinforce positive behavior. Rewarding correct responses with small incentives, such as stickers or stars, further boosts confidence. This approach fosters a supportive environment where students feel encouraged to listen carefully and follow directions precisely. Consistent positive reinforcement helps build their ability to complete tasks successfully and independently.

Three-step instructions are a proven method for enhancing listening skills and task execution, offering adaptability in educational and daily activities for all ages.

Three-step instructions are a powerful tool for improving listening and organizational skills, offering clear, structured guidance for task completion. They enhance focus, ensure accuracy, and promote independence, making them adaptable for various age groups and settings. By incorporating temporal, spatial, and conditional concepts, these instructions cater to diverse learning needs. Their effectiveness lies in breaking down complex tasks into manageable steps, using clear language, and reinforcing learning through repetition and practice. This method is widely applied in education, therapy, and daily activities, proving its versatility and impact on skill development across all ages.

The Impact of Effective Instruction-Giving

Effective instruction-giving significantly enhances learning and task execution, fostering independence and confidence. Clear, structured guidance reduces confusion, ensuring tasks are completed accurately and efficiently. In educational settings, it improves academic performance, while in therapy, it aids in skill development. By breaking tasks into steps, individuals, especially children, build organizational and listening skills. This approach also strengthens focus and attention, crucial for complex activities. The impact extends beyond academics, promoting lifelong learning and problem-solving abilities, making it a cornerstone of successful communication and skill mastery across various domains and age groups.

Future Applications of Three-Step Instructions

Three-step instructions hold vast potential for future applications, particularly in education and technology. They can be integrated into AI systems to enhance user guidance, making complex tasks more accessible. In classrooms, adaptive learning tools can utilize this structure to cater to individual learning paces. Additionally, speech therapy and occupational therapy can benefit by incorporating these instructions to help individuals with developmental challenges. The simplicity and clarity of three-step guidance make it a versatile tool, ensuring its relevance in advancing learning and skill development across diverse fields, from robotics to everyday problem-solving, as technology and education continue to evolve.

solving multi step equations with fractions worksheet pdf

Mastering multi-step equations with fractions is essential for building strong algebraic problem-solving skills. These equations require critical thinking and precise calculations‚ ensuring accuracy in every step.

1.1 Importance of Mastering Multi-Step Equations

Mastering multi-step equations is crucial for developing strong algebraic reasoning and problem-solving skills. These equations enhance critical thinking by requiring sequential operations‚ such as simplifying fractions and applying the distributive property. Proficiency in solving multi-step equations builds a solid foundation for advanced math concepts and real-world applications. It also improves accuracy in handling complex calculations‚ preparing students for practical scenarios in fields like engineering and finance. Regular practice with worksheets ensures confidence and fluency‚ making it easier to tackle more challenging problems in the future.

1.2 Role of Fractions in Algebraic Equations

Fractions play a significant role in algebraic equations‚ particularly in multi-step problems. They require precise handling to maintain equality and balance. Understanding fraction operations is vital for solving equations accurately‚ as incorrect simplification can lead to errors. Fractions often represent parts of wholes‚ making them essential in real-world applications like measurements and ratios. Incorporating fractions in equations helps students grasp proportional reasoning and prepares them for advanced math. Regular practice with worksheets ensures mastery‚ enabling students to approach complex problems with confidence and accuracy.

Step-by-Step Guide to Solving Multi-Step Equations

Solving multi-step equations involves simplifying‚ applying inverse operations‚ and verifying solutions. Free PDF worksheets offer practice problems to master these skills and prepare for real-world applications.

2.1 Understanding the Basics of Multi-Step Equations

Multi-step equations require sequential operations to isolate variables. Start by simplifying both sides‚ applying distributive properties‚ and combining like terms. Focus on fractions by finding common denominators or eliminating them by multiplying through by the least common multiple. Use inverse operations systematically to solve for the variable. Practice with free PDF worksheets to build confidence in handling integers‚ fractions‚ and decimals. These exercises ensure a solid foundation for tackling complex equations and real-world problems effectively.

2.2 Simplifying Equations with Fractions

Simplifying equations with fractions is a foundational step in solving multi-step problems. Start by identifying and combining like terms‚ ensuring fractions are managed effectively. To eliminate fractions‚ multiply the entire equation by the least common multiple (LCM) of the denominators. This step simplifies calculations and makes the equation easier to solve. Practice with free PDF worksheets to master techniques like finding common denominators and handling fractional coefficients. Regular practice builds confidence and accuracy in solving complex equations involving fractions.

2.3 Solving Equations with Variables on Both Sides

Solving equations with variables on both sides requires careful manipulation to isolate the variable. Start by simplifying each side‚ combining like terms‚ and handling fractions by finding common denominators. Next‚ use inverse operations to move variables to one side and constants to the other. For example‚ subtract the variable term from both sides or add the constant term to both sides. After isolating the variable‚ solve for its value. Always check your solution by substituting it back into the original equation. Practice with multi-step equations worksheets to improve proficiency in handling variables on both sides.

Working with Fractions in Equations

Fractions add complexity to equations‚ requiring careful handling to maintain equality. They are essential in algebraic expressions and often involve finding common denominators to simplify and solve effectively.

3.1 Adding and Subtracting Fractions in Equations

Adding and subtracting fractions within equations requires identifying common denominators to combine like terms effectively. This step ensures that the equation remains balanced and simplifies the solving process. Proper handling of fractions is crucial‚ especially when variables are involved on both sides of the equation. Worksheets often include practice problems that focus on these operations‚ helping students build confidence and accuracy. Regular practice with these exercises leads to a stronger understanding of fraction manipulation in algebraic contexts‚ which is vital for solving multi-step equations successfully.

3.2 Multiplying and Dividing Fractions in Equations

Multiplying and dividing fractions in equations involves simplifying expressions before performing the operation. When multiplying‚ multiply numerators and denominators separately. For division‚ invert the second fraction and multiply. These operations often appear in multi-step equations‚ requiring careful handling to maintain balance. Distributive properties may also apply‚ especially with variables. Common mistakes include improper simplification or incorrect inversion. Regular practice with worksheets helps refine these skills‚ ensuring accuracy in solving complex equations. Resources like Mashup Math and Mathmonks offer dedicated worksheets for mastering these operations‚ providing a solid foundation for advanced algebraic problem-solving.

Distributive Property in Multi-Step Equations

The distributive property is crucial for simplifying expressions in multi-step equations‚ especially when fractions are involved. It allows for the expansion of terms‚ making equations easier to solve.

4.1 Applying the Distributive Property to Fractions

Applying the distributive property to fractions involves multiplying a number outside the parentheses by each term inside. This step is vital for simplifying expressions and solving equations effectively. For example‚ distributing ½ over (3x + 2) gives 3x/2 + 1. This property helps in breaking down complex problems into manageable parts‚ ensuring accuracy in solutions. Regular practice with worksheets can enhance understanding and application of this concept in multi-step equations involving fractions.

4.2 Solving Equations with Parentheses and Fractions

Solving equations with parentheses and fractions requires careful handling of each term. Start by distributing any coefficients outside the parentheses to each term inside. For example‚ in the equation (1/2)x + 3 = 5‚ eliminate the fraction by multiplying the entire equation by 2 to simplify it to x + 6 = 10. Then‚ solve for x by isolating it. When dealing with more complex equations‚ such as (2/3)x + 1 = (1/3)x + 2‚ eliminate fractions by multiplying through by a common denominator‚ like 3‚ resulting in 2x + 3 = x + 6. Solving this gives x = 3. Regular practice with worksheets helps master these steps‚ ensuring accuracy in solving multi-step equations involving fractions and parentheses.

Tips for Solving Multi-Step Equations

Mastering multi-step equations with fractions requires breaking down problems‚ simplifying step-by-step‚ and checking work to avoid errors. Practice regularly to build confidence and accuracy.

5.1 Breaking Down Complex Problems

Breaking down complex multi-step equations with fractions involves identifying individual components and tackling them systematically. Start by simplifying fractions and performing operations like distributive property or combining like terms. Isolate the variable step-by-step‚ ensuring each operation is applied correctly. Use inverse operations to solve for the variable‚ and always verify solutions by plugging them back into the original equation. This methodical approach helps reduce errors and builds confidence in handling intricate algebraic problems. Regular practice with worksheets can further enhance problem-solving skills and speed.

5.2 Avoiding Common Mistakes with Fractions

When solving multi-step equations with fractions‚ common mistakes include improper handling of fraction operations and misapplying the order of operations. Always find a common denominator before adding or subtracting fractions and ensure negative signs are distributed correctly. Avoid mishandling fractions during multiplication or division by treating them as coefficients or terms. Simplify fractions whenever possible to reduce complexity. Double-check each step‚ especially when dealing with variables on both sides. Finally‚ verify solutions by substituting them back into the original equation to ensure accuracy and correctness. Regular practice with worksheets helps identify and avoid these pitfalls effectively.

Real-World Applications of Multi-Step Equations

Multi-step equations with fractions are crucial in real-world scenarios‚ such as adjusting recipes‚ calculating construction materials‚ and managing budgets. They help solve practical problems efficiently and accurately.

6.1 Using Fractions in Practical Scenarios

Fractions are essential in everyday tasks‚ such as cooking‚ where adjusting recipe ingredients requires precise measurements. Multi-step equations help solve problems like scaling recipes or mixing materials‚ ensuring accuracy and efficiency. They also apply to construction‚ where calculating dimensions and costs involves fractions. Additionally‚ budgeting and financial planning benefit from solving multi-step equations with fractions‚ aiding in precise allocation and management of resources. These real-world applications highlight the importance of mastering such equations for practical problem-solving across various domains.

6.2 Solving Word Problems with Multi-Step Equations

Word problems often require translating real-world scenarios into mathematical equations. Multi-step equations with fractions are particularly useful in solving these problems‚ as they allow for the representation of complex relationships between quantities. For example‚ calculating distances‚ speeds‚ or mixed quantities in word problems frequently involves fractions and multiple operations. By breaking down these problems into manageable steps‚ students can apply algebraic techniques to find solutions‚ reinforcing both their analytical skills and understanding of practical applications. Regular practice with worksheets enhances proficiency in this critical area of mathematical problem-solving.

Different Types of Multi-Step Equations

Multi-step equations vary widely‚ involving integers‚ fractions‚ and decimals. They may include combinations of operations‚ variables on both sides‚ and even parentheses‚ challenging students to apply diverse problem-solving strategies.

7.1 Equations with Integers‚ Fractions‚ and Decimals

Multi-step equations often involve a mix of integers‚ fractions‚ and decimals‚ requiring students to apply various arithmetic and algebraic skills. These equations may include operations like addition‚ subtraction‚ multiplication‚ and division across different number types. For instance‚ solving for a variable might involve simplifying fractions‚ converting decimals to fractions‚ or combining like terms with different numerical forms. Such problems enhance problem-solving abilities and prepare students for real-world scenarios where diverse numerical values are common. Regular practice with worksheets containing these mixed-number equations helps build confidence and fluency in handling complex algebraic expressions effectively.

7.2 Solving Equations with No Solution or Infinitely Many Solutions

Some multi-step equations may have no solution or infinitely many solutions‚ depending on the algebraic manipulation. For example‚ equations that simplify to a contradiction (e.g.‚ 1 = 0) have no solution‚ while equations that simplify to an identity (e.g.‚ 0 = 0) have infinitely many solutions. Recognizing these cases requires careful simplification and attention to detail. Worksheets often include such problems to help students identify and understand these outcomes‚ ensuring they grasp the underlying algebraic principles and apply them correctly in various scenarios.

Where to Find Multi-Step Equations Worksheets

Numerous online platforms offer multi-step equations worksheets. Websites like Mashup Math and Kuta Software provide free PDF worksheets with various practice problems and answer keys for students.

8.1 Free PDF Worksheets for Practice

Accessing free PDF worksheets for multi-step equations with fractions is straightforward. Websites like Mashup Math and Kuta Software offer extensive libraries of downloadable PDFs. These resources include varied problem sets‚ ensuring comprehensive practice. Each worksheet typically covers multiple skills‚ such as solving equations with variables on both sides‚ applying the distributive property‚ and handling fractions and decimals. Many also provide detailed answer keys‚ allowing students to verify their solutions and learn from mistakes. Regular practice with these worksheets helps build confidence and proficiency in solving complex algebraic problems.

8.2 Recommended Online Resources

Several online platforms provide excellent resources for mastering multi-step equations with fractions. Websites like Mashup Math and Kuta Software offer comprehensive collections of worksheets and practice problems. Math Monks provides detailed guides and practice sheets‚ while Corbett Maths includes video tutorials and downloadable PDFs. These resources cater to various learning styles‚ from visual learners to those needing step-by-step instructions. Many sites also offer answer keys and progress tracking tools‚ making them ideal for independent study or classroom use. Leveraging these resources can significantly enhance understanding and proficiency in solving multi-step equations with fractions.

Mastering multi-step equations with fractions is a foundational skill that enhances algebraic problem-solving abilities. By practicing with worksheets and online resources like Mashup Math and Kuta Software‚ students can build confidence and accuracy. These exercises not only improve mathematical proficiency but also prepare learners for real-world applications. Consistent practice and understanding of key concepts ensure long-term success in solving complex equations. Embrace the resources available to refine your skills and excel in algebra.

1 2