chopin waltz in a minor pdf

Chopin’s haunting Waltz in A Minor, B.150, offers a glimpse into Romantic-era melancholy, readily available as a PDF for pianists of all levels.

Numerous online resources provide free sheet music downloads, facilitating access to this beloved composition for study and performance.

Its expressive qualities and technical demands continue to captivate audiences, making it a cornerstone of the piano repertoire.

Historical Context of the Waltz

The waltz, originating in 18th-century Austria and Southern Germany, rose to prominence during the early 19th century, becoming a defining dance of the Romantic era. Initially considered scandalous due to its close embrace, it quickly gained acceptance in ballrooms across Europe.

Chopin’s waltzes, composed primarily between 1830 and 1847, represent a sophisticated evolution of the genre. He moved beyond the purely social dance music, infusing his waltzes with poetic depth and individual expression.

Access to Chopin’s works, including the A Minor Waltz, has been greatly enhanced by the availability of PDF sheet music online. This allows modern musicians to study and perform these pieces, preserving a vital part of musical history. The ease of access through digital formats ensures the waltz’s continued relevance.

Chopin’s Contribution to the Waltz Genre

Frédéric Chopin fundamentally transformed the waltz, elevating it from a simple dance form to a vehicle for profound musical expression. He imbued his waltzes with a lyrical beauty, harmonic complexity, and nuanced emotional depth previously unheard of in the genre.

Unlike the grand, often bombastic waltzes of his contemporaries, Chopin’s waltzes possess an intimate, melancholic quality. The Waltz in A Minor exemplifies this, showcasing his masterful use of rubato and delicate ornamentation.

The widespread availability of PDF sheet music allows pianists to explore these subtleties firsthand. Accessing Chopin’s scores digitally democratizes music study, fostering a deeper appreciation for his innovative contributions to the waltz tradition and his lasting legacy.

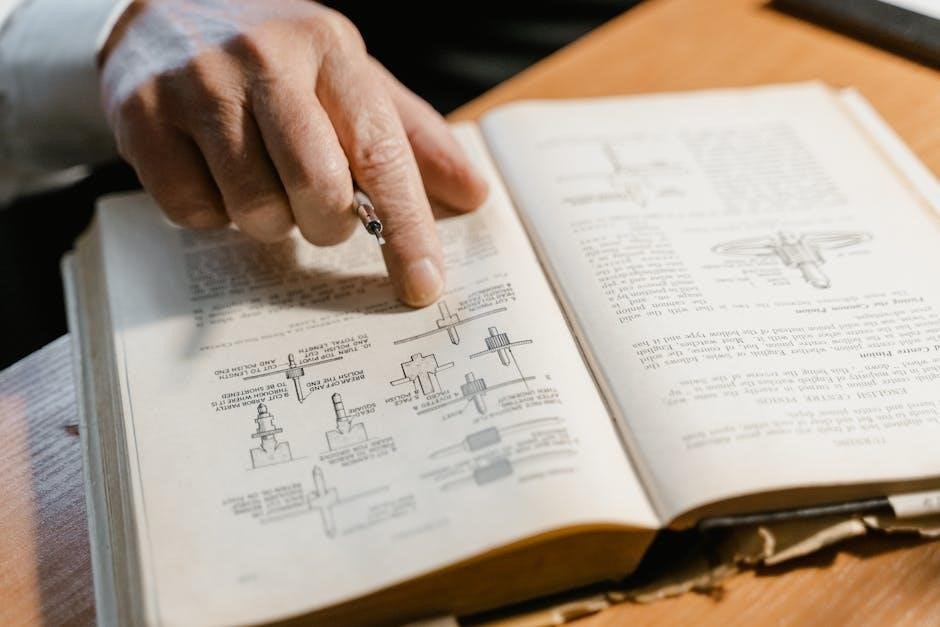
Understanding the Sheet Music (PDF Format)

PDF versions of Chopin’s Waltz in A Minor offer convenient access to the score, enabling detailed study and practice for pianists globally.

Sources for Free PDF Sheet Music

Finding free, legal PDF sheet music for Chopin’s Waltz in A Minor requires careful navigation. Several websites offer downloads, but verifying copyright status is crucial.

IMSLP (International Music Score Library Project) is a prominent resource, providing public domain scores, including various editions of this waltz.

MuseScore also hosts user-submitted arrangements and transcriptions, often available as PDFs, though quality and accuracy can vary.

8notes.com provides a selection of classical sheet music, including Chopin’s works, in PDF format. Always check the terms of use before downloading and printing. Be cautious of sites offering seemingly free downloads that may infringe on copyright laws.

Navigating PDF Sheet Music – Key Symbols

Decoding Chopin’s Waltz in A Minor PDF requires understanding common musical symbols. The key signature of A minor features four sharps, influencing accidentals throughout the piece.

Dynamic markings – p (piano), mf (mezzo forte), f (forte) – dictate volume. Slurs indicate phrasing and legato articulation.

Pedal markings, often denoted by “ped.” or “*”, guide damper pedal usage for harmonic richness. Pay attention to crescendos and diminuendos for expressive shaping.

Fermatas extend notes, while staccato dots shorten them. Understanding these symbols unlocks Chopin’s intended nuances within the PDF score.

Print Quality and Legality of PDF Sources

Downloading Chopin’s Waltz in A Minor PDF necessitates caution regarding source legitimacy. Free PDFs vary significantly in print quality; some may appear blurry or contain errors. Prioritize sources offering high-resolution scans for clear notation.

Copyright considerations are crucial. Public domain scores are legal to download and print, but copyrighted editions require purchase or subscription. Websites offering unauthorized PDFs infringe copyright laws.

Reputable sources, like the IMSLP (International Music Score Library Project), provide legally accessible, high-quality scores. Always verify the source’s credibility before downloading to ensure both legality and readability.

Musical Analysis of the Waltz in A Minor

Chopin’s A Minor Waltz showcases a poignant melody, rich harmonies, and a distinctive rhythmic flow, often studied using readily available PDF scores.

Its structure reveals Chopin’s masterful command of form and emotional expression.

Key Signature and Tonality

Chopin’s Waltz in A Minor is firmly rooted in the key of A minor, indicated by the key signature of no sharps and no flats. However, the tonality is far from simple, exhibiting frequent and dramatic shifts.

The piece explores closely related keys, notably C major (the relative major) and E minor, creating harmonic tension and release. These modulations, easily followed when studying a PDF score, contribute significantly to the waltz’s emotional depth.

Chopin frequently employs chromaticism, adding color and complexity to the harmonic landscape. The use of diminished chords and altered harmonies further intensifies the expressive character of the waltz, making it a compelling study for pianists and music theorists alike.

Analyzing the PDF reveals these tonal nuances.

Tempo and Time Signature

The Waltz in A Minor is notated in 3/4 time, the standard time signature for waltzes, providing its characteristic lilting rhythm. However, determining a precise tempo is nuanced, often described as Moderato, though interpretations vary.

Many performers favor a tempo around 66-76 beats per minute, allowing for expressive phrasing and clarity of articulation. Examining a PDF score reveals Chopin’s subtle tempo markings and dynamic indications, crucial for informed interpretation.

Rubato, a flexible approach to tempo, is essential to capturing the waltz’s emotional essence. This involves subtly speeding up and slowing down, creating a sense of freedom and spontaneity. A clear PDF facilitates studying these rhythmic subtleties.

Mastering the tempo is key to a successful performance.

Melodic Structure and Themes

The Waltz in A Minor features a distinctly melancholic and lyrical melody, characterized by descending phrases and expressive ornamentation. Analyzing a PDF score reveals a ternary (ABA) structure, with a contrasting middle section offering a brief respite from the prevailing sadness;

The primary theme, presented initially, is hauntingly beautiful, built upon stepwise motion and delicate chromaticism. Recurring melodic fragments create a sense of unity throughout the piece. A detailed PDF allows close examination of these thematic connections.

Chopin masterfully employs ornamentation – grace notes, trills, and mordents – to enhance the melody’s expressive power. These embellishments, clearly visible in a quality PDF, demand careful attention to detail.

The melodic contour evokes a sense of longing and introspection.

Harmonic Progression and Chord Voicings

The harmonic language of Chopin’s Waltz in A Minor is richly chromatic and emotionally evocative, readily apparent when studying a PDF of the score. The progression frequently utilizes diminished chords and unexpected modulations, contributing to the waltz’s overall sense of yearning.

Chopin’s characteristic use of seventh chords and inversions adds depth and color to the harmonic texture. A clear PDF reveals his sophisticated voice leading, creating smooth transitions between chords.

The piece centers around A minor, but explores related keys, enhancing the emotional impact. Examining a PDF allows pianists to trace these harmonic shifts and understand their expressive function.

Chord voicings are carefully crafted to maximize resonance and create a lush, romantic sound.

Technical Aspects for Pianists

Chopin’s Waltz in A Minor demands refined technique; a clear PDF score aids mastering its delicate fingerings, nuanced pedaling, and expressive dynamics.

Precise rhythmic control is crucial for interpreting this piece effectively.

Fingerings and Hand Positions

Chopin’s Waltz in A Minor presents unique fingering challenges, best addressed with a carefully studied PDF score. Achieving fluidity requires prioritizing comfortable hand positions and efficient finger substitutions.

The opening arpeggios benefit from a relaxed wrist and a focus on evenness between notes. Consider utilizing fingerings that minimize tension and allow for seamless transitions.

Pay close attention to passages requiring large stretches; strategic finger choices can prevent strain and maintain clarity. A well-annotated PDF can offer suggested fingerings from experienced performers.

Maintaining a curved finger shape and a flexible thumb are essential for navigating the waltz’s melodic lines and harmonic textures. Consistent practice with mindful technique will unlock the piece’s expressive potential.

Pedaling Techniques

Effective pedaling is crucial for realizing the nuanced beauty of Chopin’s Waltz in A Minor, and a detailed PDF score can illuminate suggested pedal markings. Avoid excessive pedaling, which can muddy the harmonic clarity.

Instead, employ subtle half-pedaling and quick changes to create a shimmering effect without sacrificing definition. The waltz’s melancholic character benefits from a delicate touch with the sustain pedal.

Observe the phrasing and use the pedal to enhance the emotional arc of each musical line. Syncopated rhythms require precise pedal coordination to maintain rhythmic integrity.

Studying recordings of renowned pianists alongside the PDF can provide valuable insights into their pedaling choices and interpretive approaches. Experiment to discover what best serves the music.

Dynamics and Articulation

Chopin’s Waltz in A Minor demands a sensitive approach to dynamics and articulation, readily apparent when studying a detailed PDF score. The piece fluctuates between delicate pianissimo passages and more assertive forte sections.

Pay close attention to the composer’s markings – crescendos, diminuendos, and accents – to shape the musical phrases effectively. Articulation should be varied, employing legato for lyrical melodies and staccato for rhythmic emphasis.

Subtle nuances in touch and phrasing are essential for conveying the waltz’s inherent emotional depth. A well-annotated PDF will highlight these expressive details.

Balance the left-hand accompaniment with the right-hand melody, ensuring neither overpowers the other. Careful attention to dynamics and articulation brings this waltz to life.

Rhythmic Accuracy and Interpretation

Maintaining rhythmic precision is crucial when performing Chopin’s Waltz in A Minor, especially when referencing a PDF score for detailed analysis. The waltz’s characteristic 3/4 time signature requires a steady pulse and graceful flow.

However, avoid rigidity; Chopin often employs subtle rubato – a flexible tempo – to enhance expressiveness. Studying a quality PDF reveals these nuanced rhythmic indications.

Interpretation involves balancing adherence to the written rhythm with artistic freedom. Understand the harmonic structure to inform phrasing and dynamic shaping.

A clear understanding of the waltz’s rhythmic foundation, combined with sensitive interpretation, unlocks its emotional power and beauty.

Learning Resources and Tutorials

PDF sheet music unlocks learning; online video tutorials demonstrate technique, while interactive platforms offer guided practice of Chopin’s Waltz.

Dedicated websites provide Chopin-specific insights, aiding interpretation and performance.

Online Video Tutorials

YouTube hosts a wealth of tutorials dissecting Chopin’s Waltz in A Minor, often utilizing the readily available PDF sheet music as a visual aid. These videos cater to diverse skill levels, from beginner walkthroughs focusing on basic hand positions and fingerings to advanced masterclasses exploring nuanced interpretations.

Many instructors offer slow-motion demonstrations, highlighting challenging passages and providing detailed explanations of phrasing and dynamics. Some tutorials even incorporate on-screen annotations directly onto the PDF score, clarifying complex rhythms or harmonic progressions.

Platforms like Flowkey and Skoove offer interactive learning experiences, syncing the PDF sheet music with real-time feedback as you play, helping to refine timing and accuracy. Searching for “Chopin Waltz A Minor tutorial” yields numerous options, allowing learners to find an instructor whose style resonates with their learning preferences.

Interactive Sheet Music Platforms

Several platforms enhance the learning experience beyond static PDF sheet music. Musicnotes.com and Sheet Music Plus offer interactive versions of Chopin’s Waltz in A Minor, allowing tempo adjustment and looping of difficult sections. These platforms often include playback features, enabling students to hear professional recordings alongside the score.

Newzik and ForScore are popular apps for iPad and iPhone, transforming the PDF into a dynamic, annotatable score. Users can mark fingerings, dynamics, and phrasing directly onto the music, creating a personalized learning tool.

These platforms frequently integrate with MIDI keyboards, providing real-time feedback on accuracy and rhythm. The ability to transpose the PDF to different keys can also be beneficial for learners, facilitating practice and comprehension.

Chopin-Specific Learning Websites

Dedicated websites offer focused resources for studying Chopin, complementing PDF sheet music of the Waltz in A Minor. Chopinmusic.net provides biographical information, historical context, and detailed analyses of his works, enriching understanding. International Chopin Piano Competition’s website archives performances and masterclasses, offering invaluable insights.

The Fryderyk Chopin Institute offers scholarly articles, PDF scores (some free, others for purchase), and a vast digital library. These resources delve into Chopin’s compositional techniques and stylistic nuances.

Many piano teachers maintain blogs and websites with specific lessons and interpretations of Chopin’s pieces, often referencing readily available PDF versions. Exploring these curated resources can significantly enhance learning.

Performance Considerations

Chopin’s Waltz in A Minor, often accessed via PDF, demands nuanced interpretation; prioritize emotional expression and phrasing for a captivating performance.

Authentic style requires careful attention to dynamics and rubato, bringing the piece’s inherent drama to life.

Interpreting Chopin’s Style

Chopin’s unique style, beautifully showcased in the Waltz in A Minor – frequently studied from a PDF score – transcends mere technical proficiency. It necessitates a deep understanding of bel canto, the Italian operatic style, influencing his melodic lines and phrasing.

Rubato, a flexible tempo, is crucial; it’s not about speeding up or slowing down randomly, but rather a subtle “robbing” of time from one beat to lend expression to another.

Pay attention to the ornamentation – grace notes and trills – they aren’t simply decorative, but integral to the melodic character.

Furthermore, Chopin’s harmonies are often unexpected, creating a sense of longing and melancholy. A successful interpretation requires conveying this emotional depth, moving beyond a technically accurate reading to truly embody the composer’s intent.

Emotional Expression and Phrasing

The Waltz in A Minor, often accessed via PDF sheet music, demands nuanced emotional expression. Chopin’s music isn’t simply about notes; it’s about conveying a profound sense of longing and melancholy.

Phrasing should be shaped like a vocal line, with careful attention to dynamics and subtle tempo variations. Avoid a mechanical approach; instead, allow the music to breathe.

Consider the harmonic shifts – they often create moments of tension and release. Emphasize these changes to highlight the emotional narrative.

Ultimately, successful performance relies on connecting with the music’s inherent sadness and vulnerability, communicating this depth to the audience through sensitive phrasing and expressive playing.

Stage Presence and Performance Practice

Performing Chopin’s Waltz in A Minor, often studied from a PDF score, requires a delicate balance between technical precision and artistic interpretation. Stage presence should reflect the music’s introspective nature – avoid excessive gestures or theatrics.

Maintain a focused and composed demeanor, allowing the music to speak for itself. Historically informed performance practice suggests a degree of rubato, but avoid exaggeration.

Connect with the emotional core of the piece, conveying its inherent sadness and vulnerability.

Remember that Chopin’s music was intended for intimate settings; strive to create a similar atmosphere, even in larger venues, fostering a connection with the audience.

The Waltz in A Minor in Popular Culture

Chopin’s Waltz in A Minor, easily accessed as a PDF, frequently appears in film and television, enhancing dramatic scenes with its poignant melody.

Numerous arrangements exist, showcasing its adaptability, while modern recordings continue to introduce it to new listeners.

Use in Film and Television

Chopin’s Waltz in A Minor, often found as a readily available PDF, has experienced notable inclusion in various cinematic and television productions. Its melancholic and romantic character lends itself beautifully to scenes requiring emotional depth and dramatic tension.

The waltz frequently underscores moments of introspection, loss, or burgeoning romance, enhancing the narrative impact. While specific instances are often subtle, the piece’s recognizable melody contributes to the overall atmosphere.

The accessibility of the PDF format has likely facilitated its use by independent filmmakers and student projects, further expanding its presence in visual media. Its timeless quality ensures continued relevance for future productions seeking a touch of classical elegance.

Arrangements and Adaptations

Chopin’s Waltz in A Minor, easily accessible as a PDF, has inspired a wealth of arrangements and adaptations across diverse musical genres. Beyond the original piano solo version, orchestral arrangements exist, expanding the harmonic palette and dynamic range.

Numerous transcriptions cater to different instrumentations, including cello, guitar, and even wind ensembles, demonstrating the waltz’s melodic versatility. Contemporary artists have incorporated elements of the piece into electronic music and pop songs, bridging classical and modern sounds.

The widespread availability of the PDF sheet music encourages amateur musicians to create their own interpretations, fostering creativity and a deeper engagement with Chopin’s masterpiece.

Modern Interpretations and Recordings

The accessibility of the Waltz in A Minor PDF has fueled countless modern interpretations and recordings. Renowned pianists continue to offer fresh perspectives on Chopin’s work, balancing fidelity to the score with individual artistry.

Recordings range from historically informed performances striving for authenticity to more romanticized readings emphasizing emotional expression. Digital platforms host a vast collection of these interpretations, allowing listeners to explore diverse approaches.

Furthermore, amateur pianists sharing their performances online contribute to a vibrant community surrounding the waltz, showcasing the enduring appeal of this iconic piece, readily available through PDF sheet music.

Related Chopin Waltzes

Chopin’s waltzes, including the famous “Minute Waltz” and Op. 18 “Grande valse brillante”, share stylistic traits with the A Minor Waltz PDF.

Exploring these pieces provides a broader understanding of Chopin’s waltz compositions and his innovative approach to the genre.

Waltz in D-flat Major, Op. 64, No. 1 (“Minute Waltz”)

Chopin’s “Minute Waltz,” despite its nickname, rarely takes a full minute to perform, though brisk tempos are common. Like the A Minor Waltz, readily available as a PDF, it showcases Chopin’s lyrical genius and technical brilliance.

This waltz, Op. 64 No. 1, is characterized by its sparkling melody and delicate ornamentation, demanding precise fingerwork and a light touch from the pianist. Its popularity stems from its accessibility and immediate appeal, making it a favorite among both performers and audiences.

While structurally simpler than some of Chopin’s other waltzes, the “Minute Waltz” requires nuanced interpretation to convey its charm and elegance. Numerous PDF versions exist online, offering varying levels of editing and accuracy.

Waltz in E-flat Major, Op. 18 (“Grande valse brillante”)

Chopin’s “Grande valse brillante,” Op. 18, stands in contrast to the intimacy of the A Minor Waltz, offering a display of virtuosic brilliance. Like its counterpart, finding a PDF version is relatively easy, though quality varies significantly.

This waltz demands considerable technical prowess, featuring rapid passages, sweeping arpeggios, and intricate ornamentation. It’s a showcase piece, intended to impress with its grandeur and dazzling effect. The piece’s length and complexity require stamina and a refined sense of musicality.

Despite its showy character, the “Grande valse brillante” retains Chopin’s characteristic melodic sensitivity, making it more than just a technical exercise. Many free PDF scores are available online for study.

Waltz in C-sharp Minor, Op. 64, No. 2

Chopin’s Waltz in C-sharp Minor, Op. 64, No. 2, shares a similar introspective quality with the A Minor Waltz, though possessing a distinct character. Accessing a PDF of this piece is common, with numerous websites offering free downloads of the sheet music.

This waltz is noted for its melancholic beauty and expressive harmonies, creating a poignant and emotionally resonant experience. It’s a more restrained work than the “Grande Valse Brillante,” focusing on nuance and delicate phrasing;

While technically demanding, the emphasis lies on conveying the waltz’s underlying emotional depth. Finding a legally sourced, high-quality PDF is crucial for accurate interpretation and practice.

free 12×24 shed plans pdf

Planning a spacious storage solution? Explore readily available free 12×24 shed plans PDF options online, offering detailed guides for DIY enthusiasts seeking a large, functional structure.

Why Choose a 12×24 Shed?

A 12×24 shed offers substantial space – ideal for workshops, garden tool storage, or even small vehicle housing. Utilizing free 12×24 shed plans PDF allows you to construct this sizable structure without significant upfront costs for design.

These plans cater to diverse needs, from basic storage to more complex projects. The generous dimensions accommodate larger equipment, furniture, or seasonal items. Many downloadable plans feature gable roofs and include details for doors and windows, enhancing functionality and aesthetics.

Choosing this size provides ample room for organization, while the availability of free PDF plans makes it an accessible project for DIYers of varying skill levels. It’s a cost-effective way to add valuable space to your property.

Benefits of Using PDF Plans

Free 12×24 shed plans in PDF format offer numerous advantages for builders. They are easily downloadable and printable, providing a readily accessible reference throughout the construction process. PDF plans ensure consistent formatting, eliminating discrepancies often found with online guides.

These plans typically include detailed diagrams, cut lists, and material lists, streamlining the building process and minimizing waste. The digital format allows for easy zooming and annotation, facilitating a clearer understanding of complex details.

Furthermore, PDF plans are compatible with various devices, enabling access on-site. Many plans are designed to be print-friendly, optimizing paper usage. Utilizing these resources empowers DIYers to confidently tackle a 12×24 shed project.

Essential Tools and Materials

Building from free 12×24 shed plans PDF requires standard tools – saws, drills, levels – and materials like lumber, concrete, fasteners, roofing, and siding.

Lumber Selection for Shed Construction

Choosing the right lumber is crucial when utilizing free 12×24 shed plans PDF. Typically, 2×6 lumber is recommended for wall framing, providing sufficient strength for a shed of this size. However, some builders, as noted in online discussions, opt for 2x4s for cost savings, potentially requiring closer stud spacing.

For rafters, 2x10s are frequently suggested, offering the necessary support for the roof structure. Pressure-treated lumber is essential for any wood in direct contact with the ground, preventing rot and extending the shed’s lifespan. Consider the grade of lumber; higher grades minimize knots and imperfections, leading to a more structurally sound build.

Carefully review your chosen free plans PDF for specific lumber requirements and adjust based on local building codes and desired durability.

Foundation Materials: Concrete, Gravel, or Wood

Selecting a foundation is key when implementing free 12×24 shed plans PDF. Concrete foundations offer the most durable and level base, but require more labor and expense. Gravel pads are a cost-effective alternative, providing good drainage, though they may settle over time. Wooden foundations, using pressure-treated skids, are simpler to install but are less permanent and may be unsuitable for certain soil conditions.

Many free shed plans don’t specify a foundation, leaving the choice to the builder. Consider your local climate, soil type, and intended use when deciding. Proper site preparation is vital regardless of the material chosen, ensuring a stable and long-lasting structure.

Always check local building codes regarding foundation requirements before starting construction.

Fasteners, Roofing, and Siding Options

Utilizing free 12×24 shed plans PDF requires careful material selection. For fasteners, galvanized screws and nails resist rust, crucial for outdoor structures. Roofing options range from asphalt shingles – affordable and common – to metal roofing for durability and longevity. Consider the aesthetic and budget when choosing.

Siding choices include wood, vinyl, and metal. Wood offers a classic look but needs regular maintenance. Vinyl is low-maintenance but less durable. Metal siding is robust but can be more expensive.

Free plans often list material quantities, but verifying these against your specific design and local building codes is essential for a successful build.

Understanding the 12×24 Shed Plans

Free 12×24 shed plans PDF require careful review of blueprints, component lists, and cut lists to ensure a smooth and accurate construction process.

Reading and Interpreting Shed Blueprints

Decoding free 12×24 shed plans PDF blueprints is crucial for success. These plans typically utilize standard architectural symbols representing walls, doors, windows, and roofing elements. Pay close attention to dimensions, ensuring accurate measurements for lumber and materials.

Understanding views – top, front, side, and sections – provides a comprehensive understanding of the shed’s structure. Look for details regarding framing, foundation specifics (concrete, gravel, or wood), and roofing pitch.

Familiarize yourself with the legend or key, which explains the symbols used. Note fastener types and spacing, as well as any specific construction techniques illustrated. Carefully examine the bill of materials, cross-referencing it with the drawings to verify quantities and sizes.

Don’t hesitate to consult online resources or seek guidance if any aspect of the blueprint remains unclear before commencing construction.

Key Components of the Plan: Walls, Roof, Floor

Free 12×24 shed plans PDF detail three core components: walls, roof, and floor. Wall plans specify framing layouts – typically 2×6 or 2×4 studs – with details on stud spacing, header sizes for openings, and sheathing requirements. Roof plans illustrate rafter or truss designs, pitch angles, and overhang dimensions, crucial for weather protection.

Floor plans outline foundation types (concrete slab, gravel base, or wooden skid foundation) and framing details, including joist size and spacing. Pay attention to the plans’ depiction of siding and roofing materials, ensuring compatibility with the structural design.

Understand how these components interconnect. Wall framing ties into the floor platform, while the roof structure rests upon the walls. Accurate interpretation of these relationships is vital for a structurally sound shed.

Bill of Materials and Cut Lists

Free 12×24 shed plans PDF invariably include a Bill of Materials (BOM), a comprehensive list of all required materials – lumber, fasteners, roofing, siding, doors, and windows. Carefully review the BOM to estimate project costs and ensure you procure everything needed before starting construction.

Alongside the BOM, you’ll find a Cut List. This details the precise dimensions and quantities of each lumber piece required. Utilizing a cut list minimizes waste, saves time, and improves accuracy. Double-check measurements and quantities before cutting any lumber.

Some plans categorize materials by component (walls, roof, floor), simplifying organization. Always verify the BOM and cut list against the plans to avoid discrepancies and ensure a smooth build.

Step-by-Step Construction Guide

Free 12×24 shed plans PDF provide sequential instructions, starting with the foundation and progressing through framing, roofing, and finishing – a clear path to completion!

Building the Foundation

Utilizing free 12×24 shed plans PDF, the foundation is paramount for a durable structure. Plans typically detail options like concrete slabs, gravel bases, or wooden skids. Concrete provides a robust, level surface, requiring formwork and pouring, while gravel offers excellent drainage and is more affordable.

Wooden skids are suitable for smaller sheds and allow for relocation. Regardless of the chosen method, ensure proper leveling and compaction. The plans will specify dimensions and material quantities. Accurate foundation construction, following the PDF’s guidance, prevents future structural issues and ensures a square, stable shed. Thorough preparation is key to a successful build!

Framing the Walls

Free 12×24 shed plans PDF will illustrate wall framing using 2×6 lumber, commonly spaced 16 or 24 inches on center. Begin by constructing wall sections flat on the floor, ensuring squareness with accurate measurements. Include top and bottom plates, and stud cuts detailed in the PDF.

Pay close attention to window and door openings, adding headers for support. Once sections are assembled, raise and brace them, connecting them securely at the corners. Proper bracing is crucial for stability during construction. The plans will guide you on sheathing application, adding rigidity and weather protection. Accurate framing, guided by the PDF, is vital for a structurally sound shed.

Constructing the Roof

Free 12×24 shed plans PDF typically detail a gable roof, utilizing 2×10 rafters for strength. Begin by cutting rafters to the specified angle, referencing the PDF’s diagrams for precise measurements. Assemble roof trusses or rafters individually, ensuring consistent spacing.

Install a ridge board to support the rafters, creating the roof’s peak. Sheathe the roof with plywood or OSB, following the PDF’s instructions for proper fastening. Consider overhangs for weather protection. The plans will guide you through installing roofing felt and your chosen roofing material. Accurate cuts and secure fastening, as shown in the PDF, are essential for a weatherproof roof.

Adding Finishing Touches

Free 12×24 shed plans PDF guide siding, roofing, and door/window installation. Interior finishing and organization enhance functionality, completing your spacious shed build.

Installing Siding and Roofing

Utilizing your free 12×24 shed plans PDF, carefully install siding to protect the structure from the elements. Options range from wood, vinyl, or metal, each offering unique aesthetics and durability.

Ensure proper overlap and secure fastening, following the plan’s specifications. Roofing installation is equally crucial; consider asphalt shingles, metal roofing, or other suitable materials.

Pay close attention to underlayment application for waterproofing. The free plans PDF will detail rafter spacing and roofing material quantities. Proper installation prevents leaks and extends the shed’s lifespan. Accurate cuts and secure attachment are vital for a weather-resistant finish, completing a robust exterior shell.

Door and Window Installation

Referring to your free 12×24 shed plans PDF, precisely frame the openings for doors and windows. Ensure squareness and proper dimensions before installing the frames. Select doors and windows appropriate for shed use – consider durability and weather resistance.

The free plans typically indicate window sizes and placement for optimal light and ventilation. Securely fasten the frames, ensuring a tight seal to prevent drafts and water intrusion.

Install doors with robust hinges and a reliable locking mechanism. Proper alignment is crucial for smooth operation. Following the PDF’s guidance, complete this stage for a functional and secure shed, enhancing both accessibility and usability.

Interior Finishing and Organization

Utilizing your free 12×24 shed plans PDF as a guide, consider interior finishing options to maximize usability. While not always essential, adding plywood or OSB to the walls and ceiling creates a cleaner, more finished space. This also provides a surface for mounting shelving and organization systems.

The free plans won’t detail specific organization, so plan shelving, workbenches, or pegboards based on your needs. Prioritize vertical storage to utilize the shed’s height effectively.

Think about electrical needs if you plan to use power tools. Refer to the PDF for structural considerations when adding weight. A well-organized interior transforms your shed into a functional workshop or storage haven;

Customization Options

Free 12×24 shed plans PDF offer a base; personalize with shelving, workbenches, or electrical wiring to create a tailored, functional space for your needs.

Adding Shelving and Workbenches

Maximizing space within your 12×24 shed, built from free 12×24 shed plans PDF, is crucial. Incorporating shelving and workbenches transforms it from simple storage to a functional workshop.

Consider building sturdy shelving units along the walls, utilizing the shed’s height for vertical storage. Plan for adjustable shelves to accommodate items of varying sizes. A dedicated workbench provides a solid surface for projects, and can be customized with drawers and vises.

When designing these additions, factor in the shed’s door placement and workflow. Ensure ample space for movement and access to tools and materials. Utilizing scrap lumber from the shed construction can reduce costs and promote sustainability. Remember to securely anchor shelving and workbenches to the shed’s framing for stability and safety.

Electrical Wiring Considerations

Enhancing your 12×24 shed, constructed using free 12×24 shed plans PDF, with electrical wiring expands its usability, but requires careful planning and adherence to safety codes.

Before starting, check local regulations regarding shed electrical installations – permits may be necessary. Use underground-rated wiring for exterior runs, protecting it within conduit. A dedicated circuit breaker in your main panel is essential, sized appropriately for the shed’s anticipated load.

Ground Fault Circuit Interrupter (GFCI) outlets are crucial for safety, especially in damp environments. Plan outlet placement strategically for tools, lighting, and potential future needs. If you’re unfamiliar with electrical work, always consult a qualified electrician to ensure a safe and code-compliant installation.

Paint and Exterior Protection

Protecting your shed, built from free 12×24 shed plans PDF, from the elements is vital for longevity. Begin with a quality exterior primer, ensuring good adhesion to the siding material. Choose paints specifically formulated for outdoor use, offering UV resistance and weather protection.

Acrylic latex paints are popular choices, providing durability and ease of application. Consider a satin or semi-gloss finish for better washability. Before painting, thoroughly clean the siding, removing any dirt, mildew, or loose paint.

For added protection, explore wood preservatives or stains, especially if using natural wood siding. Regularly inspect the exterior for damage and repaint as needed to maintain a weatherproof barrier.

Resources for Free 12×24 Shed Plans PDF

Numerous websites offer free 12×24 shed plans PDF downloads, providing diverse designs and instructions for building a robust and spacious outdoor structure.

Popular Websites Offering Free Plans

Finding reliable free 12×24 shed plans PDF requires exploring several online resources. Many websites specialize in DIY projects and offer downloadable plans as a service to builders. These platforms frequently feature a range of shed designs, including the popular 12×24 size, catering to various storage and workshop needs.

Some sites provide plans directly, while others link to external resources or require registration. It’s crucial to verify the source’s credibility before downloading any plans. Look for websites with positive user reviews and clear, detailed instructions. Remember to carefully review licensing and usage rights before commencing construction, ensuring compliance with any terms and conditions associated with the free plans.

Exploring these resources can significantly reduce project costs and provide a solid foundation for a successful shed-building endeavor.

Checking Plan Validity and Completeness

Before starting your 12×24 shed project with a free PDF plan, thorough verification is essential. Ensure the plans include a comprehensive bill of materials, detailed cut lists, and clear, step-by-step instructions. Missing components can lead to costly delays and structural issues.

Scrutinize the blueprints for accuracy and logical flow. Check for proper dimensions, foundation specifications, and framing details. A complete plan should cover all construction phases, from foundation building to roofing and finishing. Look for 3D diagrams or sketches to aid visualization.

If anything seems unclear or inconsistent, seek clarification or consider alternative plans. A valid, complete plan is the cornerstone of a safe and successful build.

Understanding Licensing and Usage Rights

When utilizing free 12×24 shed plans PDF, carefully review the licensing and usage rights. Many “free” plans aren’t entirely unrestricted. Some websites may retain copyright, limiting commercial use or modifications. Others might require attribution or prohibit redistribution.

Pay close attention to the terms of service or accompanying documentation. Understand if you’re permitted to alter the plans, build for resale, or share them with others. Ignoring these terms could lead to legal issues.

Look for plans with a clear Creative Commons license or explicit permission for broad usage. Prioritize plans that grant you the freedom to adapt and build without restrictions, ensuring a hassle-free project.

ge dry boost dishwasher manual

GE Dry Boost Dishwasher Manual: A Comprehensive Guide

This manual provides detailed instructions for GE dishwashers featuring Dry Boost technology, ensuring optimal performance and addressing common issues for sparkling clean dishes.

GE’s Dry Boost technology represents a significant advancement in dishwasher drying performance, specifically engineered to combat the frustrating issue of lingering moisture, particularly on plastics. Traditional dishwasher drying cycles often struggle with these materials, leaving them damp and requiring manual drying. Dry Boost addresses this challenge through a clever combination of enhanced heat and optimized airflow, creating a more effective drying environment within the dishwasher cavity.

Unlike conventional heated dry options that rely solely on residual heat from the wash cycle, Dry Boost actively introduces a fan to circulate air, drawing in warmer air and directing it over the dishes. This targeted airflow accelerates evaporation, ensuring even drying across all racks. The technology isn’t simply about higher temperatures; it’s about intelligently managing and distributing heat for superior results. This results in dishes, especially plastics, being up to three times drier compared to standard heated dry cycles, saving you time and effort.

This introduction will explore the core principles of Dry Boost, its benefits, and how it differentiates itself from other drying technologies available in modern dishwashers.

What is GE Dry Boost and How Does it Work?

GE Dry Boost isn’t merely a heating element; it’s a thoughtfully engineered system designed to maximize drying efficiency. At its heart, Dry Boost utilizes a dedicated fan that actively circulates air during the drying cycle. This isn’t just about blowing air around – the fan draws in warmer air from within the dishwasher and strategically directs it onto the dishes, accelerating the evaporation process.

This enhanced airflow is particularly beneficial for plastic items, which notoriously retain moisture. By consistently exposing these items to warmer, moving air, Dry Boost significantly reduces drying times and minimizes the need for hand-drying. The system intelligently manages heat, preventing excessive temperatures that could potentially damage delicate items.

The process begins after the final rinse cycle. The Dry Boost fan activates, initiating the circulation of heated air. This continuous airflow ensures that moisture is efficiently removed from all surfaces, leaving dishes, glassware, and plastics thoroughly dry. It’s a proactive approach to drying, rather than relying on passive heat dissipation.

Benefits of Using the Dry Boost Feature

The primary benefit of GE’s Dry Boost technology is, undeniably, superior drying performance. Users consistently report dishes being up to three times drier compared to traditional heated dry cycles, eliminating the frustrating task of hand-drying; This is especially crucial for plastic containers and utensils, which often remain stubbornly wet after a standard wash.

Beyond convenience, Dry Boost contributes to improved hygiene. Thoroughly dried dishes are less likely to harbor bacteria and mildew, promoting a cleaner kitchen environment. The feature also saves you valuable time and effort, freeing you from post-wash cleanup. Reduced hand-drying also translates to energy savings, as you’re not relying on manual heat sources.

Furthermore, Dry Boost offers peace of mind. Knowing your dishes are completely dry before storing them prevents unpleasant surprises and ensures they’re ready for immediate use. It’s a small addition that significantly enhances the overall dishwasher experience, delivering consistently sparkling and sanitary results.

Understanding Your GE Dishwasher Control Panel

GE dishwasher control panels vary by model, but generally feature intuitive buttons and displays for cycle selection, options like Dry Boost, and status indicators;

Locating the Dry Boost Option

Finding the Dry Boost option on your GE dishwasher control panel is usually straightforward, though the exact location can differ slightly depending on the specific model. Typically, you’ll find it as a dedicated button clearly labeled “Dry Boost” alongside other drying cycle selections. On newer models with touchscreens, Dry Boost is often accessible through the “Options” or “Modifiers” menu.

Look for a button that might also have an icon representing enhanced drying – often a droplet with radiating lines. If your dishwasher has multiple drying settings (like “Auto Dry,” “Heated Dry,” and “Air Dry”), Dry Boost will likely be presented as a more powerful alternative to these standard options. Some dishwashers require you to press a “Options” or “Modifiers” button first, then select Dry Boost from the displayed list.

Consult your dishwasher’s specific user manual for a visual guide to the control panel layout and precise instructions on activating the Dry Boost feature. The manual will illustrate the button’s location and explain any necessary steps to engage it during cycle setup. Remember, activating Dry Boost is key to achieving superior drying, especially for plastics.

Other Relevant Drying Cycle Options

Beyond Dry Boost, GE dishwashers offer a range of drying cycles tailored to different needs. “Heated Dry” utilizes a heating element to warm the air, aiding evaporation – a standard option, but less effective on plastics. “Auto Dry” employs sensors to detect rinse aid levels and adjust drying time automatically, conserving energy. “Air Dry” or “Eco Dry” relies on residual heat and natural airflow, offering the most energy-efficient, though slowest, drying method.

Some models feature “Extended Dry,” providing a longer drying period for heavily loaded dishwashers or items requiring extra time. “Hybrid Dry” combines condensation drying with a fan for improved performance. Understanding these options allows you to select the most appropriate cycle based on your load and preferences.

While Dry Boost excels at drying plastics, combining it with “Auto Dry” can optimize overall efficiency. Experimenting with different cycles helps determine the best settings for consistently sparkling clean and thoroughly dry dishes. Always refer to your dishwasher’s manual for a complete list of available cycles and their specific functions.

Troubleshooting Common Dry Boost Issues

Dry Boost problems often stem from simple causes; this section guides you through initial checks, persistent moisture solutions, and addressing excessive heat during the drying cycle.

Dry Boost Not Working: Initial Checks

If your GE dishwasher’s Dry Boost feature isn’t activating, begin with a series of straightforward checks. First, confirm that the Dry Boost option is actually selected on the control panel alongside your chosen wash cycle. It’s surprisingly common for this setting to be inadvertently overlooked!

Next, verify the dishwasher door is securely latched. The Dry Boost function relies on a closed system to effectively circulate heated air; an improperly sealed door will prevent activation. Also, ensure the dishwasher isn’t experiencing any power supply issues – a tripped breaker or loose connection can disable features.

Inspect the dishwasher’s heating element. While Dry Boost utilizes enhanced airflow, a malfunctioning heating element will significantly hinder drying performance. A visual inspection (with the power OFF, of course!) can reveal obvious damage. Finally, check for any error codes displayed on the control panel, as these can pinpoint the specific problem. Refer to the error code section of this manual for detailed explanations.

Persistent Moisture on Plastics – Causes and Solutions

One common complaint with dishwashers, even those with Dry Boost, is lingering moisture on plastic items. This isn’t necessarily a malfunction, but rather a characteristic of plastic’s material properties. Plastics don’t retain heat as effectively as glass or metal, making them slower to dry.

However, several factors can exacerbate this issue. Insufficient rinse aid is a primary culprit; rinse aid reduces water’s surface tension, promoting sheeting and faster evaporation. Ensure your rinse aid dispenser is adequately filled and set to the appropriate level. Proper loading is also crucial – avoid nesting plastics, allowing water to fully drain.

If Dry Boost isn’t fully resolving the problem, consider using the “High Temp Wash” option (if available) alongside Dry Boost for an extra boost of heat. Finally, manually cracking the dishwasher door slightly after the cycle completes can release trapped moisture and accelerate drying, especially for stubborn plastic containers.

Excessive Heat During Dry Boost Cycle

While Dry Boost utilizes increased heat for enhanced drying, excessively high temperatures can be a concern. Though designed with safety in mind, certain conditions might lead to perceived or actual overheating. A properly functioning heating element is crucial; if it’s malfunctioning, it could generate disproportionate heat.

Ensure the dishwasher’s vent isn’t blocked. Restricted airflow prevents heat dissipation, causing temperatures to rise. Check for obstructions around the dishwasher’s base and vent opening. Overloading the dishwasher can also contribute, hindering air circulation. Avoid tightly packing dishes, allowing space for heated air to circulate effectively.

If you suspect excessive heat, immediately stop the cycle and allow the dishwasher to cool. If the issue persists, or if you notice any burning smells, disconnect the power and contact a qualified technician. Ignoring excessive heat could damage plastic items or even pose a safety hazard. Regular maintenance helps prevent such issues.

GE Dishwasher Maintenance for Optimal Dry Boost Performance

Regular maintenance—filter cleaning, proper rinse aid use, and correct loading—is vital for maximizing Dry Boost effectiveness and ensuring consistently spotless, dry dishes every time.

Cleaning the Dishwasher Filter

Maintaining a clean dishwasher filter is paramount for optimal Dry Boost performance and overall dishwasher health. A clogged filter restricts water flow, hindering cleaning and drying efficiency. GE recommends cleaning the filter at least monthly, or more frequently depending on usage.

To clean the filter, first, remove the lower rack. Locate the filter assembly, typically at the bottom of the dishwasher interior. Twist the filter counterclockwise to unlock and lift it out. Separate the filter components – usually a cylindrical filter and a flat mesh screen.

Rinse each component thoroughly under warm running water, using a soft brush to remove any food particles or debris. Avoid using harsh detergents or abrasive cleaners, as these can damage the filter. Once clean, reassemble the filter components and securely lock it back into place. A clean filter ensures proper water circulation, contributing to better drying results with Dry Boost and extending the life of your GE dishwasher.

Rinse Aid Usage and Compatibility

Rinse aid plays a crucial role in enhancing the effectiveness of the Dry Boost feature in your GE dishwasher. It reduces water surface tension, allowing water to sheet off dishes rather than forming droplets, which contribute to spotting and poor drying. GE recommends using a high-quality rinse aid specifically formulated for dishwashers.

To fill the rinse aid dispenser, locate it within the dishwasher door and carefully pour rinse aid until the fill indicator reaches the “Max” line. Adjust the rinse aid dosage setting based on your water hardness – harder water requires a higher setting. GE dishwashers are generally compatible with most liquid rinse aids available on the market.

However, avoid using rinse aids containing chlorine bleach, as these can damage the dishwasher’s interior components. Regularly check the rinse aid level and replenish as needed. Proper rinse aid usage, combined with Dry Boost, ensures sparkling clean, spot-free dishes and optimal drying performance.

Proper Loading Techniques for Dry Boost

To maximize the benefits of the Dry Boost feature, proper dishwasher loading is essential. Avoid overcrowding, ensuring water and heated air can circulate freely around all dishes. Place items facing the center for optimal cleaning and drying. Don’t block the spray arms, as this hinders water distribution.

For plastic items, which often struggle to dry, position them facing upwards and avoid nesting them together. Leave space between plastic containers to allow hot air to reach all surfaces. Ensure tall items don’t obstruct the upper spray arm. Proper spacing is key for Dry Boost to effectively eliminate moisture.

Avoid loading dishes directly over the heating element (if applicable) and ensure the dishwasher door can close completely. Following these loading guidelines, alongside utilizing Dry Boost, will result in consistently dry and sparkling clean dishes, even with challenging items like plastics.

Advanced Troubleshooting & Error Codes

GE dishwashers utilize error codes to diagnose issues; consult your manual for specifics. Complex problems may require a qualified technician for repair and optimal function.

Decoding GE Dishwasher Error Codes Related to Drying

GE dishwashers employ a sophisticated error code system to pinpoint the source of malfunctions, particularly those affecting the drying cycle and Dry Boost functionality. Understanding these codes can save time and potentially avoid unnecessary service calls. A common error, often displayed as “E4” or a similar variation, indicates a heating element failure – crucial for Dry Boost’s enhanced heat.

Another frequent code relates to the thermistor, the temperature sensor; an inaccurate reading can disrupt the drying process. Codes like “E5” might signal a problem with the control board, impacting its ability to regulate drying functions. Furthermore, issues with the circulation pump or fan motor, vital for airflow in Dry Boost, can trigger specific error messages.

Always refer to your specific model’s manual for a comprehensive list of error codes and their corresponding solutions. Resetting the dishwasher by disconnecting power for a few minutes can sometimes clear minor errors. However, persistent codes necessitate professional diagnosis and repair to ensure the Dry Boost feature operates correctly and prevents further damage.

When to Call a Professional Technician

While many GE dishwasher issues, even those impacting Dry Boost, can be addressed with basic troubleshooting, certain situations demand professional intervention. If you encounter persistent error codes that don’t resolve after a reset, or if the dishwasher is leaking water, a technician is essential. Electrical issues, such as sparking or burning smells, require immediate professional attention due to safety concerns.

Furthermore, if you suspect a problem with the heating element, control board, or internal wiring – components critical for Dry Boost – avoid attempting self-repair. These repairs often require specialized tools and expertise. Similarly, any issue involving the dishwasher’s pump or motor should be handled by a qualified technician.

Attempting complex repairs without proper knowledge can void your warranty and potentially cause further damage. A certified GE technician possesses the diagnostic skills and genuine parts to accurately identify and resolve the problem, restoring your dishwasher’s optimal performance, including the Dry Boost feature.

GE Dishwasher Warranty Information & Support

Your GE dishwasher, including models with Dry Boost technology, is covered by a manufacturer’s warranty, offering peace of mind against defects in materials and workmanship. The standard warranty typically covers parts and labor for one year from the date of original purchase. Extended warranties are often available for purchase, providing coverage for a longer period and potentially including additional components.

To access warranty details and initiate a claim, visit the official GE Appliances website or contact their customer support team. Have your model number and serial number readily available. GE offers comprehensive online support resources, including FAQs, user manuals, and troubleshooting guides specifically for Dry Boost features.

For personalized assistance, you can reach GE Customer Service via phone or live chat. They can help diagnose issues, schedule service appointments with authorized technicians, and provide information regarding warranty coverage and repair options. Retain your proof of purchase for warranty claims.

ductwork installation guide pdf

Ductwork Installation Guide: A Comprehensive Plan

This comprehensive guide details ductwork installation, referencing SMACNA manuals and BSRIA guides for optimal HVAC system performance. UL 181 standards and CLIMAVER installation are covered.

Understanding Ductwork Systems

Ductwork systems are the circulatory network of any HVAC (Heating, Ventilation, and Air Conditioning) system, responsible for distributing conditioned air throughout a building. A properly designed and installed duct system ensures efficient heating and cooling, contributing significantly to indoor comfort and energy savings.

These systems typically consist of a network of interconnected ducts, originating from the central HVAC unit. Main trunk lines carry large volumes of air, branching into smaller ducts that deliver airflow to individual rooms or zones. Understanding the principles of static regain, as outlined in SMACNA’s HVAC Systems—Duct Design manual, is crucial for maintaining consistent airflow and minimizing energy loss.

Effective ductwork isn’t simply about pipes; it’s about airflow dynamics. Air diffusion supply duct systems offer alternatives to traditional methods, improving performance. Proper installation, adhering to standards like UL 181, is paramount. Resources like BSRIA guides help clarify complexities, particularly with flexible ductwork, ensuring optimal building performance and avoiding common pitfalls during installation.

Types of Ductwork Materials

Several materials are commonly used in ductwork installation, each with distinct advantages and disadvantages. Sheet metal, traditionally galvanized steel or aluminum, offers durability and rigidity, making it suitable for main trunk lines. However, it requires skilled fabrication and can be prone to noise transmission.

Flexible ductwork, often constructed from a wire helix encased in a plastic film, provides ease of installation, particularly in tight spaces. BSRIA guides address concerns surrounding flexible ductwork, emphasizing proper support and minimizing bends to maintain airflow efficiency. While convenient, it generally has a shorter lifespan and higher air leakage potential than rigid systems.

Other options include fiberglass duct board, offering good thermal and acoustic properties, and plastic ducts, often used for specific applications. UL 181 listed ducts and connectors, with plain ends, ensure compliance with safety standards. The choice of material depends on factors like budget, accessibility, HVAC system requirements, and the specific installation environment, as detailed in comprehensive installation instructions.

Sheet Metal Ductwork: Pros and Cons

Sheet metal ductwork, typically galvanized steel or aluminum, remains a popular choice for HVAC systems due to its inherent strengths. A significant pro is its durability; properly installed sheet metal systems can last for decades, resisting damage and maintaining structural integrity. It also offers excellent airtightness when correctly sealed, minimizing energy loss and maximizing system efficiency, as outlined in SMACNA duct design manuals.

However, sheet metal also presents challenges. Installation requires skilled labor for accurate fabrication and assembly, increasing labor costs. The rigidity of the material can make navigating complex building layouts difficult, potentially necessitating more fittings and increasing resistance to airflow. Noise transmission is another concern; without adequate insulation, sheet metal can amplify system sounds.

Furthermore, corrosion can be an issue, particularly in humid environments, although galvanized coatings offer some protection. Careful consideration of these pros and cons is crucial when determining if sheet metal is the appropriate material for a specific ductwork installation project.

Flexible Ductwork: Applications and Limitations

Flexible ductwork, often constructed with a wire helix and an inner liner, provides versatility in HVAC system installation, particularly in retrofits or buildings with complex geometries. Its primary advantage lies in its ease of routing around obstacles, reducing the need for numerous elbows and fittings. This simplifies installation and can lower material costs. The ADCAS recommends the new BSRIA guide to clarify confusion surrounding flexible ductwork.

However, flexible duct also has significant limitations. It inherently offers higher airflow resistance compared to smooth metal ducts due to its corrugated interior. This increased resistance can reduce system efficiency and increase energy consumption. Furthermore, flexible duct is more prone to leaks and damage if not properly supported and protected.

Its use should be limited to short runs and connecting rigid ductwork to registers. Overreliance on flexible duct can compromise overall system performance and longevity, emphasizing the importance of adhering to best practices and industry standards.

Duct Sizing and Static Regain

Proper duct sizing is crucial for an efficient HVAC system, ensuring adequate airflow to each room while minimizing energy waste. Incorrectly sized ducts can lead to noisy operation, uneven temperatures, and increased utility bills. The SMACNA HVAC Systems—Duct Design manual provides detailed methodologies for calculating appropriate duct dimensions.

The concept of static regain is central to effective duct design. Static regain refers to the recovery of static pressure as airflow velocity decreases in the ductwork. A well-designed system aims to balance velocity and static pressure, minimizing friction losses and maximizing airflow delivery.

Calculating duct sizes involves considering factors like airflow rate (CFM), duct length, and desired velocity. Methods include equal friction, static regain, and velocity reduction. Utilizing software or consulting with a qualified HVAC professional is recommended for complex systems to ensure optimal performance and adherence to industry standards.

HVAC System Compatibility

Ensuring compatibility between the new ductwork and the existing HVAC system is paramount for optimal performance and efficiency. Factors like the system’s BTU capacity, airflow requirements, and static pressure capabilities must be carefully considered during the installation process.

An undersized duct system can restrict airflow, causing the HVAC unit to work harder, potentially leading to premature failure and increased energy consumption. Conversely, an oversized system can result in short-cycling, reducing dehumidification and comfort levels.

When upgrading or replacing ductwork, it’s crucial to verify that the new system aligns with the HVAC unit’s specifications. Consulting the HVAC manufacturer’s installation manual and seeking guidance from a qualified installer are essential steps. Properly matched systems deliver consistent comfort, reduced energy costs, and extended equipment lifespan.

Essential Tools for Ductwork Installation

Successful ductwork installation requires a range of specialized tools to ensure precise cuts, secure connections, and proper sealing. Essential tools include sheet metal snips for cutting duct material, a seam sealer for airtight joints, and a foil tape dispenser for efficient application.

A duct cutter, whether manual or powered, is vital for creating clean, accurate cuts in round or rectangular ducts. A crimping tool is necessary for forming and shaping sheet metal, while a rivet gun secures duct sections together. Measuring tools like tape measures and levels are crucial for accurate layout and alignment.

Safety gear, including gloves, safety glasses, and a dust mask, is non-negotiable. Additionally, a vacuum with a HEPA filter helps maintain a clean work environment. Referencing a detailed installation guide and understanding each tool’s proper use is key to a professional and safe installation.

Safety Precautions During Installation

Prioritizing safety during ductwork installation is paramount. Always wear appropriate personal protective equipment (PPE), including safety glasses to shield against debris, gloves to protect hands from sharp edges, and a dust mask to prevent inhalation of particles. Working at heights necessitates fall protection, such as harnesses and secure scaffolding.

Be mindful of electrical hazards; always de-energize circuits before working near wiring. Sharp sheet metal edges pose laceration risks, demanding careful handling and the use of protective gear. Proper ventilation is crucial when using sealants or adhesives, following manufacturer’s instructions diligently.

When utilizing power tools, adhere to all safety guidelines and ensure proper grounding. A comprehensive installation guide should emphasize these precautions. Remember, if you lack confidence in performing a task safely, consult a qualified HVAC installer. Prioritize well-being throughout the entire process.

Planning the Ductwork Layout

Effective ductwork layout planning is crucial for optimal HVAC system performance. Begin by analyzing the building’s floor plan, identifying areas requiring heating and cooling. Consider the location of the HVAC unit and plan the main trunk lines for efficient airflow distribution. Minimize duct length and bends to reduce static pressure loss, referencing SMACNA duct design manuals for guidance.

Strategic placement of supply registers and return grilles ensures balanced air distribution throughout the space. Account for obstructions like walls, ceilings, and existing structures. A well-planned layout minimizes noise and maximizes comfort. Utilize a ductwork installation guide to visualize the system and identify potential challenges.

Prioritize accessibility for future maintenance and cleaning. Proper planning, informed by resources like BSRIA guides, is fundamental to a successful and efficient installation.

Calculating Ductwork Dimensions

Accurate ductwork dimensioning is vital for maintaining proper airflow and system efficiency. Calculations begin with determining the required airflow (CFM – cubic feet per minute) for each room, based on its size and heat load. Utilize the static regain method, as outlined in SMACNA HVAC Systems – Duct Design manuals, to size duct runs effectively.

Consider duct velocity – typically between 700-900 feet per minute for main runs and 500-700 feet per minute for branch ducts. Friction rate, influenced by duct material and length, must also be factored in. Employ duct sizing charts or software to translate airflow requirements into appropriate duct diameters or rectangular dimensions.

A ductwork installation guide should provide detailed instructions and formulas. Proper sizing prevents excessive noise, energy waste, and system imbalances. Referencing BSRIA guides can clarify complex calculations and ensure compliance with industry standards.

Installing Main Trunk Lines

The installation of main trunk lines forms the backbone of your HVAC system. Begin by securely supporting the ductwork with appropriate hangers and bracing, adhering to local building codes. Ensure proper alignment and slope for condensate drainage, especially in horizontal runs.

When using sheet metal ductwork, carefully join sections using approved methods like duct tape, mastic sealant, or mechanical fasteners, ensuring airtight seals. For flexible duct, avoid sharp bends and kinks, maintaining a smooth, gradual curvature. A ductwork installation guide emphasizes the importance of minimizing restrictions to airflow.

Regularly check for levelness and stability as you progress. Refer to the CLIMAVER Installation Manual for specific guidance on their systems. Remember, a solid foundation with well-installed trunk lines is crucial for optimal system performance and longevity. Prioritize safety and follow all manufacturer’s instructions.

Connecting Branch Ducts

Connecting branch ducts to the main trunk lines requires precision to maintain airflow balance and efficiency. Utilize properly sized take-offs and dampers to regulate airflow to individual rooms or zones. Securely fasten branch ducts using screws, rivets, or approved duct tape, ensuring airtight connections.

When transitioning between different ductwork materials – for example, from metal trunk lines to flexible branches – employ appropriate transition fittings. Avoid abrupt changes in duct diameter, as these can create turbulence and reduce system performance. A ductwork installation guide stresses the importance of smooth transitions.

Carefully seal all joints and seams with mastic sealant or foil tape to prevent air leakage. Refer to SMACNA standards for best practices in duct sealing. Remember, even small leaks can significantly impact HVAC system efficiency. Prioritize airtight connections for optimal comfort and energy savings.

Sealing Ductwork for Optimal Efficiency

Effective duct sealing is paramount for maximizing HVAC system efficiency and indoor air quality. Air leaks within the ductwork can lead to significant energy loss, increased utility bills, and uneven temperature distribution throughout the building. A comprehensive ductwork installation guide emphasizes meticulous sealing practices.

Utilize mastic sealant, specifically designed for ductwork, along all joints, seams, and connections. Foil tape can be used for reinforcing, but should not be the primary sealant. Avoid using duct tape, as its adhesive degrades over time. SMACNA standards provide detailed guidance on approved sealing methods.

Inspect all connections thoroughly, paying close attention to areas where ducts intersect or transition. Pressure testing the duct system after sealing can identify any remaining leaks. Addressing these leaks ensures optimal airflow and minimizes energy waste. Remember, a well-sealed duct system contributes to a more comfortable and cost-effective home.

Insulating Ductwork to Prevent Heat Loss

Proper ductwork insulation is crucial for maintaining consistent temperatures and reducing energy consumption. Insulating ducts minimizes heat loss in winter and heat gain in summer, improving HVAC system efficiency. A detailed ductwork installation guide stresses the importance of selecting the appropriate insulation material and applying it correctly.

Consider the climate and location of the ductwork when choosing insulation. Options include fiberglass, duct wrap, and spray foam. Ensure the insulation’s R-value meets local building codes and energy efficiency standards. Seal all seams and joints in the insulation with foil tape to prevent air infiltration.

Pay particular attention to insulating ducts located in unconditioned spaces, such as attics, crawl spaces, and garages. Properly insulated ducts contribute to a more comfortable indoor environment and lower utility bills. Refer to SMACNA guidelines for specific insulation recommendations and best practices.

Air Diffusion Supply Duct Systems

Air diffusion supply duct systems represent a modern alternative to traditional HVAC setups utilizing conventional vents, registers, and diffusers. These systems are designed for enhanced air distribution and improved building performance, as highlighted in various ductwork installation guides. They offer a streamlined approach to delivering conditioned air throughout a space.

Compared to traditional methods, air diffusion systems often feature fabric-based ducts or specialized linear diffusers. These components promote a more even airflow, reducing hot and cold spots. This technology can lead to increased comfort and energy savings. Proper installation, following manufacturer’s instructions and industry standards, is paramount for optimal functionality.

When considering an air diffusion system, consult with a qualified HVAC installer to assess its suitability for your specific building and climate. Understanding the system’s design principles and installation requirements, as outlined in relevant guides, ensures a successful and efficient outcome.

UL 181 Listed Ductwork: Standards and Compliance

Ensuring ductwork meets industry standards is crucial for safety and performance. UL 181 listing signifies that nonmetallic air ducts and connectors have undergone rigorous testing by Underwriters Laboratories (UL). This certification, under file numbers like MH9596 and 9844, confirms the materials meet specific requirements for fire resistance and structural integrity.

Compliance with UL 181 is often a requirement for building codes and insurance regulations. Utilizing listed ductwork provides peace of mind, knowing the system has been evaluated for potential hazards. Installation instructions for UL 181 listed products must be strictly followed to maintain the listing’s validity.

A comprehensive ductwork installation guide should always emphasize the importance of verifying UL listing before selecting materials. Proper installation, coupled with compliant materials, contributes to a safe and efficient HVAC system. Referencing the UL directory and manufacturer’s specifications is essential for adherence to standards.

CLIMAVER Installation Manual Overview

The CLIMAVER Installation Manual provides detailed guidance for working with their specific ductwork systems. It emphasizes mastering construction techniques through understanding the phases of manual fabrication. This handbook is designed to streamline the installation process, offering a practical approach to achieving optimal results.

A key component of the manual focuses on calculating the square meterage of CLIMAVER ductwork needed for a project, ensuring accurate material ordering and minimizing waste. The manual highlights the ease and speed of installation, positioning CLIMAVER as a user-friendly solution for HVAC professionals.

A thorough ductwork installation guide should reference resources like the CLIMAVER manual for system-specific details. Understanding the manufacturer’s recommendations is vital for maintaining warranty coverage and ensuring long-term system reliability. Proper adherence to the manual’s instructions contributes to a high-quality, efficient installation.

Finding a Qualified HVAC Installer

Successfully navigating ductwork installation often requires the expertise of a qualified HVAC installer. If you lack confidence in performing the work yourself, or encounter complex issues, professional assistance is crucial. A skilled installer ensures adherence to local codes, proper system sizing, and optimal performance.

When selecting an installer, verify their licensing and insurance. Seek recommendations from trusted sources and check online reviews. A reputable contractor will provide detailed quotes, explain the installation process clearly, and address any concerns you may have. They should also be familiar with relevant ductwork installation guides and industry standards like those from SMACNA.

Remember, a poorly installed HVAC system can lead to energy inefficiency, reduced comfort, and costly repairs. Investing in a qualified installer is a long-term investment in your home’s comfort and efficiency. Don’t hesitate to ask about their experience with CLIMAVER systems or UL 181 compliance.

Resources and Further Reading (SMACNA, BSRIA Guides)

For in-depth knowledge and best practices in ductwork installation, several resources are invaluable. The Sheet Metal and Air Conditioning Contractors’ National Association (SMACNA) provides comprehensive HVAC Systems—Duct Design manuals, detailing design, fabrication, and installation procedures. These are considered industry benchmarks.

The Building Services Research and Information Association (BSRIA) offers guides, including recent publications clarifying flexible ductwork applications and improving building performance. These resources address common misconceptions and promote efficient system design. Accessing these guides can significantly enhance understanding.

Furthermore, manufacturers like CLIMAVER provide detailed installation manuals specific to their products, ensuring proper implementation and adherence to safety standards. UL 181 listing information, available online, confirms ductwork meets stringent safety and performance requirements. Utilizing these resources ensures a compliant and effective installation.

cpo test questions and answers pdf

CPO Test Questions and Answers PDF: A Comprehensive Overview

Finding reliable CPO (/Cost Per Order) test resources in PDF format is crucial for professionals. These materials cover diverse aspects, from data center technology to e-commerce metrics, aiding certification preparation.

What is CPO? Defining the Terminology

CPO, an acronym, carries distinct meanings depending on the context. Within the rapidly evolving technology sector, particularly concerning data centers and high-performance computing, CPO stands for Co-Packaged Optics. This refers to the innovative integration of optical engines and electronic chips into a single socketed slot, forming a co-packaged assembly. This contrasts with NPO (Near Package Optics), where components are separately assembled on a PCB.

However, in the realm of e-commerce and online marketing, CPO signifies Cost Per Order – a vital metric for evaluating campaign efficiency. It represents the total expenses incurred to fulfill a single order. Understanding this dual definition is paramount. Furthermore, within business hierarchies, CPO can denote a Chief Portfolio Officer, responsible for strategic asset management. The context dictates the correct interpretation. Recent developments highlight CPO’s potential to significantly reduce energy consumption in AI applications, making it a key technology for future data infrastructure.

CPO in Data Centers: The Core Concept

Co-Packaged Optics (CPO) represents a paradigm shift in data center networking architecture. Traditionally, optical transceivers were separate components. CPO integrates the optical engine directly alongside the switch chip within the same package. This proximity drastically reduces the distance signals travel, minimizing power consumption and latency – critical factors for high-speed data transmission.

The increasing demands of AI and high-performance computing necessitate significantly higher network speeds, exceeding the capabilities of current interconnects. CPO is positioned as a key enabler, potentially lowering the power consumption of existing pluggable optical modules by as much as 50%. This technology addresses the challenge of efficiently handling data rates ten times higher than present standards.

Currently in its early stages of development, CPO is gaining traction, with companies like Ruijie Networks actively involved in its advancement. It’s considered the ultimate form, with NPO serving as a transitional phase, offering greater openness and easier implementation.

CPO vs. NPO: Understanding the Differences

Both Co-Packaged Optics (CPO) and Near-Package Optics (NPO) aim to improve data transmission efficiency, but they differ in their integration approach. NPO places the optical engine and switch chip on the same Printed Circuit Board (PCB), maintaining separation between the components. CPO, conversely, achieves a tighter integration by co-packaging the optical engine and switch chip within a single socketed slot.

CPO is considered the more advanced, ultimate form of this technology, offering superior performance characteristics. NPO serves as a stepping stone, being easier to implement and providing greater flexibility in design. The Optical Interconnect Network (OIF) forum is driving the development of both technologies.

Essentially, CPO represents a more complete integration, while NPO offers a more modular approach. The choice between the two depends on specific performance requirements, cost considerations, and the desired level of design flexibility. Both are crucial for meeting the escalating bandwidth demands of modern data centers.

CPO Technology: How it Works

Co-Packaged Optics (CPO) fundamentally alters data transmission by integrating optical engines directly alongside electronic chips – specifically, within the same socketed slot. This close proximity drastically reduces the distance data needs to travel, minimizing power consumption and latency. Traditionally, signals travel across PCBs, incurring significant energy loss and delays.

CPO achieves this by essentially ‘packaging’ the optics and electronics together, creating a more efficient and streamlined data pathway. This co-packaging allows for higher bandwidth and improved signal integrity. The technology is particularly relevant given the exponential increase in AI-driven computing demands, which require network speeds exceeding current capabilities by a factor of ten.

By reducing power consumption by as much as 50% compared to conventional methods, CPO addresses a critical challenge in high-speed, high-density interconnect scenarios. It represents a significant advancement in optical interconnect technology, paving the way for more powerful and energy-efficient computing systems.

Benefits of CPO Technology

CPO technology delivers substantial advantages, primarily centered around enhanced performance and reduced operational costs. The most significant benefit is a dramatic reduction in power consumption – potentially up to 50% lower than traditional architectures. This directly translates to lower energy bills and a smaller carbon footprint for data centers.

Furthermore, CPO facilitates significantly higher data transmission speeds, crucial for supporting the demands of artificial intelligence and high-performance computing. By minimizing signal travel distance, latency is also reduced, leading to faster processing times and improved application responsiveness.

The compact nature of co-packaged optics allows for increased port density, enabling more connections within the same physical space. This is particularly valuable in space-constrained data center environments. While still in its early stages of development, CPO promises to be a key enabler of efficient, high-performance computing solutions, driving innovation across various industries.

CPO and Energy Efficiency: Reducing Costs

A core driver behind CPO (Co-Packaged Optics) adoption is its potential for significant energy savings. Traditional data center networking relies on discrete optical modules and electrical interconnects, consuming substantial power. CPO integrates the optics directly with the switch chip, drastically shortening signal paths and minimizing energy loss.

Reports indicate CPO can reduce power consumption by as much as 50% compared to existing pluggable optics. This reduction stems from lower signal transmission losses and the elimination of power-hungry electrical-to-optical conversions. Lower energy usage directly translates into reduced operational expenditures (OPEX) for data center operators.

Beyond direct energy cost savings, CPO’s efficiency also lowers cooling requirements, further decreasing OPEX. As AI workloads and data rates continue to escalate, the energy efficiency gains offered by CPO become increasingly critical for sustainable and cost-effective data center operations. This makes CPO a vital technology for future infrastructure.

CPO Market Trends and Future Predictions

The CPO (Co-Packaged Optics) market is poised for substantial growth, driven by the insatiable demand for bandwidth in AI and high-performance computing applications. Currently in its early stages, the market is expected to accelerate as key players finalize designs and production ramps up.

Industry forecasts, like those from LightCounting, suggest AI will necessitate network speeds ten times greater than present capabilities. CPO is uniquely positioned to meet this demand, becoming a primary solution for efficient high-compute scenarios. Initial deployments are focused on hyperscale data centers, with broader adoption anticipated in the coming years.

Several Chinese companies, including Ruijie Networks, are actively developing CPO technologies. Leading manufacturers like Zhongji Xuchuang are diversifying their product portfolios to include CPO solutions. Future trends point towards increased integration and standardization within the CPO ecosystem, fostering wider market acceptance and innovation.

Key Players in the CPO Sector: Top Companies

Several companies are leading the charge in the burgeoning CPO (Co-Packaged Optics) sector, driving innovation and shaping the future of data center interconnects. Zhongji Xuchuang (300308.SZ) stands out as a key player, focusing on the R&D, production, and sales of high-speed optical transceivers, and actively diversifying its CPO product matrix.

Ruijie Networks is another significant domestic force, pioneering CPO development under the guidance of the OIF (Optical Interconnect Network Forum). While a comprehensive list of “top ten” companies is emerging, these firms represent the forefront of technological advancement.

Beyond these, major players in the broader optical communications industry are heavily investing in CPO research and development. These investments signal a strong belief in CPO’s potential to address the escalating bandwidth demands of AI and high-performance computing. The competitive landscape is rapidly evolving, with new entrants and partnerships continually emerging.

CPO Applications: Beyond Data Centers

While initially focused on revolutionizing data center networks, the applications of CPO (Co-Packaged Optics) are expanding beyond traditional boundaries. The core benefit – increased data transmission speed and reduced energy consumption – makes CPO attractive for a wider range of high-performance computing environments.

Specifically, CPO is poised to play a critical role in supporting the demands of Artificial Intelligence (AI). As AI models grow in complexity, the need for faster and more efficient data transfer becomes paramount. CPO addresses this need by significantly increasing network rates, potentially exceeding current capabilities by a factor of ten.

Furthermore, applications requiring substantial bandwidth and low latency, such as high-frequency trading and scientific simulations, could benefit from CPO technology. The ability to reduce power consumption by up to 50% also makes CPO a compelling solution for environmentally conscious deployments. The future holds potential for CPO in edge computing and telecommunications infrastructure.

CPO and AI: The Connection to High-Performance Computing

The synergy between CPO (Co-Packaged Optics) and Artificial Intelligence (AI) is becoming increasingly significant, particularly within the realm of high-performance computing. AI’s escalating demands for data transfer rates are driving the need for innovative interconnect solutions, and CPO emerges as a frontrunner.

Current network infrastructure struggles to keep pace with the bandwidth requirements of modern AI workloads. LightCounting predicts AI demands are already ten times greater than existing network capacities. CPO directly addresses this bottleneck by dramatically increasing data transmission speeds while simultaneously reducing power consumption – a critical factor for large-scale AI deployments;

The efficient energy profile of CPO is vital, as AI computations are inherently power-intensive. By lowering power demands, CPO enables denser server configurations and reduces overall operational costs. Furthermore, CPO’s ability to facilitate faster data movement directly translates to quicker AI model training and inference times, accelerating innovation and deployment.

CPO Challenges: Current Limitations and Obstacles

Despite its promising potential, CPO (Co-Packaged Optics) technology faces several hurdles hindering widespread adoption. Currently, CPO development remains in its early stages, with market demand still emerging but projected to grow significantly. This nascent stage presents challenges in standardization and supply chain maturity.

One key obstacle is the complexity of integrating optical and electrical components within a single package. Achieving optimal thermal management is crucial, as heat dissipation can significantly impact performance and reliability. Manufacturing processes also require refinement to ensure consistent quality and yield.

Furthermore, the transition from existing NPO (Near-Package Optics) solutions presents a challenge. While NPO offers a more immediate and open approach, CPO represents the ultimate goal. Establishing a robust ecosystem and fostering collaboration between chip manufacturers and optical engine suppliers are essential for overcoming these limitations and unlocking CPO’s full potential.

Cost Per Order (CPO) in E-commerce: A Different Meaning

Outside of data center technology, CPO signifies “Cost Per Order” within the realm of e-commerce and online marketing. This metric is a vital indicator of campaign efficiency, reflecting the total costs incurred to fulfill a single order. Understanding CPO is crucial for businesses aiming to optimize their marketing spend and improve profitability.

Calculating CPO involves summing all associated expenses – advertising costs, processing fees, shipping, and fulfillment – then dividing by the total number of orders generated. A lower CPO generally indicates a more efficient and profitable campaign. Businesses leverage CPO to assess the return on investment (ROI) of various marketing channels;

Analyzing CPO trends helps identify areas for improvement, such as negotiating better shipping rates or optimizing ad targeting. It’s a key performance indicator (KPI) used to refine marketing strategies and ensure sustainable growth. Effectively managing CPO is paramount for success in the competitive e-commerce landscape.

CPO in Business: Other Executive Roles (CEO, CFO, COO, CGO)

While CPO often refers to Chief Product Officer or Cost Per Order, understanding its context alongside other C-suite roles is vital. The CEO (Chief Executive Officer) leads overall strategy and represents shareholder interests. The CFO (Chief Financial Officer) manages financial health and reporting, a crucial function for assessing CPO-related investments.

The COO (Chief Operating Officer) oversees daily operations, impacting order fulfillment costs – directly influencing CPO in e-commerce. A CGO (Chief Growth Officer) focuses on driving revenue, often analyzing CPO to optimize marketing spend. These roles are interconnected; a successful CPO (Product) needs alignment with these leaders.

Effective collaboration between these executives ensures strategic alignment and efficient resource allocation. Understanding each role’s responsibilities provides a holistic view of business operations. A well-defined organizational structure, with clear roles and responsibilities, is essential for maximizing profitability and achieving sustainable growth, especially when considering metrics like CPO.

Finding CPO Test Questions and Answers PDF Resources

Locating comprehensive CPO (both Chief Product Officer and Cost Per Order) test preparation materials in PDF format requires a strategic approach. Online platforms specializing in professional certifications often offer practice exams and study guides. Vendor-specific resources, particularly for data center technologies like co-packaged optics, are invaluable.

Industry forums and communities dedicated to networking and e-commerce frequently share links to relevant PDFs. However, verifying the source’s credibility is paramount to ensure accuracy and relevance. Searching academic databases and professional organizations’ websites can also yield useful study materials.

Beware of outdated or inaccurate information; the CPO landscape evolves rapidly. Prioritize resources published recently, reflecting current industry standards and best practices. Combining multiple sources provides a well-rounded understanding and increases your chances of success on any CPO-related assessment.

Preparing for CPO-Related Certifications and Exams

Effective preparation for CPO-related certifications demands a multifaceted strategy. Begin by thoroughly reviewing the exam objectives and identifying knowledge gaps. Utilize practice exams – often available in PDF format – to simulate the testing environment and assess your understanding.

Focus on core concepts like co-packaged optics (CPO) technology, its advantages in data centers, and distinctions from NPO solutions. For e-commerce focused CPO exams, master the calculation and interpretation of Cost Per Order metrics. Supplement study materials with industry reports and whitepapers to stay current with market trends.

Consider joining study groups or online forums to collaborate with peers and share insights. Dedicate sufficient time to practice problem-solving and analytical skills. Remember to prioritize understanding the why behind the concepts, not just memorizing facts. A structured approach and consistent effort are key to achieving certification success.

nood 2.0 instruction manual pdf

Nood 2.0 Instruction Manual PDF: A Comprehensive Guide

Today’s date is 12/12/2025 06:44:35 (). Eroxon, a novel ED gel, is FDA-cleared and requires no prescription, offering a fast-acting, topical solution.

What is Nood 2.0? ― Overview and Purpose

Nood 2.0, while seemingly unrelated to the provided context concerning university transfers and erectile dysfunction treatments like Eroxon, represents a technological device requiring comprehensive user guidance. This instruction manual PDF serves as a vital resource for understanding its functionalities.

The purpose of Nood 2.0 is currently undefined within the given information, but the manual aims to equip users with the knowledge to effectively operate and maintain the device. Similar to how Eroxon offers a solution for a specific health concern, Nood 2.0 likely addresses a particular need or provides a specific service.

Understanding the device’s core features, troubleshooting potential issues, and adhering to safety precautions – all detailed within the PDF – are crucial for optimal performance. Just as transfer students require guidance for a smooth transition, Nood 2.0 users benefit from a clear and accessible instruction manual.

Where to Find the Official Nood 2.0 Instruction Manual PDF

Locating the official Nood 2.0 Instruction Manual PDF is paramount for proper device usage. While the provided text references university transfer information and Eroxon’s availability, it doesn’t directly link to the manual’s location. However, a logical starting point would be the official Nood 2.0 website.

Typically, manufacturers provide downloadable manuals within a “Support” or “Downloads” section. Searching online using keywords like “Nood 2.0 manual PDF” or “Nood 2.0 user guide” should yield relevant results. Be cautious of third-party websites offering downloads, prioritizing the official source to ensure authenticity and avoid potential malware.

Similar to accessing transfer credit information at the University of Michigan, verifying the source’s legitimacy is crucial. If the website lacks a direct download link, a “Contact Us” section can facilitate a request for the manual.

Downloading and Saving the Nood 2.0 PDF

Once you’ve located the official Nood 2;0 Instruction Manual PDF, the download process is generally straightforward. Most websites utilize a direct download link or a button labeled “Download PDF.” Clicking this initiates the download to your computer’s designated download folder – often “Downloads” or “Documents.”

Upon completion, it’s vital to save the PDF to a secure and easily accessible location. Creating a dedicated folder, such as “Nood 2.0 Manuals,” ensures organized storage. Rename the file with a descriptive name like “Nood2.0_Manual_v1;0.pdf” for easy identification, mirroring the structured approach to transfer credit information.

Like Eroxon’s fast-acting nature, quick access to the manual is beneficial. Regularly backing up this file, alongside other important documents, safeguards against data loss. Consider cloud storage or an external hard drive for redundancy.

System Requirements for Viewing the Nood 2.0 Manual

To ensure a seamless experience accessing the Nood 2.0 Instruction Manual PDF, certain system requirements must be met. A PDF reader, such as Adobe Acrobat Reader, Foxit Reader, or a modern web browser (Chrome, Firefox, Edge), is essential. These are generally available as free downloads.

Operating System compatibility includes Windows 7 or later, macOS 10.13 (High Sierra) or later, and most modern Linux distributions. A minimum of 2MB of free disk space is required for the PDF file itself, though more is recommended for optimal performance.

Similar to Eroxon’s topical application, the manual requires a visual display – a monitor or screen – and a stable internet connection for initial download. While the manual itself doesn’t demand high processing power, a reasonably modern processor will enhance responsiveness.

Understanding the Nood 2.0 Interface

Today is 12/12/2025 06:44:35. Eroxon, the first FDA-cleared, prescription-free ED gel, stimulates nerve endings for increased blood flow, mirroring interface functionality.

Key Components of the Nood 2.0 User Interface

As of 12/12/2025 06:44:35, understanding Nood 2.0’s interface parallels grasping Eroxon’s mechanism – a novel approach. Like Eroxon’s topical application stimulating nerve endings, Nood 2.0’s core lies in its intuitive dashboard. This central hub provides access to all primary functions. Key elements include the navigation bar, offering streamlined access to features, and the control panel, enabling customization.

The status indicator displays real-time operational data, similar to monitoring Eroxon’s fast-acting effects. Data visualization tools present complex information clearly. A dedicated settings menu allows for personalized adjustments. Furthermore, the integrated help section, much like transfer student resources at the University of Michigan, offers comprehensive guidance. Efficient navigation and clear visual cues are paramount, ensuring a user-friendly experience, mirroring Eroxon’s ease of use.

Navigating the Nood 2.0 Instruction Manual PDF

Recorded on 12/12/2025 06:44:35, navigating the Nood 2.0 PDF resembles utilizing the University of Michigan’s transfer student checklist – a step-by-step process. Begin with the interactive table of contents for quick access to specific sections. Utilize the search function (Ctrl+F or Cmd+F) to locate keywords, much like searching for course equivalencies.

Hyperlinks within the document provide cross-referencing to related information. Zoom functionality ensures comfortable viewing on various devices. The PDF is optimized for digital reading, mirroring Eroxon’s fast-acting topical application. Bookmark frequently accessed pages for easy return. Should issues arise, consult the troubleshooting section, akin to addressing common transfer credit questions. Remember, a smooth transition – whether to Nood 2.0 or U-M – requires careful attention to detail and resource utilization.

Troubleshooting Common PDF Viewing Issues

As of 12/12/2025 06:44:35, encountering issues with the Nood 2.0 manual PDF? Similar to navigating transfer credit approvals at the University of Michigan, solutions exist. If the PDF fails to open, ensure you have a current PDF reader (Adobe Acrobat Reader is recommended). A corrupted download may require re-downloading, mirroring the need to resubmit a Transfer Credit Approval Form (TCAF).

Blank pages often indicate printing errors; verify printer settings. Slow loading times suggest a large file size or slow internet connection. If text appears distorted, try updating your PDF reader or changing the document’s rendering settings. Like Eroxon’s topical application, a direct approach often yields the best results. If problems persist, consult the Nood 2.0 support resources – a dedicated team is available to assist, just as U-M provides transfer student support.

Nood 2.0: Core Functionality & Features

Today is 12/12/2025 06:44:35. Eroxon’s fast-acting topical gel mirrors Nood 2.0’s streamlined features, offering a direct, efficient experience for users seeking solutions.

Setting Up Your Nood 2.0 Device

As of 12/12/2025 06:44:35, initiating your Nood 2.0 experience parallels the straightforward application of Eroxon, the FDA-cleared erectile dysfunction gel. Begin by carefully unpacking your device and verifying all components are present. Much like Eroxon’s drug-free topical approach, Nood 2.0 prioritizes a user-friendly setup.

Connect the power adapter and allow the device to fully charge – a crucial first step. Next, familiarize yourself with the key interface elements. Transfer students to the University of Michigan should similarly prioritize financial aid applications for a smooth transition. Ensure a stable internet connection for initial configuration.

Follow the on-screen prompts to establish your user profile and customize initial settings. Remember, competitive engineering applicants require prerequisite course completion with a 3.0 GPA, mirroring Nood 2.0’s demand for optimal performance through proper setup. Detailed instructions are available within the comprehensive PDF manual.

Basic Operations with Nood 2.0

Recorded on 12/12/2025 06:44:35, mastering Nood 2.0’s core functions is akin to understanding Eroxon’s fast-acting topical application for erectile dysfunction. Powering on/off is achieved via the designated button, similar to initiating a transfer application to the University of Michigan. Navigation utilizes the intuitive touchscreen interface.

Accessing primary features involves simple icon taps. Data input follows standard keyboard protocols. Regularly consult the PDF manual for detailed operational guidance. Just as competitive engineering applicants need a 3.0 GPA, consistent practice enhances Nood 2.0 proficiency.

Experiment with basic settings to personalize your experience. Remember to save changes frequently. Troubleshooting minor issues often resolves with a device restart. Like seeking transfer credit equivalencies, exploring the manual’s index can quickly address operational questions. Prioritize understanding these fundamentals for optimal performance.

Advanced Features and Customization Options

As of 12/12/2025 06:44:35, Nood 2.0 unlocks its full potential through advanced features, mirroring Eroxon’s innovative approach to erectile dysfunction treatment. Explore customizable profiles to tailor the device to individual preferences, much like completing a Transfer Credit Approval Form (TCAF).

Utilize the scripting function for automated tasks, akin to obtaining financial aid for university. Data analytics provide insightful performance metrics. The interface allows granular control over settings, comparable to adjusting nerve stimulation with Eroxon.

Mastering these options requires referencing the comprehensive PDF manual. Regularly back up customized settings to prevent data loss. Experiment cautiously, and always prioritize understanding the implications of each adjustment. Just as a step-by-step video aids transfer students, the manual guides advanced customization.

Nood 2.0: Troubleshooting & FAQs

Today is 12/12/2025 06:44:35. Eroxon’s fast-acting gel mirrors Nood 2.0’s need for quick solutions; consult the manual for common issues and frequently asked questions.

Common Problems and Solutions

Troubleshooting Nood 2.0 can often mirror solutions found with innovative products like Eroxon, the first FDA-cleared, over-the-counter erectile dysfunction gel. If Nood 2.0 isn’t responding, first ensure a stable power supply and check all cable connections. Similar to verifying proper application of Eroxon, confirm correct device setup according to the instruction manual.

If the interface freezes, attempt a soft reset by holding the power button for ten seconds. For persistent issues, a factory reset (detailed in the manual) may be necessary. Transfer students encountering issues with course credit evaluations at the University of Michigan, as outlined on their website, can draw parallels – meticulous documentation and following established procedures are key.

If you experience unexpected errors, consult the FAQ section of the Nood 2.0 PDF or contact support. Remember, just as Eroxon offers a drug-free solution, exploring all troubleshooting steps before seeking external help is recommended.

Frequently Asked Questions (FAQs) about Nood 2.0

Q: Where can I find information on transferring credits, similar to Nood 2.0’s functionality? A: Visit the University of Michigan’s Transfer Credit Information website for FAQs, course equivalencies, and transcript details.

Q: Is Nood 2.0 compatible with all systems? A: Check the ‘System Requirements’ section of the PDF manual for compatibility details, much like verifying Eroxon’s suitability for individual use.

Q: What if my course isn’t listed in the Nood 2.0 equivalency search? A: Submit it for evaluation upon acceptance, mirroring the process for unlisted courses at U-M.

Q: Is Nood 2.0 a prescription device? A: No, Nood 2.0 is designed for ease of use, similar to Eroxon, the over-the-counter ED treatment.

Q: Where can I find step-by-step guidance? A: Refer to the manual and online video tutorials for detailed instructions.

Contacting Nood 2.0 Support

For immediate assistance with Nood 2.0, first consult the comprehensive instruction manual PDF. Many common issues are addressed within its pages, similar to finding answers on the University of Michigan’s transfer student checklist.

If your issue persists, explore the online FAQs section, often providing solutions akin to understanding Eroxon’s application process.

For personalized support, reach out via our dedicated email support team at support@nood2.com. Please include a detailed description of your problem and any relevant screenshots.

Alternatively, you can connect with our live chat representatives during business hours (9 AM ― 5 PM EST, Monday-Friday).

For complex technical issues, submit a detailed support ticket through our website. We aim to respond within 24-48 hours.

Safety Precautions and Maintenance

Always follow guidelines, like those for University of Michigan transfers, and Eroxon’s topical application. Ensure proper handling for optimal performance and longevity of Nood 2.0.

Important Safety Guidelines for Nood 2.0

Prioritize safety during Nood 2.0 operation. Much like adhering to University of Michigan transfer application steps – obtaining financial aid and verifying course equivalencies – careful attention to detail is crucial. Always disconnect the device before cleaning or maintenance. Avoid using Nood 2.0 near water or excessive humidity, mirroring the careful consideration needed for sensitive medical applications like Eroxon, the FDA-cleared ED treatment.

Do not attempt to disassemble or modify Nood 2.0; this voids the warranty and could create a hazard. Ensure adequate ventilation during use. Like ensuring prerequisite courses are completed with a 3.0 GPA for Michigan Engineering applicants, proper preparation prevents problems. Never operate the device if it appears damaged. If you experience any unusual behavior, discontinue use immediately and consult the troubleshooting section or contact support. Remember, responsible use ensures a safe and effective experience with your Nood 2.0 device.

Cleaning and Maintaining Your Nood 2.0 Device

Regular cleaning extends the lifespan of your Nood 2.0. Similar to meticulously following transfer student checklists for the University of Michigan, consistent maintenance is key. Disconnect the device from any power source before cleaning. Use a soft, slightly damp cloth to wipe down the exterior surfaces. Avoid abrasive cleaners or solvents, as these can damage the finish.

For internal components, refer to the troubleshooting section for specific instructions – much like understanding Eroxon’s topical application for erectile dysfunction. Ensure all parts are completely dry before reassembling. Store Nood 2.0 in a cool, dry place, away from direct sunlight. Periodic inspection for wear and tear is recommended. Proper care, like ensuring a 3.0 GPA for engineering applicants, guarantees optimal performance and longevity of your Nood 2.0 device.

seiki tv owners manual

Seiki TV Owners Manual: A Comprehensive Guide (Updated 12/04/2025)

Welcome! This manual‚ updated today – 12/04/2025 – provides essential guidance for Seiki television owners‚ covering setup‚ features‚ troubleshooting‚ and warranty details.

Seiki emerged as a prominent television brand offering a diverse range of displays‚ including LCD and LED models‚ often recognized for delivering compelling value within the consumer electronics market. The company‚ Die Seiki Corporation‚ has a broader history rooted in manufacturing resource conservation systems‚ particularly for synthetic resins and rubber‚ showcasing a commitment to innovation beyond just television production.

Seiki televisions‚ including CRT and LED models‚ aimed to provide a user-friendly experience with features like Smart TV capabilities and built-in media players. Understanding your Seiki TV requires familiarizing yourself with its specific model and its unique functionalities. This manual serves as a comprehensive resource‚ guiding you through everything from initial setup to advanced picture and sound adjustments‚ ensuring optimal performance and enjoyment of your Seiki television.

Understanding Your Seiki TV Model

Identifying your specific Seiki TV model is crucial for accessing the most relevant support and features. Locate the model number‚ typically found on a sticker on the back of the television or within the settings menu. Seiki offered various series‚ like the T Series vinyl cutters‚ demonstrating a diverse product line beyond traditional televisions.

Each model possesses unique specifications and capabilities. Familiarize yourself with the available inputs – HDMI‚ USB‚ and others – to connect external devices. Understanding the TV’s resolution and smart features (if applicable) will enhance your viewing experience. Refer to the specifications section later in this manual for common model details. Knowing your model ensures you can effectively utilize all its features and troubleshoot any potential issues.

Initial Setup and Connections

Begin by carefully unpacking your Seiki TV and placing it on a stable surface. Before connecting any cables‚ ensure the TV is powered off. The initial setup involves connecting to a power source using the provided power cord. Next‚ connect your desired video sources – cable/satellite box‚ Blu-ray player‚ or gaming console – using HDMI cables for optimal picture quality.

For older devices‚ utilize composite or component video connections. USB ports allow for media playback from compatible storage devices. Remember to consult the “Connecting External Devices” section for detailed instructions. Once all connections are made‚ power on the TV and follow the on-screen prompts to complete the initial configuration‚ including language selection and network setup.

Connecting to Power and Basic Cables

First‚ locate the power input on the rear of your Seiki TV and connect the supplied power cord securely. Ensure the power outlet is easily accessible and meets the TV’s voltage requirements. Next‚ connect basic cables like coaxial cables for antenna or cable TV reception. Screw the coaxial cable connector firmly onto the “Cable In” port.

If using older devices‚ connect composite (red‚ white‚ yellow) or component (red‚ green‚ blue) cables to the corresponding inputs. These connections provide standard definition video and audio. Always ensure cables are fully inserted for a stable signal. Power on the TV after all basic cable connections are established to initiate the setup process.

Connecting External Devices (HDMI‚ USB‚ etc.)

For high-definition sources‚ utilize the HDMI ports located on the rear panel of your Seiki TV. Connect Blu-ray players‚ gaming consoles‚ or streaming devices using HDMI cables. Each HDMI port may be labeled (HDMI 1‚ HDMI 2‚ etc.). To access content from USB drives‚ plug them into the USB ports – typically found on the side or rear.

The TV supports various USB file formats for media playback. Some Seiki models may also feature a dedicated USB media player function. Remember to safely eject the USB drive through the TV’s on-screen menu before physically disconnecting it to prevent data corruption. Ensure all connections are secure for optimal performance.

Navigating the On-Screen Display (OSD)

The On-Screen Display (OSD) is your central hub for controlling your Seiki TV. Access it by pressing the “Menu” or “Settings” button on your remote. The OSD is structured with clearly labeled icons representing different settings categories – Picture‚ Sound‚ Channel‚ Network‚ and System.

Use the arrow keys on your remote to navigate through the menus and submenus. Select an option by pressing “OK” or “Enter.” To return to the previous menu‚ press the “Back” or “Exit” button. Explore each section to customize your viewing experience. Remember to save any changes made before exiting the OSD.

Remote Control Functions Explained

Your Seiki remote is designed for intuitive control. The power button turns the TV on/off‚ while number buttons directly access channels. “Volume” and “Channel” controls adjust audio and change channels respectively. “Menu” or “Settings” opens the On-Screen Display (OSD) for customization.

Dedicated buttons provide quick access to features like input source selection (“Input” or “Source”)‚ smart TV functions‚ and media playback. Arrow keys navigate the OSD‚ and “OK/Enter” confirms selections. “Back” or “Exit” returns to previous screens. Utilize the “Mute” button for instant silence and explore specialized buttons for specific apps or features.

Picture Settings and Calibration

Optimizing your Seiki TV’s picture quality is simple. Access the “Picture Settings” menu via the OSD. Begin by adjusting “Brightness” for overall light levels and “Contrast” for the difference between light and dark areas. “Color” controls the intensity of hues‚ while “Sharpness” defines image detail.

For advanced calibration‚ explore “Color Temperature” options (Warm‚ Cool‚ Normal) to fine-tune white balance. Experiment with “Advanced Settings” like dynamic contrast and noise reduction. Remember‚ optimal settings vary based on content and personal preference. Calibrating ensures accurate colors and a visually pleasing experience.

Adjusting Brightness‚ Contrast‚ and Color

Brightness controls the overall luminance of the screen; increase for darker rooms‚ decrease for bright environments. Contrast determines the difference between the darkest and brightest parts of the image – higher values create a more vivid picture‚ but can lose detail in shadows.

Color adjusts the intensity of the hues displayed. Subtle adjustments are key; over-saturation can appear unnatural. Begin with the default settings and make small changes‚ observing the impact on your favorite content. These basic adjustments form the foundation of a well-calibrated picture‚ enhancing your viewing experience.

Advanced Picture Settings (Sharpness‚ Color Temperature)

Sharpness controls the definition of edges within the image. Excessive sharpness can introduce artificial artifacts and a grainy appearance; a moderate setting usually provides the best balance. Color Temperature adjusts the warmth or coolness of the picture.

Options typically include “Cool” (bluish tint)‚ “Normal‚” and “Warm” (reddish tint). “Warm” is often preferred for accurate color reproduction‚ especially in dimly lit rooms. Experiment to find the setting that best suits your viewing preferences and content type. Careful adjustment of these settings unlocks a more refined and personalized viewing experience.

Sound Settings and Audio Options

Seiki TVs offer a range of audio adjustments to optimize your listening experience. Access the sound menu via the On-Screen Display (OSD). Volume control is the primary adjustment‚ but explore additional settings for enhanced audio. Equalizer settings allow customization of bass‚ treble‚ and mid-range frequencies.

Sound Modes‚ such as “Standard‚” “Movie‚” or “Music‚” provide pre-configured audio profiles. Explore these to find the best fit for your content. External audio devices can be connected via HDMI ARC or optical audio output for superior sound quality. Adjusting these settings ensures clear and immersive audio.

Using Built-in Features

Seiki Smart TVs unlock a world of entertainment with integrated apps. Access the app store to install streaming services like Netflix‚ Hulu‚ and more. The Media Player allows playback of content directly from USB drives‚ supporting various video‚ audio‚ and image formats. Explore the built-in web browser for convenient internet access directly on your TV.

Utilize screen mirroring to display content from compatible smartphones or tablets. These features enhance your viewing experience‚ offering diverse entertainment options. Refer to the specific app instructions for optimal performance and functionality. Enjoy the convenience of a connected entertainment hub with your Seiki TV.

Smart TV Functions and App Installation

Accessing the App Store: Navigate to the app store on your Seiki Smart TV’s home screen. Browse categories or use the search function to find desired applications. Installation Process: Select the app and click “Install.” You may be prompted to agree to terms and conditions.

Managing Apps: Once installed‚ apps appear on your home screen. You can rearrange them or uninstall unwanted apps through the settings menu. Account Setup: Some apps require account creation or login for full functionality. Ensure a stable internet connection during installation and usage. Explore the diverse range of apps available to personalize your viewing experience.

Media Player Capabilities (USB Playback)

Supported Formats: Your Seiki TV’s media player supports playback of various file formats via USB‚ including common video (MP4‚ AVI‚ MKV)‚ audio (MP3‚ WAV‚ FLAC)‚ and image (JPEG‚ PNG‚ BMP) types. Connecting a USB Device: Simply plug your USB drive into a USB port on the TV. A menu will appear‚ allowing you to browse the contents.

Playback Controls: Use the remote control to navigate files‚ play‚ pause‚ stop‚ fast-forward‚ and rewind media. File Organization: For easier navigation‚ organize your files into folders on the USB drive. Ensure the files are not corrupted for smooth playback. Enjoy your personal media library directly on your Seiki TV!

Troubleshooting Common Issues

Initial Checks: Before diving into complex solutions‚ ensure the TV is plugged in‚ the power outlet works‚ and the correct input source is selected. No Picture/Sound: Verify cable connections (HDMI‚ AV). Try a different cable or input. Check the volume level and mute settings. Connectivity Problems: For Wi-Fi issues‚ restart your router and re-enter the password. Ensure the TV is within range.

Remote Control Issues: Replace the batteries. Ensure nothing obstructs the signal between the remote and the TV. If problems persist‚ consult the ‘Remote Control Functions Explained’ section or consider a factory reset.

No Picture or Sound

Initial Assessment: If your Seiki TV displays a blank screen or lacks audio‚ begin with basic checks. Confirm the power cord is securely connected to both the TV and a functioning outlet. Verify the volume isn’t muted and is set to an audible level. Cable Connections: Inspect all cable connections (HDMI‚ AV‚ component) for looseness or damage. Try using alternative cables to rule out a faulty connection.

Input Source: Ensure the correct input source is selected on your TV using the remote. Power Cycle: Unplug the TV from the power outlet for 60 seconds‚ then plug it back in. This can often resolve temporary glitches.

Connectivity Problems (HDMI‚ Wi-Fi)

HDMI Issues: If experiencing problems with HDMI-connected devices‚ try a different HDMI port on your Seiki TV. Ensure the HDMI cable is securely connected at both ends. Test the HDMI cable with another device to confirm it’s functioning correctly. Update the firmware of both the TV and the connected device.

Wi-Fi Difficulties: For Wi-Fi connectivity issues‚ verify your router is functioning and broadcasting a signal. Restart your router and the TV. Double-check the Wi-Fi password entered on the TV. Move the TV closer to the router to improve signal strength. Consider a wired Ethernet connection for a more stable link.

Performing a Factory Reset

Caution: A factory reset will erase all your personalized settings‚ including saved channels‚ network configurations‚ and app logins. Use this option as a last resort for resolving persistent software issues.

Reset Procedure: Navigate to the TV’s settings menu using the remote control. Locate the “System” or “General” section. Within this menu‚ find the “Reset” or “Factory Reset” option. Confirm your decision when prompted. The TV will power off and restart‚ returning to its original factory state.

Post-Reset: After the reset‚ you’ll need to reconfigure your TV‚ including selecting your language‚ connecting to Wi-Fi‚ and retuning channels.

Software Updates and Firmware

Importance of Updates: Regularly updating your Seiki TV’s software and firmware is crucial for optimal performance‚ security‚ and access to new features. Updates often include bug fixes‚ improved compatibility‚ and enhanced app functionality.

Update Methods: Your Seiki TV can typically receive updates automatically over a Wi-Fi connection. Navigate to the “System” or “Support” section in the settings menu and select “Software Update.” Choose the “Auto Update” option to enable automatic downloads and installations. Alternatively‚ you can manually check for updates.

Caution: Do not interrupt the update process. Ensure a stable power supply during updates to prevent potential damage to the TV’s software.

Safety Precautions and Warnings

Electrical Safety: To prevent electric shock‚ never expose the TV to rain or moisture. Do not overload power outlets. Always unplug the TV during lightning storms or prolonged periods of disuse. Use only the provided power cord;

Physical Safety: Ensure the TV is placed on a stable surface to prevent tipping. Keep the ventilation openings clear to avoid overheating. Do not block the airflow. Avoid placing heavy objects on the power cord.

General Warnings: Do not attempt to disassemble or repair the TV yourself. Refer servicing to qualified personnel. Prolonged viewing may cause eye strain; take regular breaks.

Cleaning and Maintenance

Regular Cleaning: Disconnect the TV from the power outlet before cleaning. Use a soft‚ dry cloth to gently wipe the screen and cabinet. Avoid using liquid cleaners‚ abrasive materials‚ or solvents‚ as these can damage the surface.

Screen Care: For stubborn smudges‚ lightly dampen a soft cloth with distilled water and wipe gently. Never spray water directly onto the screen. Avoid excessive pressure when cleaning.

Ventilation: Regularly inspect and clean the ventilation openings to ensure proper airflow. Dust accumulation can cause overheating. Use a vacuum cleaner with a brush attachment to remove dust.

Understanding the Warranty Information

Limited Warranty: Your Seiki television is covered by a limited warranty against defects in materials and workmanship from the date of original purchase. The warranty period varies depending on the specific model – consult your purchase documentation for details.

Coverage Details: This warranty covers parts and labor for repairs necessary to correct manufacturing defects. It does not cover damage caused by misuse‚ accidents‚ unauthorized modifications‚ or normal wear and tear.

Warranty Service: To obtain warranty service‚ contact Seiki Customer Support (see Resources section). You will need your model number‚ serial number‚ and proof of purchase. Shipping costs to and from the service center are typically the responsibility of the owner.

Seiki TV Specifications (Common Models)

Model Range Overview: Seiki offers a diverse range of televisions‚ primarily focusing on digital CRT and LED technologies. Specifications vary significantly between models‚ but common features include HD and Full HD resolution options.

Typical Specifications: A standard Seiki LED TV might feature a screen size of 32-55 inches‚ a native resolution of 1920×1080 (Full HD)‚ and multiple HDMI inputs for connecting external devices. Refresh rates typically range from 60Hz to 120Hz.

Connectivity: Most models include USB ports for media playback‚ component and composite video inputs‚ and built-in Wi-Fi for Smart TV functionality. Detailed specifications for your specific model are available on the Seiki official website.

Resources for Additional Support

Online Resources: For immediate assistance‚ visit the Seiki Official Website. It hosts a comprehensive FAQ section addressing common issues and provides downloadable manuals for various models. The Internet Archive also offers archived user manuals for older Seiki televisions.

Direct Contact: If you require personalized support‚ Contacting Seiki Customer Support is recommended. Their contact information‚ including phone numbers and email addresses‚ can be found on their website. Be prepared to provide your TV model number and a detailed description of your issue.

Community Forums: Explore online tech forums and communities where Seiki TV owners share experiences and solutions. These platforms can offer valuable insights and troubleshooting tips.

Seiki Official Website and FAQs

Accessing Support: The Seiki Official Website serves as a primary hub for owner resources. Here‚ you’ll find downloadable user manuals for a wide range of Seiki TV models‚ including the T Series vinyl cutter documentation. These manuals cover everything from initial setup to advanced features and troubleshooting.

Frequently Asked Questions: The website’s FAQ section addresses common user inquiries regarding picture settings‚ connectivity issues (HDMI‚ Wi-Fi)‚ smart TV functions‚ and media player capabilities. It’s a great first stop for quick solutions.

Firmware Updates: Regularly check the support section for available software updates and firmware to ensure optimal TV performance and access to the latest features.

Contacting Seiki Customer Support

Need Direct Assistance? If the online resources – the official website‚ FAQs‚ and downloadable manuals – don’t resolve your issue‚ Seiki offers dedicated customer support channels. While specific contact details may vary‚ generally‚ you can reach them through email or a dedicated support form on their website.

Prepare Your Information: Before contacting support‚ have your TV model number and purchase date readily available. Clearly describe the problem you’re experiencing‚ including any error messages displayed. This will expedite the troubleshooting process.

Response Times: Be aware that response times may vary depending on the volume of inquiries. Patience is appreciated while the support team addresses your concerns.

Die Seiki Corporation: Company Overview

A Legacy of Innovation: Die Seiki Corporation is a globally recognized manufacturer committed to delivering high-quality products and services‚ prioritizing customer satisfaction. Originally focused on resource conservation systems for synthetic resins and rubber‚ Seiki has expanded its expertise into diverse areas‚ including television manufacturing.

Core Values: The company emphasizes continuous improvement and a dedication to environmental responsibility. They strive to be a leader in runnerless molding technology and hot runner systems for injection molding‚ showcasing a commitment to advanced manufacturing processes.

Global Presence: Seiki serves a broad international market‚ offering innovative solutions and building lasting partnerships with clients worldwide.

Seiki in Manufacturing: Resource Conservation Systems

Pioneering Efficiency: Die Seiki Corporation initially established itself as a leading provider of resource conservation systems‚ specifically for the synthetic resin and rubber industries. Their core competency lies in developing and implementing technologies that minimize waste and maximize material utilization during manufacturing processes.

Hot Runner Technology: A key area of expertise is hot runner systems for angusslosen (runnerless) injection molding. This innovative approach eliminates material waste associated with traditional sprue and runner systems‚ resulting in significant cost savings and improved product quality.

Sustainable Practices: Seiki’s commitment extends beyond profitability‚ actively promoting environmentally responsible manufacturing practices and contributing to a more sustainable future.

Horizontal Balance Adjustment (Related to Seiki Analog Devices)

Precision Tonearm Calibration: For Seiki vinyl cutters – utilizing analog devices – achieving proper horizontal balance is crucial for optimal performance and stylus longevity. This adjustment ensures consistent tracking force across the record surface‚ minimizing distortion and wear.

Static-Balance Tonearm: Seiki employs a static-balance type tonearm‚ requiring careful calibration to maintain correct stylus pressure. Detach the cartridge stylus cover if removable‚ to facilitate accurate balancing.

Operational Readiness: Before operation‚ thoroughly review all supplied manuals from Seiki‚ the NC unit manufacturer‚ and related equipment providers. Proper understanding of these resources is vital for safe and effective use.

tubular support bandage size guide

Article Plan: Tubular Support Bandage Size Guide

When it comes to selecting the appropriate tubular support bandage, understanding the correct size and fit is crucial for effective injury management. Whether you’re dealing with sprains, strains, or soft tissue injuries, the right bandage size ensures proper support and compression without restricting movement or circulation. This guide will help you navigate the different sizes, types, and fitting considerations to make an informed decision.

Understanding Tubular Support Bandage Sizes

Tubular support bandages come in various sizes designed to accommodate different limb types and injury locations. The size is typically determined by the width of the bandage, which correlates with the circumference of the limb it will cover. Common sizes include A, B, C, and D, with each size suited for specific body parts:

  • Size A: Ideal for small limbs like wrists and elbows, providing gentle yet effective support.
  • Size B: Designed for slightly larger limbs, such as the lower leg or forearm.
  • Size C: Suitable for medium-sized limbs, including the ankle and upper arm.
  • Size D: Best for larger limbs, such as the thigh or upper leg, offering greater coverage and support.

Always refer to the manufacturer’s size guide to ensure the bandage aligns with the specific measurements of the limb being treated. Incorrect sizing can lead to inadequate support or discomfort, which may hinder the healing process.

Selecting the Right Width

The width of the tubular support bandage is determined by the broadest part of the limb being treated. For example, when supporting an ankle, measure the widest part of the ankle and select a bandage size that matches this measurement. A sizing chart is often provided to help users determine the correct width. For instance:

  • Small limbs (e.g., wrists and elbows) may require a narrower bandage, such as Size A or B.
  • Larger limbs (e.g., thighs and calves) typically require a wider bandage, such as Size C or D.

Proper width ensures even compression and prevents pressure points, which can cause discomfort or restrict blood flow. Always measure the limb before selecting a bandage size to ensure the best fit.

Choosing the Correct Length

Tubular support bandages are available in different lengths to accommodate varying needs. Common lengths include 2 meters and 10 meters:

  • 2-Meter Bandages: Ideal for temporary or short-term use, such as during initial injury management or as a travel-sized option.
  • 10-Meter Bandages: Suitable for longer-term use, providing extended coverage and support for chronic injuries or prolonged immobilization.

Selecting the appropriate length ensures you have enough material to wrap the limb properly without running out of bandage mid-application. For instance, a 2-meter bandage is sufficient for smaller limbs, while a 10-meter bandage is better for larger or multiple-limb injuries.

Application Tips for Optimal Fit

Once you’ve selected the correct size and length, proper application is key to maximizing the benefits of the tubular support bandage. Follow these tips:

  1. Measure the limb at its widest point to determine the correct size.
  2. Wrap the bandage evenly, ensuring consistent compression without causing excessive tightness.
  3. Overlap the bandage by 50% with each wrap to maintain proper support and prevent gaps.
  4. Avoid applying the bandage too tightly, as this can restrict blood flow and cause discomfort.
  5. Adjust the bandage as needed to ensure it remains in place and provides adequate support throughout the day.

Regular monitoring of the limb is essential to ensure the bandage continues to fit properly and provide effective support without causing adverse effects.

Frequently Asked Questions

Here are some common questions and answers to help you navigate the selection process:

  • Q: Can I reuse a tubular support bandage?
    A: Yes, tubular support bandages are reusable, provided they remain clean and intact. However, inspect the bandage for damage or wear before reuse.
  • Q: How do I clean a tubular support bandage?
    A: Most tubular support bandages are machine-washable. Check the manufacturer’s instructions for specific care guidelines.
  • Q: Can I cut the bandage to fit my needs?
    A: Yes, you can cut the bandage to the desired length using scissors. Ensure clean, precise cuts to maintain the integrity of the material.

By following these guidelines and recommendations, you can select the right tubular support bandage size to effectively manage injuries and promote healing.

Stay informed and make the best choice for your injury support needs!

benz service manual

Benz Service Manual: A Comprehensive Guide

Navigating Mercedes-Benz ownership requires understanding vehicle intricacies; a dedicated service manual provides essential guidance for maintenance‚ repairs‚ and optimal performance.

Understanding Benz Service Manuals

Benz service manuals are detailed‚ comprehensive guides specifically created for Mercedes-Benz vehicles. They transcend basic owner’s manuals‚ delving into the intricate mechanical and electrical systems. These manuals offer technicians – and capable owners – the information needed for accurate diagnosis‚ repair‚ and maintenance.

They aren’t simply instruction sets; they’re a deep dive into the engineering behind your vehicle. Understanding the manual’s structure‚ terminology‚ and the level of detail provided is crucial. A well-understood manual empowers you to tackle repairs confidently‚ potentially saving significant costs and ensuring your Benz remains in peak condition. Proper utilization unlocks a wealth of knowledge.

Why Use a Benz Service Manual?

Employing a Benz service manual offers substantial benefits beyond simple repairs. Accurate diagnosis becomes achievable‚ preventing unnecessary part replacements and costly guesswork. Detailed procedures ensure jobs are completed correctly‚ maintaining vehicle safety and performance.

Furthermore‚ a manual fosters a deeper understanding of your vehicle’s systems‚ empowering informed maintenance decisions. It’s invaluable for tackling complex issues‚ circumventing expensive dealership visits. Access to torque specifications‚ wiring diagrams‚ and component locations streamlines work. Ultimately‚ a service manual extends your Benz’s lifespan and preserves its value‚ providing peace of mind.

Types of Benz Service Manuals Available

Several options exist when sourcing a Benz service manual‚ each with unique advantages. Official Mercedes-Benz Workshop Manuals‚ directly from the manufacturer‚ provide the most comprehensive and accurate information. Aftermarket Service Manuals‚ like Haynes or Chilton‚ offer a more affordable alternative‚ though potentially less detailed.

The format also varies: Digital vs. Print Service Manuals. Digital versions offer searchability and portability‚ while print manuals are ideal for garage use without electronic distractions. Choosing depends on your budget‚ technical expertise‚ and preferred working style. Consider the specific model year‚ as coverage varies between publications.

Official Mercedes-Benz Workshop Manuals

These manuals represent the gold standard for Benz repair information‚ originating directly from the manufacturer’s engineering and service departments. They deliver unparalleled detail‚ encompassing every aspect of vehicle maintenance‚ diagnostics‚ repair‚ and overhaul. Expect comprehensive wiring diagrams‚ precise torque specifications‚ and step-by-step procedures illustrated with detailed visuals.

While typically the most expensive option‚ the accuracy and completeness minimize errors and ensure repairs meet Mercedes-Benz standards. They often include updates and revisions reflecting design changes; Access can be through dealerships or specialized online platforms‚ sometimes requiring a subscription or per-vehicle access fee.

Aftermarket Service Manuals (Haynes‚ Chilton)

Haynes and Chilton manuals offer a more budget-friendly alternative to official Mercedes-Benz workshop manuals‚ catering to DIY enthusiasts and independent mechanics. These publications provide simplified instructions and diagrams‚ focusing on common maintenance and repair tasks. While not as exhaustive as official manuals‚ they cover essential procedures like oil changes‚ brake replacements‚ and basic engine diagnostics.

Expect a less detailed approach to complex systems‚ potentially requiring supplemental resources for intricate repairs. They are widely available at auto parts stores and online retailers‚ offering a convenient entry point for vehicle upkeep. However‚ always verify compatibility with your specific Benz model and year.

Digital vs. Print Service Manuals

The choice between digital and print Benz service manuals hinges on user preference and work style. Digital versions‚ often subscription-based‚ offer searchability‚ zoom functionality‚ and potential updates – ideal for quick reference and accessing the latest information. They’re accessible on laptops‚ tablets‚ and smartphones‚ providing portability.

Print manuals‚ conversely‚ are durable‚ require no power‚ and are less prone to technical glitches. Some prefer the tactile experience and ease of flipping through pages in a garage environment. Consider your typical usage scenario; frequent‚ detailed work might benefit from digital access‚ while occasional tasks suit a physical copy.

Locating a Benz Service Manual

Finding the correct Benz service manual requires exploring several avenues. Starting with your local Mercedes-Benz dealership is a reliable option‚ guaranteeing an official manual for your specific model. However‚ this often comes at a premium price. Online retailers like Amazon and eBay present a broader selection‚ including both official and aftermarket manuals‚ often at competitive rates.

Specialized automotive manual websites dedicate themselves to providing service literature. Thoroughly verify the manual’s compatibility with your vehicle’s year and model before purchasing‚ ensuring accurate information for successful repairs and maintenance.

Mercedes-Benz Dealerships

Your local Mercedes-Benz dealership remains a primary source for authentic service manuals. They stock manuals specifically tailored to your vehicle’s model year and configuration‚ ensuring complete accuracy. While generally the most expensive option‚ purchasing directly from the dealership guarantees you receive an official‚ up-to-date resource.

Dealerships can also assist in identifying the correct manual if you’re unsure which one you need. Furthermore‚ their service departments may offer digital access to service information‚ though this usually requires a paid subscription or service visit. Expect a higher price point‚ but benefit from guaranteed compatibility and quality.

Online Retailers (Amazon‚ eBay)

Amazon and eBay present a vast marketplace for both new and used Benz service manuals. These platforms often offer competitive pricing and a wide selection‚ including older or out-of-print manuals difficult to find elsewhere. However‚ verifying the manual’s condition and edition is crucial before purchasing.

Carefully review seller ratings and descriptions to ensure accuracy. Be mindful of potential discrepancies between the listed model year and your vehicle. Digital downloads are also frequently available‚ offering instant access; Exercise caution regarding copyright and ensure the source is legitimate to avoid incomplete or inaccurate information.

Specialized Automotive Manual Websites

Numerous websites specialize in providing automotive repair manuals‚ including those specifically for Mercedes-Benz vehicles. These platforms often curate a more focused selection than general retailers like Amazon or eBay‚ potentially offering higher quality or more specialized manuals.

Examples include sites dedicated to factory service manuals or those offering digital subscriptions. These resources frequently provide detailed diagrams‚ troubleshooting guides‚ and repair procedures. Always check for compatibility with your specific Benz model and year. Consider user reviews and forum discussions to assess the website’s reputation and the manual’s accuracy before making a purchase.

Essential Information Found in a Benz Service Manual

A comprehensive Benz service manual is a treasure trove of technical data crucial for both routine maintenance and complex repairs. Expect detailed engine specifications – torque figures‚ compression ratios‚ and fluid capacities – alongside step-by-step repair procedures.

Furthermore‚ manuals thoroughly cover the transmission & drivetrain‚ including diagrams and adjustments. Crucially‚ they contain electrical system diagrams and troubleshooting flowcharts‚ vital for diagnosing issues. Expect wiring schematics‚ component locations‚ and fault code explanations‚ empowering informed repairs and ensuring vehicle reliability.

Engine Specifications & Repair Procedures

This section details the heart of your Benz – the engine. You’ll find precise engine specifications like bore and stroke dimensions‚ compression ratios‚ and horsepower ratings for each variant. Detailed repair procedures cover everything from routine oil changes and spark plug replacements to more complex tasks like timing belt replacements and cylinder head overhauls.

Expect exploded diagrams illustrating component placement and torque specifications for every bolt. Manuals also provide troubleshooting guides for common engine issues‚ aiding in accurate diagnosis and efficient repairs‚ ultimately preserving engine performance and longevity.

Transmission & Drivetrain Information

Beyond the engine‚ a Benz’s smooth operation relies on a robust transmission and drivetrain. Service manuals dedicate significant sections to these components‚ outlining detailed transmission information – from fluid type specifications and adjustment procedures to complete disassembly and rebuild instructions for both automatic and manual gearboxes.

You’ll also find comprehensive coverage of the drivetrain‚ including axles‚ differentials‚ and driveshafts. Diagrams illustrate component layouts‚ while step-by-step guides facilitate repairs and maintenance‚ ensuring optimal power transfer and a refined driving experience.

Electrical System Diagrams & Troubleshooting

Modern Mercedes-Benz vehicles boast complex electrical architectures. A quality service manual is invaluable for navigating this complexity‚ providing detailed electrical system diagrams that map out wiring harnesses‚ component locations‚ and circuit pathways. These schematics are crucial for diagnosing electrical faults accurately.

Furthermore‚ manuals offer systematic troubleshooting procedures‚ guiding technicians through diagnostic steps‚ component testing‚ and repair strategies. Information on sensor operation‚ module programming‚ and fuse/relay locations empowers users to resolve electrical issues efficiently‚ restoring vehicle functionality.

Common Benz Models Covered by Service Manuals

Mercedes-Benz service manuals cater to a wide spectrum of models‚ ensuring comprehensive support for owners and technicians. Popular lines like the C-Class (W202‚ W203‚ W204‚ W205‚ W206) receive extensive coverage‚ detailing everything from routine maintenance to complex repairs. Similarly‚ the luxurious E-Class (W123‚ W124‚ W210‚ W211‚ W212‚ W213) is well-documented.

Flagship S-Class (W140‚ W220‚ W221‚ W222‚ W223) models‚ known for their advanced technology‚ also benefit from dedicated manual support. Coverage extends to SUVs like the GLE and GLS‚ and various AMG performance variants‚ providing detailed guidance for all Benz enthusiasts.

C-Class (W202‚ W203‚ W204‚ W205‚ W206)

The Mercedes-Benz C-Class‚ spanning generations from the W202 to the modern W206‚ is a popular model with readily available service manuals. These manuals provide detailed instructions for maintaining and repairing each iteration‚ covering engine specifications‚ transmission procedures‚ and electrical system diagnostics.

Specific attention is given to common issues affecting each generation‚ like the W203’s oxidation issues or the W204’s balance shaft bolt problems. Comprehensive diagrams and troubleshooting guides empower both DIY mechanics and professionals to address any challenge‚ ensuring the C-Class remains a reliable performer.

E-Class (W123‚ W124‚ W210‚ W211‚ W212‚ W213)

The E-Class‚ a cornerstone of the Mercedes-Benz lineup‚ benefits from extensive service manual coverage across its various generations – from the classic W123 to the contemporary W213. These manuals are invaluable for tackling repairs‚ ranging from routine maintenance like oil changes to complex procedures like engine overhauls and transmission servicing.

Detailed wiring diagrams and diagnostic flowcharts assist in resolving electrical issues‚ common in these sophisticated vehicles. Manuals often address specific problems associated with each generation‚ such as the W210’s conductor plate issues or the W211’s SBC brake system. Proper use ensures longevity and performance.

S-Class (W140‚ W220‚ W221‚ W222‚ W223)

The S-Class‚ representing Mercedes-Benz’s pinnacle of luxury and technology‚ demands meticulous maintenance‚ making a dedicated service manual essential. Covering models from the W140 through the current W223‚ these manuals provide detailed instructions for servicing complex systems like Airmatic suspension‚ Distronic radar systems‚ and advanced engine technologies.

Troubleshooting guides address unique S-Class issues‚ such as hydraulic leaks‚ electronic malfunctions‚ and climate control problems. Comprehensive wiring diagrams and component locations are crucial for accurate repairs. Proper manual utilization ensures the preservation of the S-Class’s renowned comfort and reliability.

Using a Benz Service Manual Effectively

Maximizing the benefits of a Benz service manual requires a systematic approach. Always prioritize safety – disconnect the battery before electrical work and use appropriate personal protective equipment. Thoroughly read all warnings and precautions before commencing any repair. Ensure you possess the correct tools‚ as specified within the manual‚ to avoid damage to components.

Understanding the diagrams and schematics is paramount; utilize the manual’s key and symbols for accurate interpretation. Follow procedures step-by-step‚ and double-check connections before reassembly. A methodical approach‚ guided by the manual‚ minimizes errors and ensures a successful outcome.

Safety Precautions & Warnings

Working on a Benz demands strict adherence to safety protocols. Always disconnect the negative battery terminal before initiating any electrical repairs to prevent shorts and shocks. Wear safety glasses to protect your eyes from fluids and debris. Use jack stands when working under the vehicle – never rely solely on a jack.

Be mindful of hot surfaces like the engine and exhaust system. Handle fluids responsibly‚ disposing of them according to local regulations. Avoid working alone and ensure a well-ventilated workspace. The service manual highlights specific warnings for each procedure; heed these carefully to prevent injury and vehicle damage.

Tool Requirements & Specifications

A Benz service manual meticulously details the necessary tools for each repair. Standard tools like wrenches‚ sockets‚ and screwdrivers are essential‚ but many procedures require specialized equipment. Torque wrenches are critical for tightening fasteners to precise specifications‚ preventing damage. Diagnostic tools‚ including scan tools for reading fault codes‚ are often indispensable.

The manual specifies the correct socket sizes‚ wrench types‚ and torque values. Specialty tools‚ such as Mercedes-Benz-specific pullers or alignment tools‚ may be required for certain tasks. Using the correct tools ensures efficient and safe repairs‚ maintaining the vehicle’s integrity.

Understanding Diagrams & Schematics

Benz service manuals heavily rely on diagrams and schematics to illustrate complex systems. Electrical wiring diagrams‚ for instance‚ depict the intricate network of wires‚ connectors‚ and components. These diagrams aren’t simply pictures; they use standardized symbols representing each part. Learning to interpret these symbols is crucial for troubleshooting.

Component location diagrams show where parts are situated within the vehicle. Exploded views illustrate how assemblies fit together‚ aiding in reassembly. Hydraulic schematics detail fluid pathways. Patience and careful study are key to deciphering these visuals‚ enabling accurate diagnosis and repair.

Troubleshooting with a Benz Service Manual

A Benz service manual transforms troubleshooting from guesswork to a systematic process. It provides diagnostic flowcharts – step-by-step guides leading you through potential issues based on observed symptoms. These charts direct you to specific tests and inspections.

Crucially‚ manuals detail fault code interpretation. Modern Mercedes-Benz vehicles store diagnostic trouble codes (DTCs) accessible via an OBD-II scanner. The manual explains what each code signifies‚ potential causes‚ and recommended repair actions. Understanding these codes saves time and prevents unnecessary part replacements‚ ensuring efficient and accurate problem resolution.

Diagnostic Flowcharts

Benz service manuals feature detailed diagnostic flowcharts‚ acting as visual roadmaps for pinpointing vehicle issues. These charts present a series of questions or tests‚ branching based on the results obtained. They guide technicians (and informed DIYers) through a logical sequence‚ eliminating random part swapping and reducing diagnostic time.

Flowcharts typically begin with a primary symptom – for example‚ “Engine fails to start” – and then ask clarifying questions like “Does the engine crank?” or “Is there fuel pressure?”. Each answer directs you to the next step‚ ultimately leading to a probable cause and the appropriate repair procedure.

Fault Code Interpretation

Modern Mercedes-Benz vehicles rely heavily on onboard diagnostics‚ storing fault codes when issues arise. A comprehensive benz service manual is crucial for deciphering these codes‚ which appear as alphanumeric sequences. The manual provides a detailed list of all possible codes‚ along with their specific meanings and potential causes.

Simply knowing the code isn’t enough; the manual explains the conditions under which the code is set‚ potential related symptoms‚ and recommended troubleshooting steps. It often includes freeze-frame data – a snapshot of sensor readings at the moment the code was triggered – offering valuable diagnostic clues. Accurate interpretation minimizes guesswork and ensures effective repairs.

Cost of Benz Service Manuals

The price of a Benz service manual varies significantly depending on several factors. Official Mercedes-Benz workshop manuals‚ known for their detail‚ typically command a higher price than aftermarket options like Haynes or Chilton. Print manuals generally range from $80 to $300‚ depending on the model and comprehensiveness.

Digital versions are often more affordable‚ with single-model downloads costing around $30-$100. Subscription services‚ offering access to a wide range of models‚ can range from $20 to $50 per month. Condition (new vs. used) also impacts price‚ as does the specific model year and complexity of the vehicle;

Factors Affecting Price

Several key elements influence the cost of a Benz service manual. The vehicle’s model and year are primary determinants; newer‚ more complex models generally have pricier manuals. Official Mercedes-Benz manuals consistently cost more than aftermarket alternatives due to their comprehensive detail and direct manufacturer origin.

Format plays a role‚ with print versions usually exceeding digital download costs. Subscription services‚ offering broad model access‚ present a different pricing structure than one-time purchases. Condition (new or used) significantly impacts the price‚ and rarity or demand for a specific model’s manual can also inflate costs.

Subscription Services vs; One-Time Purchase

Choosing between a Benz service manual subscription and a one-time purchase depends on your needs. A one-time purchase provides permanent access to a manual for a specific model‚ ideal for owners of a single vehicle. However‚ it lacks coverage for future cars or different model years.

Subscription services‚ conversely‚ offer access to a vast library of manuals‚ covering multiple models and years – beneficial for enthusiasts or mechanics working on diverse vehicles. These services typically involve recurring fees‚ potentially exceeding the cost of individual manuals over time‚ but provide ongoing updates and broader coverage.

microkorg manual

The MicroKorg manual is a comprehensive guide essential for mastering this iconic synthesizer. It covers key features‚ operation‚ and advanced techniques‚ ensuring optimal use of its capabilities.

Overview of the MicroKorg Synthesizer

The MicroKorg is a compact‚ portable analog-modeling synthesizer renowned for its rich sound and intuitive design. It features 4-voice polyphony‚ 8-band vocoder‚ and a built-in effects processor. Designed for musicians and producers‚ it offers a wide range of timbres‚ from bass and leads to pads and textures. The synthesizer is equipped with dual oscillators‚ a filter section‚ and LFO/Envelope generators for deep sound shaping. Its lightweight and user-friendly interface make it ideal for both studio and live performances. With its unique exterior and versatile capabilities‚ the MicroKorg has become a staple in modern music production‚ catering to both beginners and seasoned artists.

Importance of the Manual for Optimal Usage

The MicroKorg manual is indispensable for unlocking the synthesizer’s full potential. It provides detailed instructions on navigating the interface‚ configuring oscillators‚ and utilizing the vocoder. By understanding MIDI functionality‚ effects customization‚ and sound design techniques through the manual‚ users can create complex sounds and patterns. The guide also covers maintenance and troubleshooting‚ ensuring longevity and optimal performance. Whether you’re a novice or an experienced musician‚ the manual serves as a comprehensive resource‚ helping you master every feature and enhance your creative workflow. It’s a must-have for anyone aiming to get the most out of their MicroKorg experience.

History and Evolution of the MicroKorg

The MicroKorg‚ first released in 2002‚ revolutionized analog modeling synthesis. It evolved through versions like the XL‚ S‚ and MicroKorg 2‚ each adding enhanced features and capabilities.

Release and Impact of the Original MicroKorg

The original MicroKorg‚ released in 2002‚ marked a significant milestone in synthesizer history. Its compact design‚ intuitive interface‚ and powerful analog modeling capabilities made it an instant hit. Priced affordably‚ it democratized access to professional-grade synthesis‚ appealing to both hobbyists and professionals. The MicroKorg introduced a built-in vocoder‚ a unique feature that set it apart from competitors. Its versatility in creating diverse sounds‚ from basslines to leads‚ solidified its place in music production. The synthesizer’s success led to it becoming one of the best-selling synths of its time‚ leaving a lasting impact on the music industry and inspiring future iterations like the XL and S models.

The MicroKorg XL‚ introduced in 2008‚ built upon the success of its predecessor with enhanced features. It retained the original’s compact design and intuitive interface while offering improved functionality. The XL featured a more powerful effects processor‚ expanded sound capabilities‚ and a gooseneck microphone for enhanced vocoder use. New PCM sounds were added‚ broadening its sonic palette. The XL also introduced a more responsive keyboard‚ making it a favorite among performers. Its versatility and affordability solidified its reputation as a top choice for musicians. The XL remains a testament to Korg’s commitment to innovation‚ blending analog modeling with modern digital enhancements seamlessly.

Launch of the MicroKorg S and Its Features

The MicroKorg S was introduced as a successor to the original‚ offering enhanced features and improved performance. It boasted a new‚ versatile sound engine with expanded PCM sounds and analog modeling capabilities. The S model featured a high-quality color screen for better navigation and a more intuitive interface. It included a vocoder with a gooseneck microphone‚ allowing for creative vocal processing. Additionally‚ the S introduced hardtune and harmonizer effects‚ adding depth to vocal performances. With its solid build and responsive keys‚ the MicroKorg S catered to both live performers and studio producers‚ making it a versatile tool for modern music creation and sound design.

Unveiling the MicroKorg 2 at NAMM 2024

The MicroKorg 2 was officially unveiled at the NAMM 2024 conference in California‚ marking a significant evolution in the series. This updated model boasts a new‚ more versatile sound engine‚ enhanced effects processing‚ and a high-resolution color touchscreen for improved navigation. It introduces advanced vocal effects such as hardtune and harmonizer‚ alongside the classic vocoder functionality. The MicroKorg 2 also features a solid‚ durable build and is set for release in June 2024. This latest iteration promises to build on the legacy of its predecessors while offering modern musicians and producers a powerful tool for sound design and performance.

Understanding the Vocoder Feature

The vocoder feature in the MicroKorg allows for unique vocal processing‚ blending speech with synthesized sounds. It’s perfect for creating robotic voices and intricate soundscapes‚ enhancing musical creativity.

What Is a Vocoder and How It Works

A vocoder is an electronic device that processes audio signals‚ blending a modulator signal (like vocals) with a carrier signal (synthesized sound). It analyzes the spectral characteristics of the modulator and applies them to the carrier‚ creating unique‚ robotic-like voices. Commonly used in music production‚ the vocoder allows artists to create distinctive vocal effects and intricate soundscapes. The MicroKorg’s vocoder feature simplifies this process‚ offering intuitive controls to shape and customize sounds. By combining speech and synthesis‚ it enables the creation of expressive‚ otherworldly timbres‚ making it a popular tool for genres ranging from electronic to pop music.

Using the Vocoder on the MicroKorg

Using the vocoder on the MicroKorg involves capturing a modulator signal‚ typically vocals‚ through the built-in gooseneck microphone. The carrier signal is generated by the synthesizer‚ creating a blend of the two. To activate the vocoder‚ select a vocoder program and ensure the microphone is properly connected. Adjust the carrier and modulator levels to achieve the desired balance. The MicroKorg also offers effects like hardtune and harmonizer to enhance vocal processing. Experiment with parameter adjustments to shape the sound‚ and use the LFO or envelope generators for dynamic modulation. This feature is ideal for creating robotic voices or unique sound effects‚ making it a standout tool for electronic music production.

Advanced Vocoder Techniques and Effects

Advanced vocoder techniques on the MicroKorg involve experimenting with modulation and effects to create unique sounds. Use the LFO to modulate the carrier or modulator signals‚ adding dynamic movement. The envelope generator can control the vocoder’s response‚ creating expressive variations. Hardtune and harmonizer effects can be layered for robotic or choir-like textures. Adjusting the cutoff frequency and resonance in the filter section further refines the sound. For complex patterns‚ sync the vocoder with external MIDI devices or arpeggiators. These techniques allow producers to craft distinctive vocal effects‚ from subtle enhancements to futuristic soundscapes‚ making the MicroKorg a versatile tool for electronic music production.

MIDI Functionality in the MicroKorg

MIDI functionality in the MicroKorg enables seamless integration with external devices‚ allowing control of parameters and synchronization of sounds. It enhances creativity and workflow for producers and musicians.

Understanding MIDI Modes on the MicroKorg

The MicroKorg offers versatile MIDI modes that enhance its functionality as a MIDI controller and synthesizer. In Single Mode‚ it transmits and receives data on a single MIDI channel‚ ideal for controlling external devices or integrating into a DAW. Multi Mode allows the MicroKorg to manage multiple MIDI channels‚ enabling complex setups and layered sound designs. These modes ensure compatibility with a wide range of external gear‚ making the MicroKorg a flexible tool for both studio and live performances. Understanding these modes is crucial for unlocking the full potential of the MicroKorg in MIDI-based workflows.

Assigning and Using MIDI Control Change

MIDI Control Change (CC) on the MicroKorg allows for dynamic parameter adjustments via external controllers or software. Assigning MIDI CC involves selecting specific parameters‚ such as filter cutoff or LFO rate‚ and mapping them to MIDI control numbers. This enables real-time manipulation of sounds during performances or recordings. The MicroKorg supports a wide range of MIDI CC messages‚ making it compatible with various external devices. By assigning MIDI CC‚ users can enhance their sound design capabilities and achieve precise control over their synthesizer. This feature is particularly useful for creating expressive and evolving sounds in both studio and live settings.

Connecting External MIDI Devices

Connecting external MIDI devices to the MicroKorg enhances its functionality and integration with other gear. Using a MIDI cable‚ users can link the MicroKorg to sequencers‚ drum machines‚ or other synthesizers. The MIDI IN/OUT ports allow for seamless communication‚ enabling the MicroKorg to receive or transmit MIDI data. To ensure proper connection‚ select the correct MIDI channel on both the MicroKorg and the external device. This setup allows for controlling the MicroKorg from an external sequencer or using it as a MIDI controller for other devices. Proper synchronization ensures precise timing and expanded creative possibilities for live performances and studio productions.

Synthesis and Sound Design

Synthesis and sound design are foundational to the MicroKorg’s creative potential. With oscillators‚ filters‚ LFOs‚ and effects‚ users can craft unique timbres and textures‚ from simple tones to complex sounds;

Oscillators and Their Configuration

The MicroKorg features dual oscillators‚ each offering a variety of waveforms‚ including sawtooth‚ square‚ triangle‚ and sine. These oscillators can be configured in multiple modes‚ such as mono‚ unison‚ or sync‚ allowing for rich and dynamic sound creation. Users can adjust parameters like octave‚ detune‚ and waveform type to shape the basic tone. The oscillators’ configurations are crucial for achieving desired timbres‚ from deep basses to piercing leads. By experimenting with different settings‚ musicians can unlock a wide range of sonic possibilities‚ making the MicroKorg a versatile tool for sound design and music production.

Filter Types and Cutoff Frequency Adjustment

The MicroKorg features a multi-mode filter that includes low-pass‚ high-pass‚ and band-pass options‚ allowing for versatile sound shaping. The cutoff frequency can be adjusted to determine the tonal character‚ from deep basses to sharp‚ piercing leads. Resonance control adds intensity and brightness to the sound. Adjusting these parameters enables users to sculpt unique timbres‚ making the filter a key component in achieving desired sonic textures. The filter’s responsiveness to modulation sources further enhances its creative potential‚ providing dynamic and evolving sounds. Proper use of the filter is essential for crafting professional-quality sounds‚ whether for basslines‚ leads‚ or atmospheric pads.

LFO and Envelope Generators Explained

The MicroKorg’s LFO (Low Frequency Oscillator) and envelope generators are essential for creating dynamic‚ evolving sounds. The LFO offers various waveforms‚ including sine‚ square‚ and random‚ to modulate parameters like pitch‚ cutoff‚ and volume. Envelope generators shape the sound’s amplitude over time‚ with adjustable attack‚ decay‚ sustain‚ and release (ADSR) stages. These tools allow for intricate sound design‚ from subtle vibratos to dramatic filter sweeps. By assigning LFOs and envelopes to different parameters‚ users can craft rich‚ expressive timbres that bring their sounds to life. Proper use of these features is crucial for achieving professional-quality results in music production and live performance.

Modulation and Routing Options

The MicroKorg offers extensive modulation and routing options‚ enabling deep sound customization. Users can assign LFOs‚ envelopes‚ and MIDI controllers to various parameters‚ such as pitch‚ filter cutoff‚ and amplitude. The modulation matrix allows for flexible routing‚ creating complex interactions between sources and destinations. This flexibility enables dynamic sound design‚ from subtle vibratos to intricate filter sweeps. With multiple modulation sources and destinations‚ the MicroKorg empowers artists to craft unique‚ evolving timbres. Proper use of these features unlocks the full potential of the synthesizer‚ making it a powerful tool for both live performance and studio production.

Creating Bass and Lead Sounds

Creating bass and lead sounds on the MicroKorg involves selecting the right oscillators and shaping them with filters and envelopes. For bass‚ use lower octave settings and square or sine waves for deep‚ solid tones. Adjust the filter cutoff and resonance to add punch and clarity. The LFO can be used to create subtle movement or rhythmic interest in basslines.

For lead sounds‚ opt for brighter oscillators like sawtooth or pulse waves. Use the filter to enhance high-end clarity and the LFO for vibrato or pitch modulation. Layering multiple timbres and adjusting envelope attack/decay times can create dynamic‚ expressive leads. These techniques allow users to craft sounds that stand out in any mix.

Effects Processor and Its Capabilities

The MicroKorg’s effects processor offers a range of customizable options‚ including delay‚ reverb‚ and distortion‚ to enhance and shape sounds creatively for professional-quality results.

Overview of the Effects Processor

The MicroKorg’s effects processor is a powerful tool for enhancing sounds. It includes a variety of effects such as delay‚ reverb‚ chorus‚ and distortion‚ allowing for creative sound shaping. The effects processor is highly customizable‚ enabling users to tailor their sounds to suit specific musical genres or artistic visions. With the ability to adjust parameters like depth‚ rate‚ and level‚ musicians can achieve precise control over their effects. This feature is particularly useful for live performances and studio recordings‚ making the MicroKorg a versatile instrument for both beginners and experienced synthesizer enthusiasts. The effects processor is integral to unlocking the MicroKorg’s full sonic potential.

Editing and Customizing Effects

Customizing effects on the MicroKorg allows users to tailor sounds to their creative vision. The effects processor offers editable parameters such as depth‚ rate‚ and level‚ enabling precise control. Musicians can experiment with different effect combinations to achieve unique textures. Real-time tweaking via knobs or MIDI ensures dynamic sound manipulation. Presets can be saved for quick recall‚ while deeper editing unlocks advanced possibilities. This flexibility makes the MicroKorg ideal for both studio and live performances‚ catering to diverse musical styles. By mastering effect customization‚ users can unlock the full potential of their sound design‚ creating distinctive and captivating audio experiences with ease and precision.

Sound Design and Programming

Sound design and programming on the MicroKorg involve shaping tones using oscillators‚ filters‚ and LFOs. The vocoder and arpeggiator add unique textures‚ enabling deep customization and creative expression.

Step-by-Step Guide to Creating Sounds

Creating sounds on the MicroKorg begins with selecting a program and initializing it. Choose oscillators‚ adjust waveforms‚ and set octave and detune parameters. Define the filter cutoff and resonance‚ then assign LFOs to modulate pitch‚ volume‚ or other parameters. Use the vocoder for unique vocal effects by routing an external microphone signal. Experiment with envelope generators to shape dynamics and assign modulation sources for deeper customization. Save your creations for easy recall during performances or future sessions. This process allows for endless sound design possibilities‚ making the MicroKorg a versatile tool for musicians and producers.

Using the Arpeggiator for Complex Patterns

The MicroKorg’s arpeggiator is a powerful tool for creating intricate musical patterns. It allows you to generate rhythmic sequences by automatically cycling through notes in a chord or scale. To use it‚ select an arpeggio pattern‚ choose a tempo‚ and enable synchronization with MIDI if desired. The arpeggiator can produce everything from simple grooves to complex‚ evolving textures. Experiment with different modes‚ such as random or gate‚ to add variety. Use the shift key to access advanced arpeggiator settings‚ like adjusting the range or octave. This feature is especially useful for live performances and sound design‚ making it a key part of the MicroKorg’s creative arsenal.

Saving and Organizing Programs

Saving and organizing programs on the MicroKorg is straightforward‚ allowing you to store up to 128 user programs. Use the “Write” function to save your custom sounds‚ ensuring they are preserved for future use. Programs can be organized into categories like bass‚ lead‚ or effects for easy access. Utilize the “Select” button to navigate through programs and assign them to specific locations. Regularly backing up your programs via MIDI or an external editor is recommended to prevent data loss. Organizing your sounds logically enhances workflow‚ making it easier to retrieve them during performances or recording sessions. This feature ensures your creative work remains accessible and well-structured.

User Interface and Navigation

The MicroKorg features an intuitive interface with a gooseneck mic‚ 3-axis joystick‚ and a clear layout. The shift key unlocks advanced functions‚ while the menu system simplifies navigation.

Layout and Controls of the MicroKorg

The MicroKorg features a compact‚ user-friendly design with a gooseneck microphone for vocoder use and a 3-axis joystick for real-time sound manipulation. The interface includes a backlit LCD screen‚ data wheel‚ and a matrix of buttons for navigation. The shift key provides access to advanced functions‚ while the synth’s controls are logically arranged for intuitive operation. The keyboard is lightweight and responsive‚ making it ideal for both studio and live performances. Additional inputs include a microphone jack and MIDI ports for external connectivity. The layout emphasizes ease of use‚ allowing users to quickly access oscillators‚ filters‚ LFOs‚ and effects‚ ensuring seamless sound design and performance.

Navigating Menus and Submenus

Navigating the MicroKorg’s menus is straightforward‚ with a data wheel and buttons providing quick access to various functions. The LCD screen displays menu options‚ allowing users to scroll through parameters using the wheel. Pressing the button selects the highlighted option‚ while the shift key unlocks advanced features. Submenus are accessed by pressing the shift key and a function button simultaneously. The interface is designed for efficiency‚ enabling users to adjust oscillators‚ filters‚ and effects without confusion. The menu system is intuitive‚ making it easy to explore and customize sounds‚ even for those new to synthesizers. This design ensures seamless navigation and creative freedom.

Using the Shift Key for Advanced Functions

The Shift key on the MicroKorg unlocks advanced functions‚ enabling deeper control over sound design and performance. By pressing Shift‚ users can access alternate parameter assignments for knobs and buttons‚ allowing for precise adjustments to LFO speed‚ filter resonance‚ and more. For example‚ Shift + LFO button enables synchronization of LFO rates to MIDI clock. This feature enhances creativity and customization‚ making it indispensable for experienced users. The Shift key also facilitates quick navigation through menus and activation of hidden modes‚ streamlining workflow. Mastering its use is essential for unlocking the MicroKorg’s full potential and achieving professional-grade results in music production. It’s a powerful tool for advanced synthesis.

Maintenance and Troubleshooting

Regularly clean the MicroKorg’s exterior with a soft cloth and avoid harsh chemicals. For troubleshooting‚ refer to the manual for solutions to common issues like MIDI connectivity or sound glitches.

Cleaning and Maintaining the MicroKorg

Regular maintenance ensures the MicroKorg’s longevity and optimal performance. Use a soft‚ dry cloth to wipe down the exterior‚ avoiding harsh chemicals or abrasive materials. For the gooseneck microphone‚ gently clean with a damp cloth‚ ensuring no moisture enters the electronics. Avoid exposing the unit to extreme temperatures or humidity. Dust buildup on knobs and controls can be removed with compressed air. Periodically‚ power cycle the device to reset its system. Check for firmware updates to keep your MicroKorg up-to-date. Proper care will preserve its functionality and sound quality‚ ensuring it remains a reliable tool for music production and performance.

Common Issues and Their Solutions

Common issues with the MicroKorg include patch loss‚ MIDI connectivity problems‚ and encoder dial malfunction. To resolve patch loss‚ power cycle the unit and ensure the latest firmware is installed. For MIDI issues‚ check cable connections and verify MIDI channel settings. If encoder dials are unresponsive‚ clean them with compressed air and recalibrate. Firmware updates often address bugs and improve functionality. Consult the manual for detailed troubleshooting steps. Regular maintenance and updates can prevent many issues‚ ensuring smooth operation. If problems persist‚ contact Korg support for assistance. Proper care and timely solutions will keep your MicroKorg performing at its best.

Mastery of the MicroKorg requires practice and exploration. This manual guides you to unlock its full potential‚ ensuring creative freedom and endless musical possibilities with precision and ease.

Final Thoughts on Mastering the MicroKorg

Mastering the MicroKorg is a rewarding journey that combines creativity with technical skill. From its intuitive interface to its powerful sound design capabilities‚ this synthesizer offers endless possibilities for musicians and producers. By exploring its oscillators‚ filters‚ LFOs‚ and effects‚ users can craft unique timbres and textures; The vocoder and arpeggiator add layers of depth‚ while MIDI functionality expands its connectivity. Whether creating bass lines‚ leads‚ or ambient soundscapes‚ the MicroKorg empowers artists to push boundaries. With practice and experimentation‚ users can unlock its full potential‚ making it an indispensable tool in any music production setup. Embrace the journey and let your creativity shine.

Resources for Further Learning

For deeper exploration‚ Korg’s official website offers detailed manuals and guides. Video tutorials on platforms like YouTube provide hands-on lessons. Online forums and communities share user experiences and tips. The Korg MicroKorg XL manual is a valuable resource‚ as is the Synthesizer/Vocoder microKORG manual. These materials cover advanced techniques‚ troubleshooting‚ and creative sound design. Additionally‚ Korg’s support page offers FAQs and updates. Exploring these resources will enhance your understanding and mastery of the MicroKorg‚ ensuring you unlock its full potential for music production and performance. Continuous learning and experimentation are key to maximizing this versatile synthesizer’s capabilities.

1 2 3 23